Service Program
3
3- 4 Perfusor® compact, 3.0 gb
Working with the Service Program
Preparation
1. Connect service cable (Fig.: 3 - 3 / Item 2) to MFC connector
(Fig.: 3 - 3 / Item 1) of unit and to PC serial port (COM 1 or
COM 2).
2. Connect mains power cable to the unit.
3. Start the Service Program on the PC.
4. [Version 5.5004]: To start communication, press the ON key
on the Perfusor® compact until "Release On/Off key" is
displayed on the PC. and are displayed on the LC
display.
[Version 2.1.0.1]: To start communication, select menu item
File
➨
Connect
, then keep the On key on the Perfusor®
compact pressed until disappears from the LC display.
After connection has been established and are
displayed.
Display / Save the Unit Settings
1. Menu item
File
➨
Connect
.
2. Menu item
EEPROM
➨
Read
.
3. Menu item
File
➨
Save
.
4. [Version 5.5004]: Select menu item
Modi
➨
Modification
Data
and menu item
Syringe
➨
Syringe selection
or
Syringe
types
. Note down parameters prior to any modification (e.g.
new E-Module).
[Version 2.1.0.1]: Select menu item
Modification
➨
Modification data
and menu item
Syringes
➨
Syringe
selection
or
Syringe types
. Note down parameters prior to
any modification (e.g. new E-module) or print out with
File
➨
Print
.
Adjust Unit Settings
1. Menu item
File
➨
Connect
.
2. Menu item
EEPROM
➨
Read
.
3. Desired modifications / display, please see:
-
Service
➨
Service Values
[Version 5.5004] or
Processing
➨
Processing values
[Version 2.1.0.1]
-
Modi
➨
Modification Data
[Version 5.5004] or
Modification
➨
Modification data
[Version 2.1.0.1]
-
Calibration
➨
Pressure calibration
(required in case of
bolus rate change)
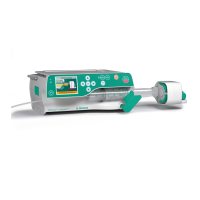
Fig.: 3 - 3
Legend of fig. 3 - 3:
ItemDesignation
1 MFC connector on the unit
2 MFC service cable
2
1
3.0
 Loading...
