Checks after Repair
5
Perfusor® compact, 3.0 gb 5- 5
3. Insert max. 50 ml potentiometer calibration gauges.
The 50 ml syringe symbol is displayed.
4. Remove potentiometer calibration gauge.
Pre- and End Alarm
1. Draw up a 50 ml OPS syringe to 6 ml and insert syringe.
2. Confirm OPS with F-button
3. Change delivery rate to 99 ml/h (key sequence C 9 9) and
press START.
Pump delivers and triggers pre-alarm at a volume of 5 ml.
4. Bolus (press buttons F and 1 simultaneously and keep buttons
pressed) until end alarm (pump must not trigger pressure
alarm).
5. Draw up a 20 ml OPS syringe to 6 ml and insert syringe.
6. Confirm syringe type 20 with F-button.
7. Press START button.
Pump delivers and triggers pre-alarm at a volume of 5 ml.
8. Bolus (press buttons F and 1 simultaneously and keep buttons
pressed) until end alarm (pump must not trigger pressure
alarm).
Electrical Safety
1. Measure the line voltage and note down.
2. Measure protective conductor resistance and note down.
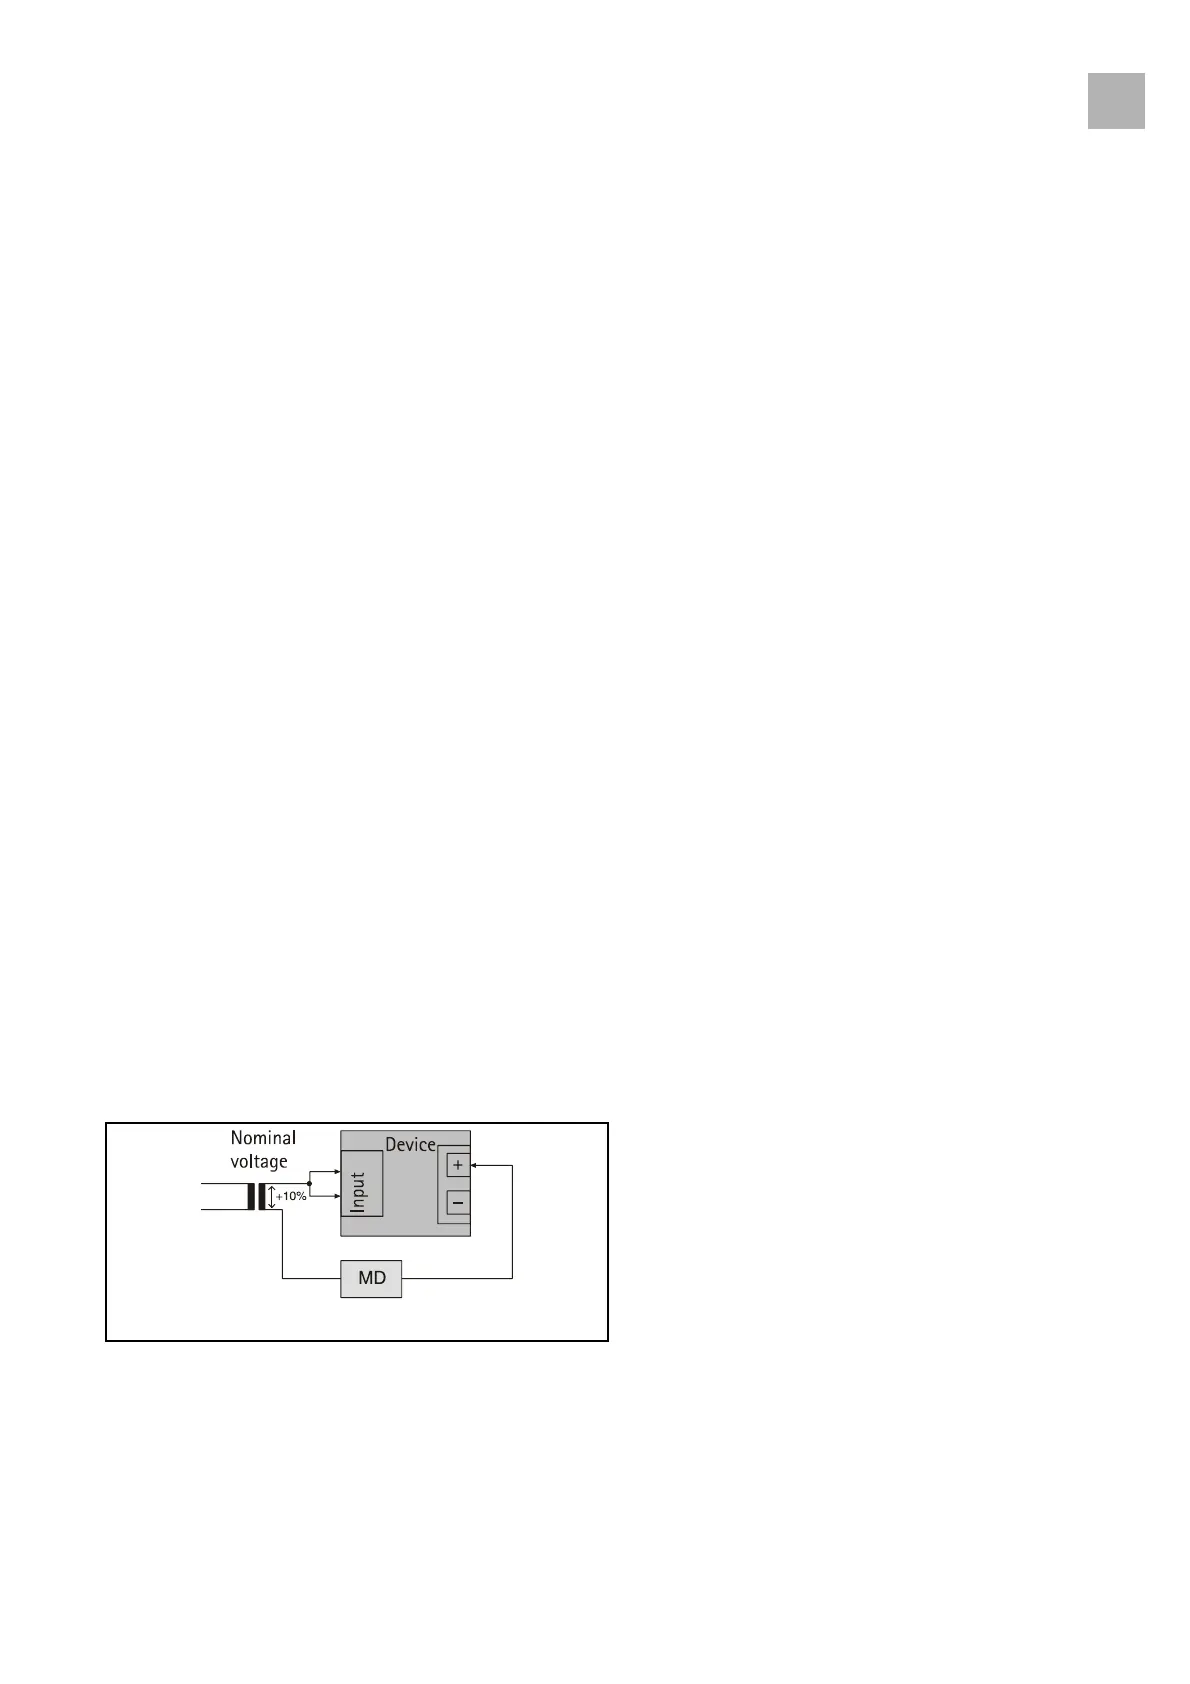
3. Measure patient leakage current as described hereafter and
note down. This is an equivalent leakage current
measurement:
- Remove battery pack or batteries. Unit is at rest.
- Apply nominal voltage + 10 %.
- Measure patient leakage current between short-
circuited mains inlet and plus pole (right top battery
compartment).
- Enter value in check list.
Fig.: 5 - 3
3.0