Classic Cycles Technical Resources
33
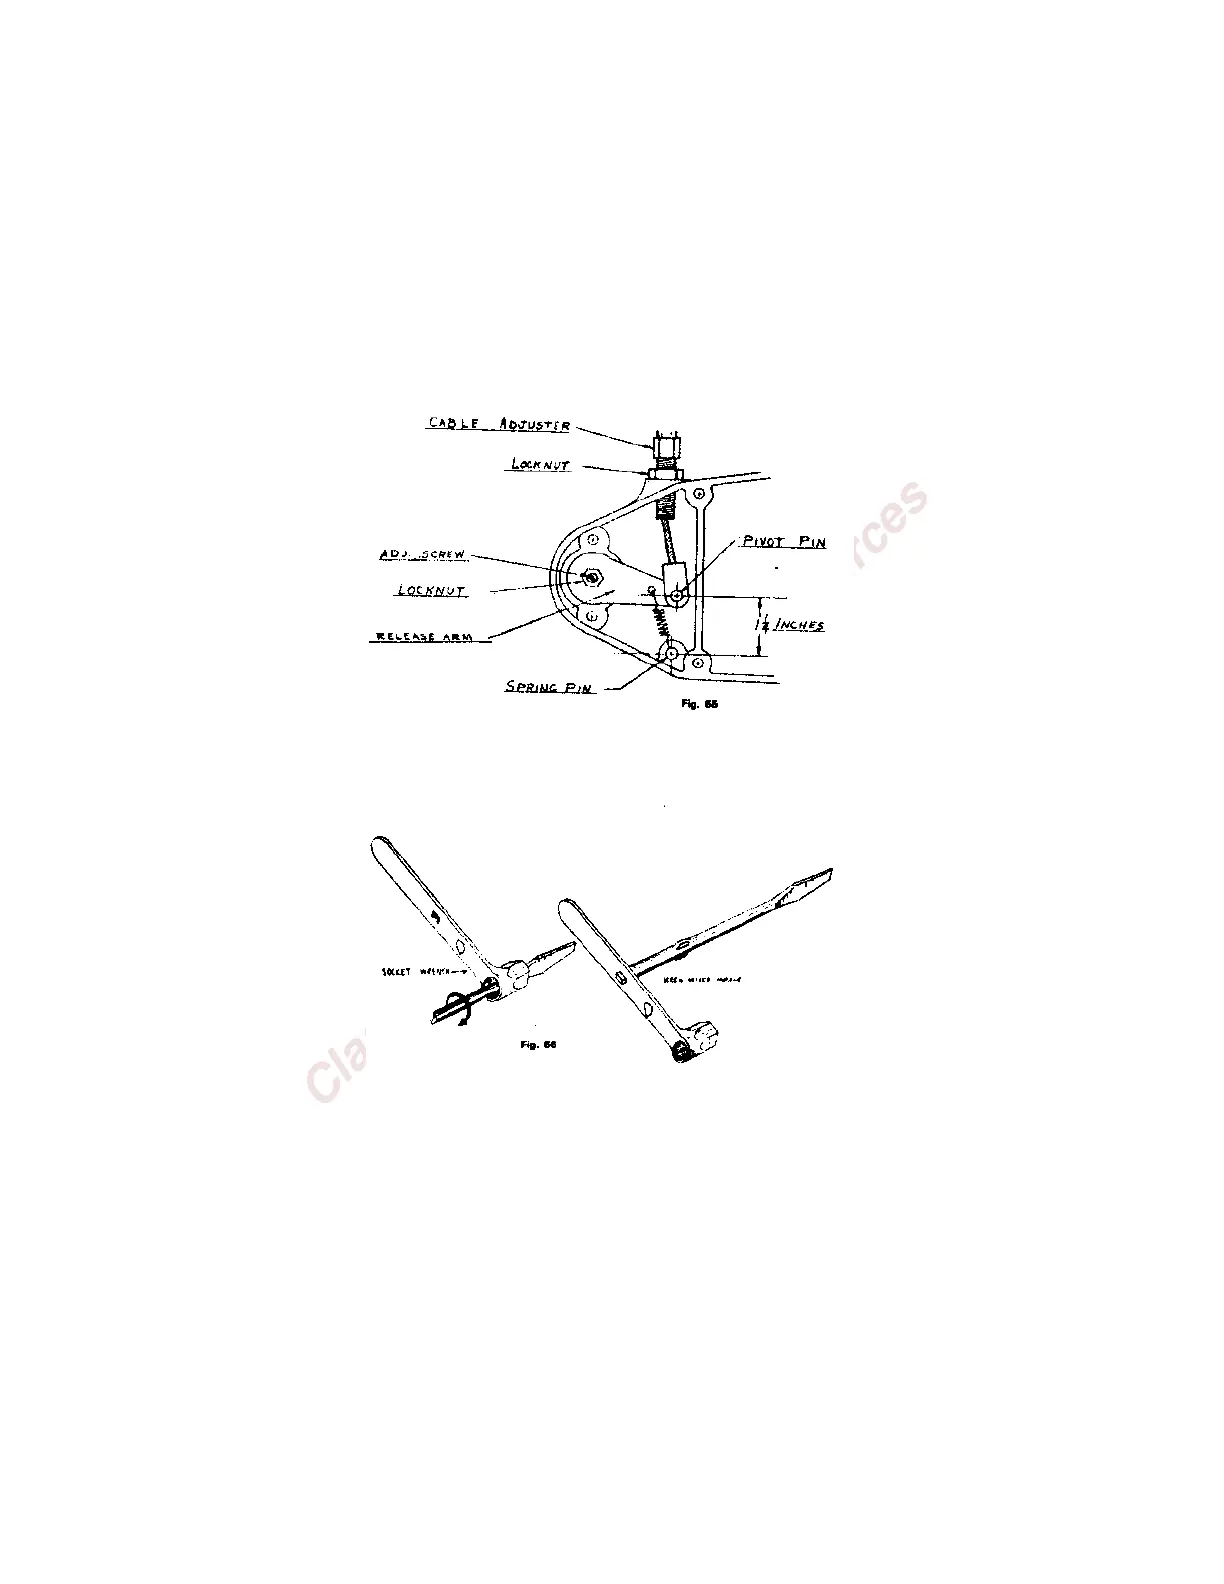
the distance, out to increase the distance. When properly positioned, secure with cable adjuster lock
nut.)
3. Loosen clutch adjusting screw lock nut and turn screw in (clockwise) until you feel it just touch the
clutch throw-out bearing. Then turn screw out (counter-clockwise) ¼ turn.
4. Check clutch lever for correct free play (3/8"-5/8" at lever end). Turn adjusting screw as required for
correct free play. (Counter-clockwise for more free play; clockwise for less.)
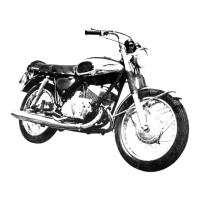
5. Secure adjusting screw in correct position with lock nut. NOTE: The tool kit shipped with the machine
contains a special socket wrench with handle which fits adjusting screw lock nut. The design of this
wrench enables you to hold clutch adjusting screw in correct position with a screw driver while securing
the lock nut. This tool, incidentally, also serves as a screwdriver handle in cases where heavy pressure is
required. See Fig. 66.
No further adjustment should be made on the cable adjuster unless it stretches with age. Periodic clutch
adjustments should be made with the clutch adjusting screw only.