Classic Cycles Technical Resources
63
3. Set charger for correct voltage (6V or 12V)
4. DO NOT LET FILLED, UNCHARGED BATTERY STAND LONGER THAN 12 HOURS BEFORE
CHARGING.
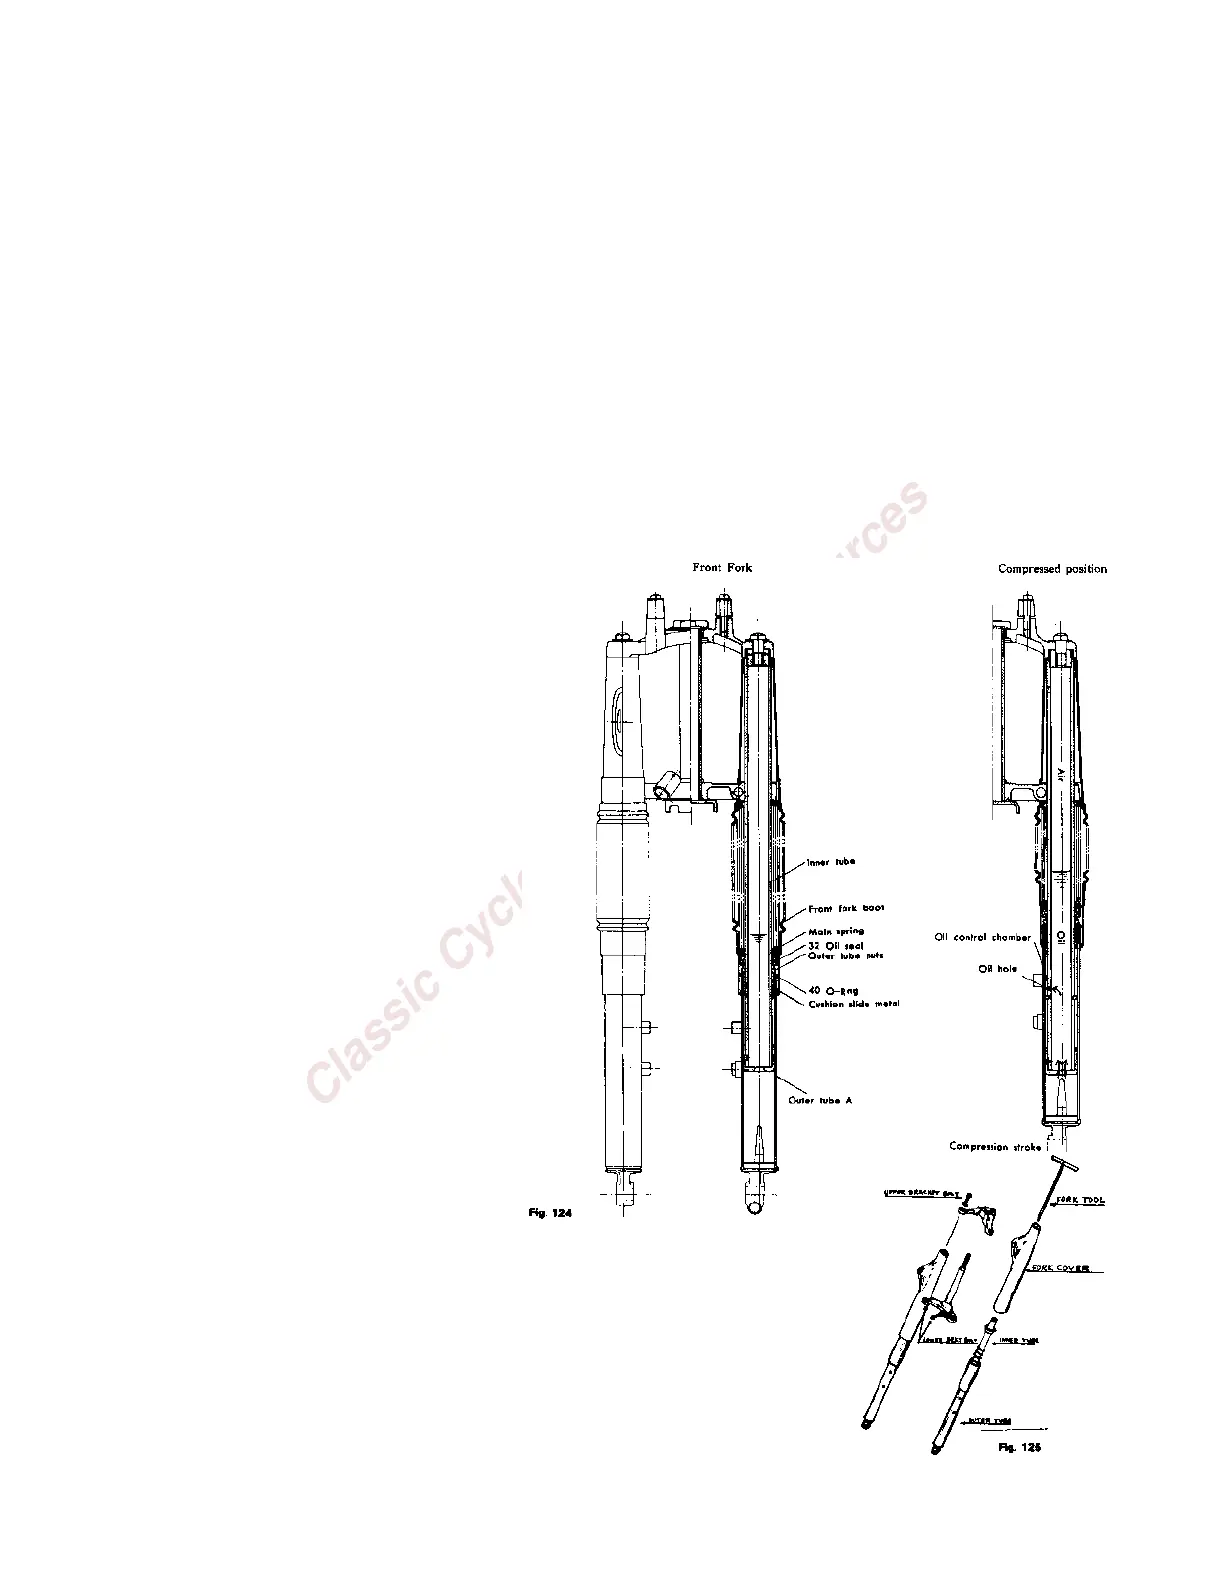
FRONT FORK:
Operation:
When a load is applied to the front fork, the load is received by the fork springs. At the same time, oil in the
oil chamber flows into the oil control chamber and the load is held by resistance of the compressed oil and
air and the shock is absorbed.
Oil lock bars are installed inside the bottom of the lower fork legs to prevent the fork from bottoming when
receiving severe shocks. When oil moves through the gap between the piston oil and the oil lock bar, shock
is absorbed by the resistance of the oil. The oil lock bar is tapered so that oil resistance increases as the
front fork shortens.
When the fork lengthens, rebound is dampened by oil resistance generated by the oil flow from the oil
control chamber through the oil hole to the oil chamber and by the oil flow through the gap between the oil
lock bar and the piston oil hole.
Maintenance:
If it is ever necessary to add fluid to the
front fork, use hydraulic jack oil. To insert
fluid into the fork, remove the upper
bridge bolt on the top of the fork tube. Do
not add more fluid than is required:
6 ozs. – 50, 60 Sport
6-7 ozs. – 90CC
7.5 ozs. – 175 DT
To determine the amount of fluid already
in the fork, remove the upper bridge bolt
on the top of the fork tube. Insert a wire
gauge of sufficient length, making certain
it touches the bottom of the tube. Remove
the gauge and measure the fluid mark. It
should measure 6 ½ to 7 inches (50, 60 Spt;
90) or 7 ½ to 8 inches (175 DT).
If no gauge is available, remove the screw
at the bottom of the outer tube and drain
the fluid. Reinsert the correct amount (in
ounces) for the particular model involved,
as indicated above.
NOTE: The front fork assemblies on the
B/S 50 Sport model with serial numbers before 13N are sealed units. For these
units the above instructions are not applicable. (Loss of fluid would require
replacement of the entire inner tube assembly. )
Assembling Front Fork:
CAUTION: When disassembling or assembling the front fork, do not tip inner
tube or outer tubes. This will avoid spilling the oil supply.