4. Maintenance and Repair VX TopCooler
TopCooler Replacement Part Number: 606325 Rev. A
Step Action
2.
RemovethePoppetAssemblyfromthechamber.
l
Loosenthe(4)M8SHCSwithsplitwashers.
l
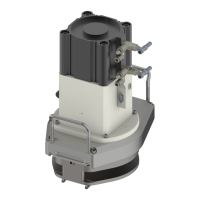
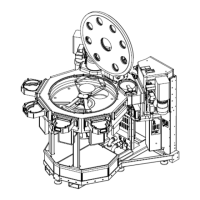
ForallTopCoolerassemblies,graspthePoppetAssemblyusingtheattachedhandlesasshown
inFigure4-1.PulltheassemblyupandoutoftheCoolingStationslotontheTransportChamber.
Handletheassemblycarefullytoprotecttheo-ringfromdamage.
3.
RemovetheCoolingChuckAssemblyfromthechamber.
l
Loosenthe(4)M8x30mmSHCS,M8split,andM8flatwashers.
l
RemovetheCoolingChuckAssemblybypullingassemblystraightupandoutofchamber.
Handlecarefullysoasnottodisturbthegaugeslocatedonthebottomoftheassemblyandtheo-
rings.
ReplacementProcedure
Step Action
1.
InstalltheCoolingChuckAssemblybyplacingassembly,gaugesdown,intotheCoolingStationslot
onthesystemTransportChamber.Handlecarefullysoasnottodisturbtheo-rings.
2.
SecuretheCoolChuckassemblytothechamberwith(4)M8x30mmSHCS,M8split,andM8flat
washers.
3.
Next,installthePoppetAssemblybyplacingontotheCoolingStationslotontheTransportChamber.
Handleassemblycarefullytoprotecttheo-ringfromdamage.
4.
SecurethePoppetAssemblytothechamberwith(4)M8SHCSwithsplitwashers.
5.
ConnectthetwoairconnectionsandtheserialconnectionattheCableFittingMountandthegascon-
nectionstothebottomassembly.
32
Copyright © 2023, Brooks Automation, Inc.