TROUBLESHOOTING AND ROUTINE MAINTENANCE 13 - 5
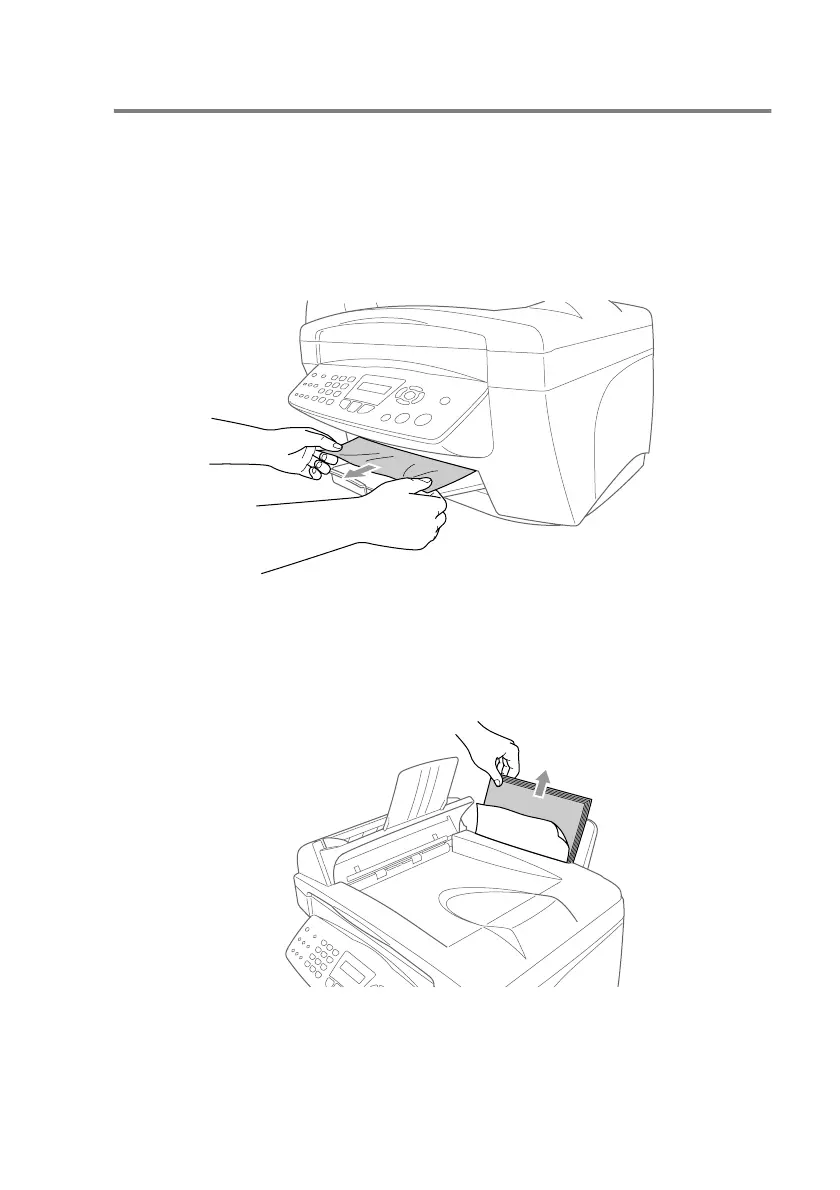
Printer jam or paper jam
Remove the jammed paper depending on where it is jammed in the
machine.
Paper is jammed inside the front of the machine.
Pull the jammed paper toward you.
Paper is jammed in the paper tray.
1
Remove any paper from the paper tray that is not jammed.
 Loading...