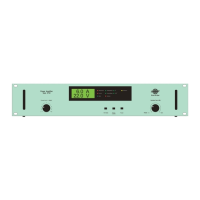
Measuring Ampifier Type 2525
User Manual Vol.1
Brüel & Kjær
4–2
Chapter 4 –The Menus
Introduction
4.1 Introduction
The menu system of the 2525 amplifier can best be seen by using Fig.4.4 as a
reference (this is the overview diagram which lies at the back of this chapter and
can be folded out to show all the amplifier menu options).
When the amplifier is powered on for the first time, the Main Set-up menu appears
on the screen. This menu includes all the top level menus in the amplifier. Some of
these menus branch down further, and in particular the Measurement Set-up menu
contains so many sub-menus that it is the topic of Chapter 5.
Once the amplifier is set up it will retain its current settings even if it is turned off.
To return to the menu default settings use the Set-up Memory menu (section 4.2.11)
and specify Recall Factory.
Note: In the sections which follow “*” indicates the factory set default setting for
the menu.
4.2 Main Set-up
4.2.1 Measurement Set-up
This menu contains a list of options which are either for directly specifying a meas-
urement parameter, or which open up other menus for their specification. Because
of the number and importance of these parameters, they are treated in a separate
chapter: See Chapter 5.
4.2.2 Display Set-up
The options shown in this menu allow you to specify the main parameters for
viewing measurement data. The options are:
RMS* Provides a useful general description of signal levels. The square
root of the integrated time-averaged squared function is related to
the vibration energy and hence the vibration’s damage potential.
+PEAK* Defines the maximum instantaneous value which is measured and
is useful in the measurement of short duration shocks.
–PEAK* Defines the maximum negative instantaneous value which is
measured and is useful in the measurement of short duration
shocks.
PEAK-TO-PEAK Defines the maximum instantaneous difference between the top
(or bottom) of one peak and the bottom (or top) of the next.

 Loading...