Contents
4
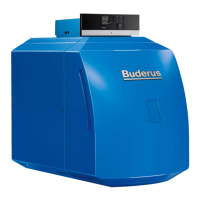
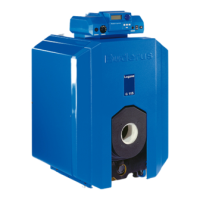
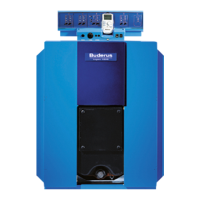
Installation and maintenance instructions Logano G215 WS oil/gas-fired special boilers • Issue 02/2006
We reserve the right to make any changes due to technical modifications.
1 Regulations and guidelines . . . . . . . . . . . . . . . . . . . . . . . . . 6
1.1 General . . . . . . . . . . . . . . . . . . . . . . . . . . . . . . . . . . . . . . . . 6
1.2 Boiler application . . . . . . . . . . . . . . . . . . . . . . . . . . . . . . . . . . . 6
2 Installation . . . . . . . . . . . . . . . . . . . . . . . . . . . . . . . . . . 7
2.1 Standard delivery . . . . . . . . . . . . . . . . . . . . . . . . . . . . . . . . . . . 7
2.1.1 Pre-assembled delivery . . . . . . . . . . . . . . . . . . . . . . . . . . . . . . . . . . . . . . 7
2.1.2 Supplied in sections . . . . . . . . . . . . . . . . . . . . . . . . . . . . . . . . . . . . . . . . 7
2.2 Tools and additional materials as required for assembly . . . . . . . . . . . . . 8
2.2.1 Boiler compression tool size 2.2 . . . . . . . . . . . . . . . . . . . . . . . . . . . . . . . . . . 8
2.2.2 Boiler compression tool 2.3 (complete in toolbox) . . . . . . . . . . . . . . . . . . . . . . . . . 8
2.3 Positioning . . . . . . . . . . . . . . . . . . . . . . . . . . . . . . . . . . . . . . 9
2.3.1 Plinth . . . . . . . . . . . . . . . . . . . . . . . . . . . . . . . . . . . . . . . . . . . . . . . . 9
2.3.2 Clearance from walls recommended for installation and maintenance . . . . . . . . . . . . . 10
2.4 Installation of boiler sections . . . . . . . . . . . . . . . . . . . . . . . . . . . .11
2.4.1 Arrangement of the boiler sections within the boiler block (unassembled). . . . . . . . . . . . 11
2.4.2 Fitting the boiler sections (unassembled) . . . . . . . . . . . . . . . . . . . . . . . . . . . . 12
2.4.3 Aligning the boiler block for pre-assembled deliveries . . . . . . . . . . . . . . . . . . . . . . 17
2.4.4 Slide the return header into place (carton of installation components). . . . . . . . . . . . . . 18
2.4.5 Sealing the sensor well. . . . . . . . . . . . . . . . . . . . . . . . . . . . . . . . . . . . . . 18
2.5 Leak test . . . . . . . . . . . . . . . . . . . . . . . . . . . . . . . . . . . . . . .19
2.5.1 Leak test preparation . . . . . . . . . . . . . . . . . . . . . . . . . . . . . . . . . . . . . . . 19
2.5.2 Test pressure. . . . . . . . . . . . . . . . . . . . . . . . . . . . . . . . . . . . . . . . . . . 20
2.6 Installation of fittings and burner door (only for unassembled boilers) . . . . .21
2.6.1 Positioning the flue gas collector . . . . . . . . . . . . . . . . . . . . . . . . . . . . . . . . . 21
2.6.2 Cleaning cover at the rear section . . . . . . . . . . . . . . . . . . . . . . . . . . . . . . . . 21
2.6.3 Install the burner door . . . . . . . . . . . . . . . . . . . . . . . . . . . . . . . . . . . . . . 22
2.6.4 Insert the hot gas baffle plates . . . . . . . . . . . . . . . . . . . . . . . . . . . . . . . . . . 22
2.6.5 Burner installation . . . . . . . . . . . . . . . . . . . . . . . . . . . . . . . . . . . . . . . . 23
2.6.6 Fit the flue gas pipe sealing collar (optional accessory) . . . . . . . . . . . . . . . . . . . . . 24
2.6.7 Fit the flue gas temperature sensor (Option). . . . . . . . . . . . . . . . . . . . . . . . . . . 24
2.7 Boiler casing . . . . . . . . . . . . . . . . . . . . . . . . . . . . . . . . . . . . .25
2.7.1 Support brackets . . . . . . . . . . . . . . . . . . . . . . . . . . . . . . . . . . . . . . . . . 25
2.7.2 Thermal insulation . . . . . . . . . . . . . . . . . . . . . . . . . . . . . . . . . . . . . . . . 26
2.7.3 Side and top casing . . . . . . . . . . . . . . . . . . . . . . . . . . . . . . . . . . . . . . . 27
2.8 Control unit . . . . . . . . . . . . . . . . . . . . . . . . . . . . . . . . . . . . . .30
2.8.1 Controller installation . . . . . . . . . . . . . . . . . . . . . . . . . . . . . . . . . . . . . . . 30
2.8.2 Installation of the temperature sensor . . . . . . . . . . . . . . . . . . . . . . . . . . . . . . 31
3 System start-up . . . . . . . . . . . . . . . . . . . . . . . . . . . . . . . 33
3.1 Filling the heating system and checking for leaks . . . . . . . . . . . . . . . . .33
3.2 Making the system operational . . . . . . . . . . . . . . . . . . . . . . . . . . .36
3.3 Commissioning the control device . . . . . . . . . . . . . . . . . . . . . . . . .36
3.4 Start up the burner . . . . . . . . . . . . . . . . . . . . . . . . . . . . . . . . . .36
3.5 Commissioning report . . . . . . . . . . . . . . . . . . . . . . . . . . . . . . . .37
4 System shutdown . . . . . . . . . . . . . . . . . . . . . . . . . . . . . . 38
4.1 Shutting down the system via the control device . . . . . . . . . . . . . . . . .38
4.2 Shutting down the system in an emergency . . . . . . . . . . . . . . . . . . . .38
5 System inspection and maintenance . . . . . . . . . . . . . . . . . . . . 39
5.1 General notes . . . . . . . . . . . . . . . . . . . . . . . . . . . . . . . . . . . . .39
6 Maintenance . . . . . . . . . . . . . . . . . . . . . . . . . . . . . . . . . 40
6.1 General notes . . . . . . . . . . . . . . . . . . . . . . . . . . . . . . . . . . . . .40
6.2 Cleaning with cleaning brushes . . . . . . . . . . . . . . . . . . . . . . . . . . .40
6.3 Wet-cleaning the boiler . . . . . . . . . . . . . . . . . . . . . . . . . . . . . . .43
 Loading...