15 2020/11 - Version: B -
Force the assembly under the water, remain standing on the plates for approx. two minutes. During this time, air
will escape from the axle as it fills with water.
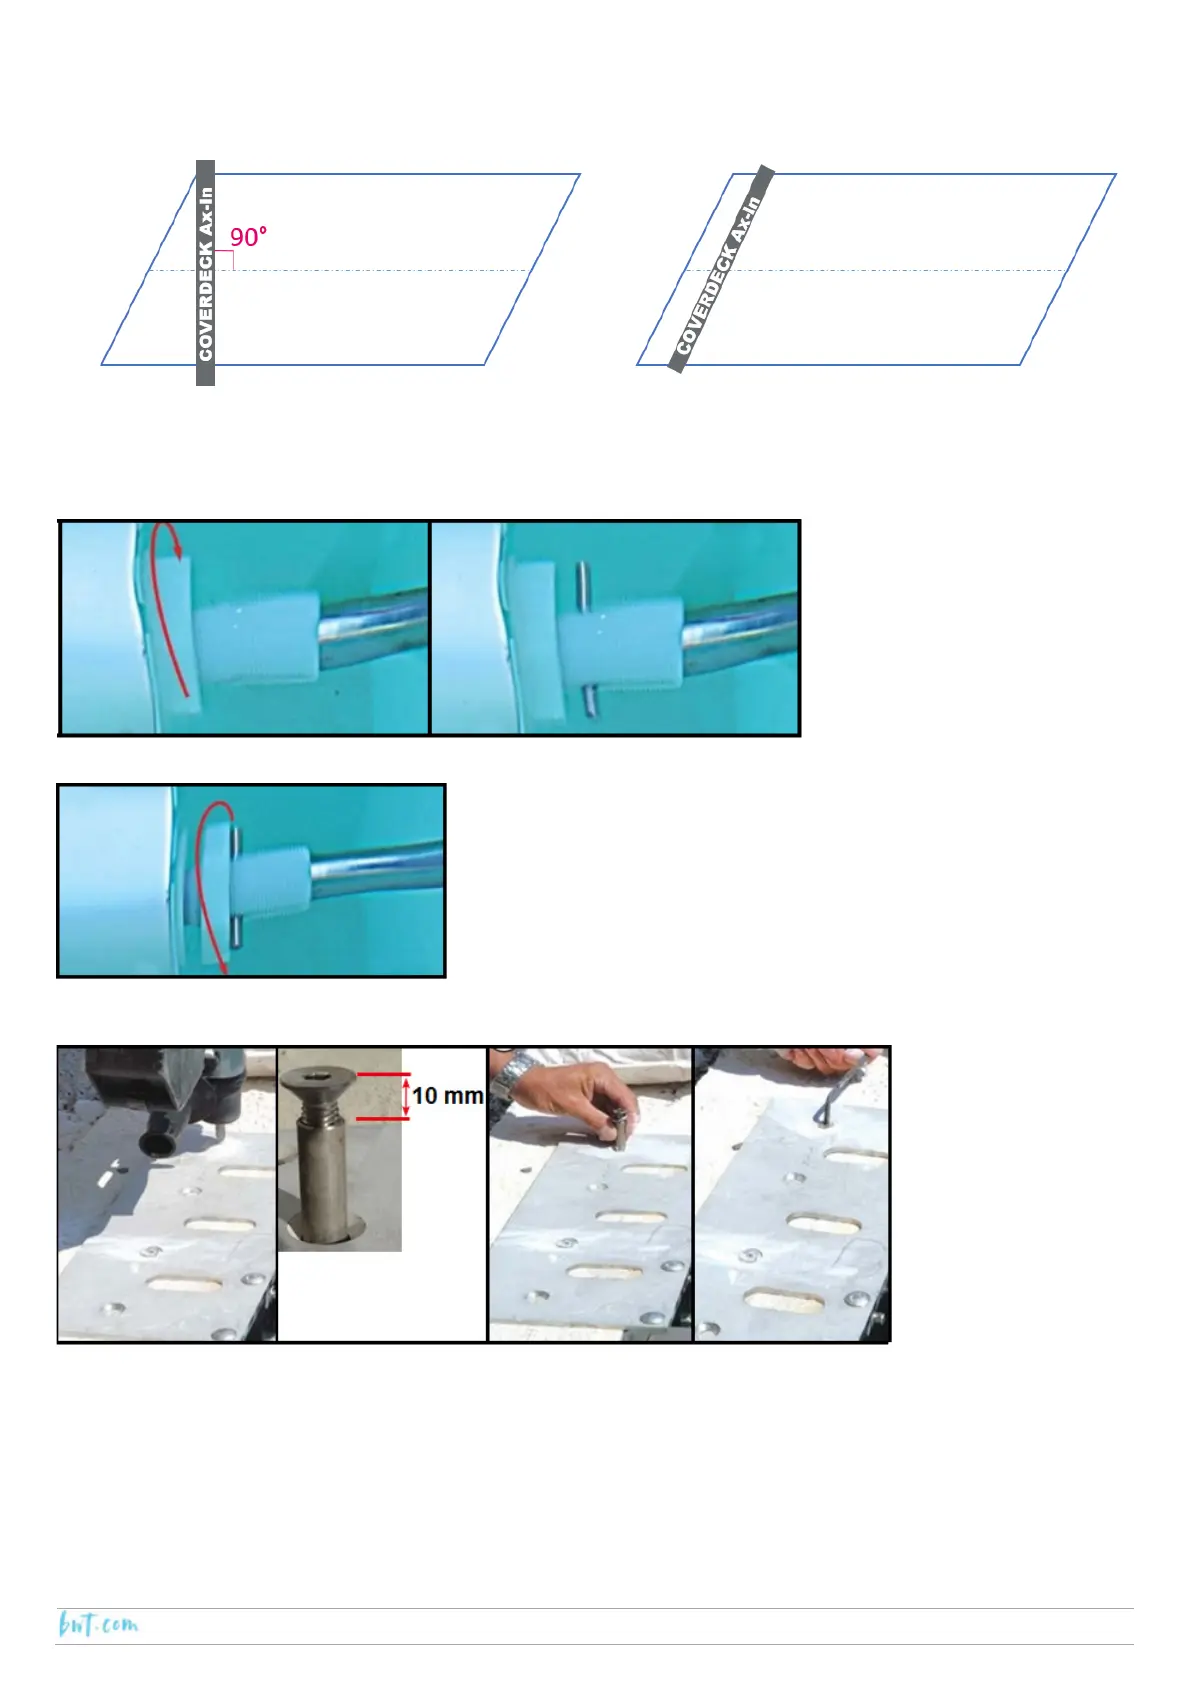
Before fastening the flanges in position, check that the axle is perpendicular to the axis of the pool, to make sure
that the slat apron rolls out properly. Refer to the civil engineering diagrams for the position.
On the bearing side, tighten the
nut as much as possible towards
the axle to reveal the ring
threading.
Insert the Ø 8 mm pin into the
hole in the stainless steel shaft,
passing through the apertures in
the threaded ring. Take care to
centre the pin in the shaft.
Unscrew the nut as far as possible towards the pin by hand (do not
use a tool). This will push the flanges out against the walls.
Fastening the assembly in position
Check that the top of each flange is up against the pool wall. Drill holes Ø 10 mm, depth 80 mm, through the
holes in the flanges. In the case of a Blokit pool, drill through the holes furthest from the pool.
Check that the sub-coping plate is horizontal. Insert wedges underneath if necessary.
Insert the screws in the Upat bushings, leave them protruding by 10 mm.
Insert the bushing assemblies into the holes and push them in with a mallet until the head of the screw is in
contact with the plate. Finish tightening using the hex key wrench no. 5.
 Loading...