7
2 Connecting Label Printer to Computer
2.1 Connecting Label Printer via Serial RS-232 Interface
2.1.1 Connecting Label Printer
The RS-232 interface is operated via an RS-232 cable.
Connect computer and label printer with a suitable cable.
Secure cable connections with the screws found at the plugs.
Congure the RS-232 interface of the printer to match the settings of the connected computer ( ”4.1.4” on page
18).
If problems occur, contact the computer manufacturer for interface assignments and note the pin assignment of the
SUB-D jack described below.
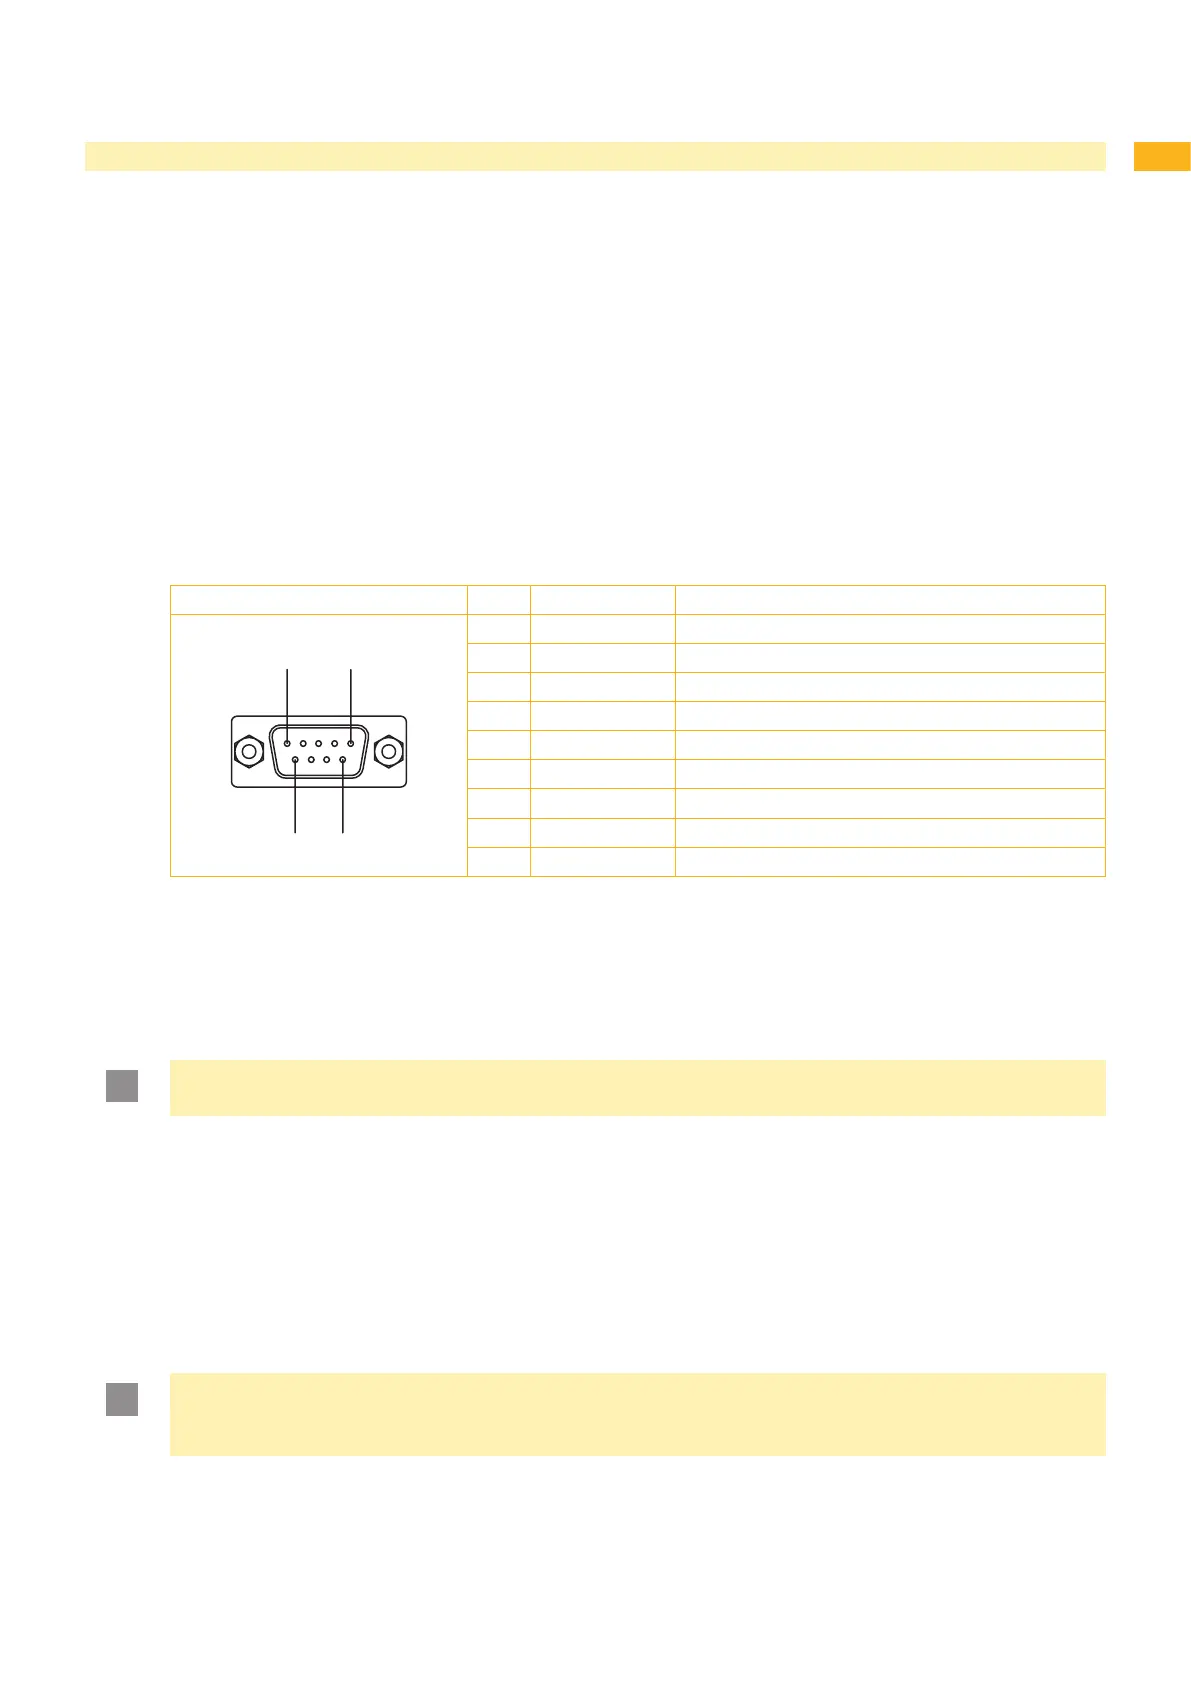
2.1.2 Pin Assignment of Connection Jack of the RS-232 Interface
On the back of the printer there is a 9-pin SUB-D jack for the serial RS-232 interface.
Pin Designation Function
1 CD Carrier Detect
2 TxD Transmit Data
3 RxD Receive Data
4 DTR Data Terminal Ready (not used)
5 GND Ground
6 DSR Data Set Ready (not used)
7 RTS Request to Send
8 CTS Clear to Send
9 RI Ring Indication (not used)
1 Pin assignment of the 9-pin SUB-D jackTable
2.2 Connecting Label Printer via Ethernet Interface
To connect the label printer to a network jack, a patch cable with an RJ45 plug for 10 Base T or 100 Base T is
required. For direct connection of the printer to the Ethernet card of a local computer, use an appropriate crossover
cable.
Attention!
A shielded cable must be used to connect the printer to the network.
Connect computer and label printer with a suitable cable.
Make basic settings for operation of the Ethernet interface ( ”4.1.4” on page 18).
Call up the printer website ( ”4.2.1” on page 21).
Open the "Setup" tab on the printer website.
Set the parameters described in table 12 on page 24 in the path Setup > Interfaces > Ethernet.
Click Set on the "Setup" tab ( page 23).
Enter PIN and click Conrm.
Set up print service if necessary ( ”2.2.1” on page 8).
Adjust Windows printer setting ( ”2.2.2” on page 8).
Attention!
Do not change the settings of the "IP" and "Gateway" on the printer website, as otherwise the connection
to the printer may be lost.
1.
2.
3.
4.
5.
6.
7.
8.
9.