Viper SC+™ IP Router for Licensed Spectrum PN 001-5008-000 Rev. C | Page 29
3.3. CONNECT THE VIPER SC+ TO PROGRAMMING PC
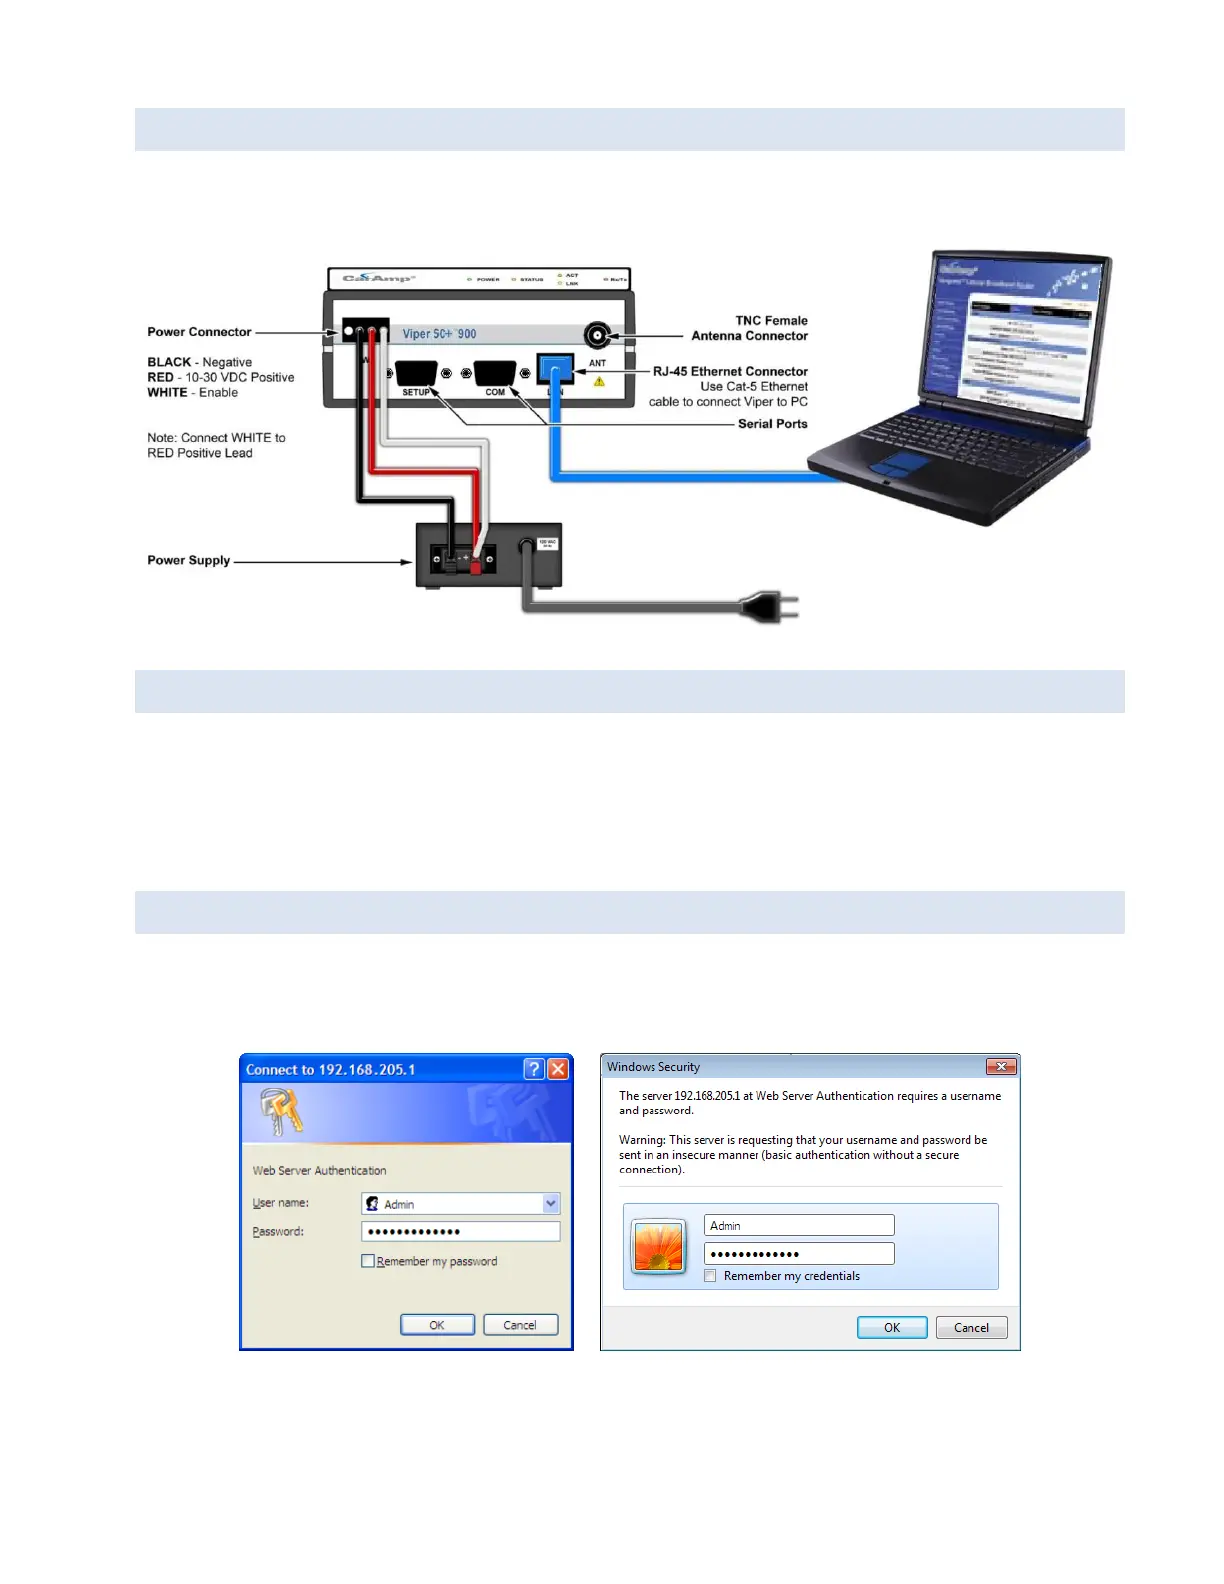
Connect an Ethernet cable into the LAN port of the Viper SC+ and plug the other end into the Ethernet port of your PC.
Figure 17 – Viper SC+ cable connections
3.4. LAN CONFIGURATION
The Viper SC+ contains a DHCP server which will automatically assign an IP address to your computer, however in some
cases it may be necessary to change the network settings on your computer to accept the IP address assigned by the
Viper SC+. Before powering on the unit, confirm that your computer’s Ethernet port is set up to receive an IP address
from an external DHCP server rather than using a static address. Refer to the relevant operating system documentation
for details on configuring your computer to use DHCP
3.5. LOG IN
After you have connected your PC to the Viper SC+ by Ethernet cable and powered the Viper SC+, start your Web
browser and enter 192.168.205.1 in the address bar. A connection Login window (or Web Server Authentication
Window or Web Security window) similar to one of the following appears.
or
Enter a user name and password. The default user name and password the Viper SC+ ship with are Admin and
ADMINISTRATOR (both Admin and ADMINISTRATOR are case-sensitive—enter in all capital letters) and click OK.

 Loading...