1. Ensure your CR6-WIFI is connected to an antenna and power.
2. Using Device Configuration Utility, connect to the data logger.
3. On the Deployment tab, click the Wi-Fi sub-tab.
4. In the Configuration list, select the Create a Network option.
5. Optionally, set security on the network to prevent unauthorized access by typing a
password in the Password box (recommended).
6. Apply your changes.
3.1.4.2 Connecting your computer to the data logger over Wi-Fi
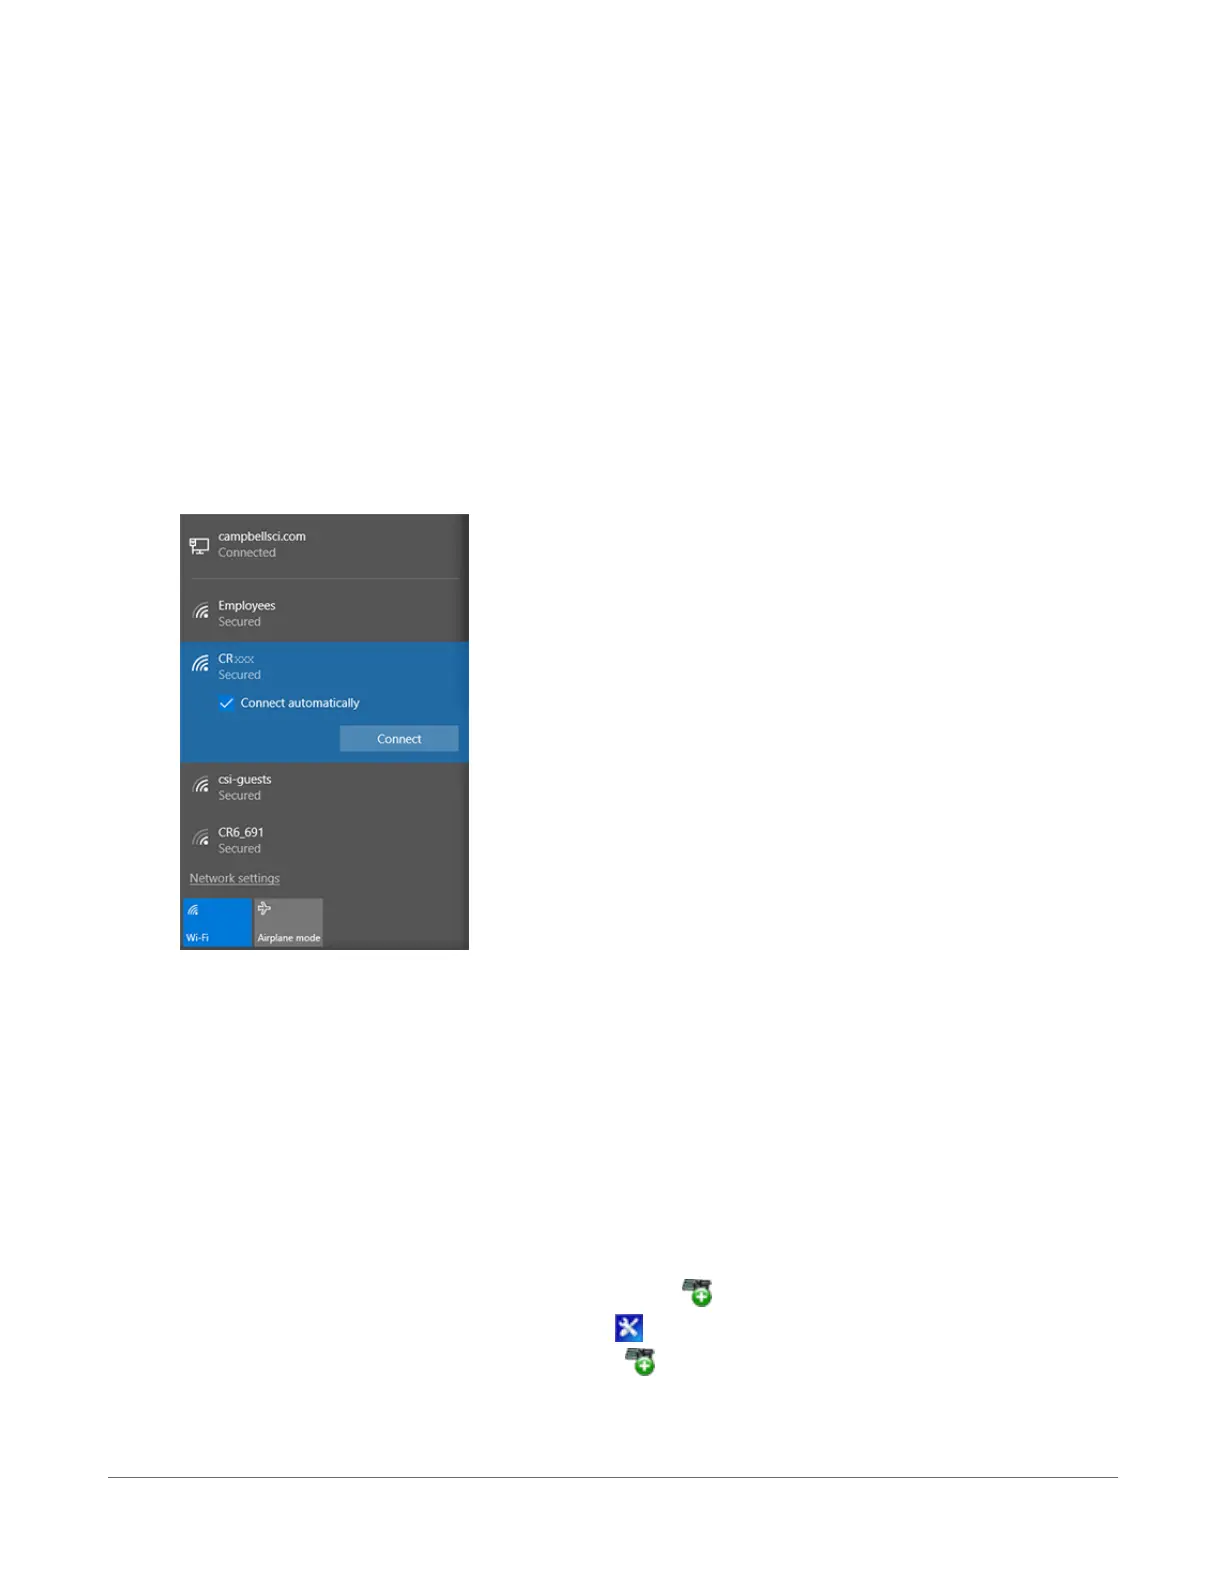
1. Open the Wi-Fi network settings on your computer.
2. Select the Wi-Fi-network hosted by the data logger. The default name is CR6 followed by
the serial number of the data logger. In the previous image, the Wi-Fi network is CRxxx.
3. If you set a password, select the Connect Using a Security Key option (instead of a PIN) and
type the password you chose.
4. Connect to this network.
3.1.4.3 Setting up Wi-Fi communications between the data logger and
the data logger support software
1.
Using LoggerNet or PC400, click Add Datalogger to launch the EZSetup Wizard. For
LoggerNet users, you must first click Setup , then View menu to ensure you are in the EZ
(Simplified) view, then click Add Datalogger .
3. Setting up the CR6 26