Use the Short Cut software to generate a program for your data logger. ShortCut is included
with your data logger support software.
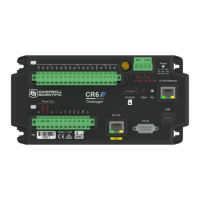
This section will guide you through programming a CR6 data logger to measure the voltage of
the data logger power supply, the internal temperature of the data logger, and a thermocouple.
With minor changes, these steps can apply to other measurements. Use the following
instructions or watch the Quickstart part 2 video .
1. Using data logger support software, launch ShortCut.
l
LoggerNet users, click Program then ShortCut .
l
PC400 and PC200W users, click ShortCut .
2. Click Create New Program.
3. Select CR6 Series and click Next.
NOTE:
The first time ShortCut is run, a prompt will ask for a noise rejection choice. Select 60
Hz Noise Rejection for North America and areas using 60 Hz ac voltage. Select 50 Hz
Noise Rejection for most of the Eastern Hemisphere and areas that operate at 50 Hz.
A second prompt lists sensor support options. Campbell Scientific, Inc. (US) is usually
the best fit outside of Europe.
To change the noise rejection or sensor support option for future programs, use the
Program menu.
4. A list of Available Sensors and Devices and Selected Measurements Available for Output
display. Battery voltage BattV and internal temperature PTemp_C are selected by
default. During operation, battery and temperature should be recorded at least daily to
assist in monitoring system status.
5. Use the Search feature or expand folders to locate your sensor or device. Double-click on a
sensor or measurement in the Available Sensors and Devices list to configure the device (if
needed) and add it to the Selected list. For the example program, expand the
Sensors/Temperature folder and double-click Type T Thermocouple.
6. If the sensor or device requires configuration, a window displays with configuration
options. Click Help at the bottom of the window to learn more about any field or option.
For the example program, accept the default options:
l 1 Type TTCsensor
l Temp_C as the Temperature label, and set the units to Deg C
l PTemp_C as the Reference Temperature Measurement.
7. Click OK.
3. Setting up the CR6 44

 Loading...