CHAPTER 3 MECHANICAL SYSTEM
3-6
COPYRIGHT © 1999 CANON INC. CANON DADF-B1 REV.0 APR. 1999 PRINTED IN JAPAN (IMPRIME AU JAPON)
II. DRIVE SYSTEM
A. Removing the Pickup Unit
Be sure to remove the ADF from the
copier before removing any parts of the drive
system.
1) Remove the original tray. (See A.
“External Covers” under I. “Basic
Construction.”)
2) Remove the body covers. (See A.
“External Covers” under I. “Basic
Construction.”)
3) Remove the feed belt unit. (See B.
“Removing the Feed Roller Unit” under I.
“Basic Construction.”)
4) Remove the ADF controller PCB. (See C.
“Removing the ADF Controller PCB”
under I. “Basic Construction.”)
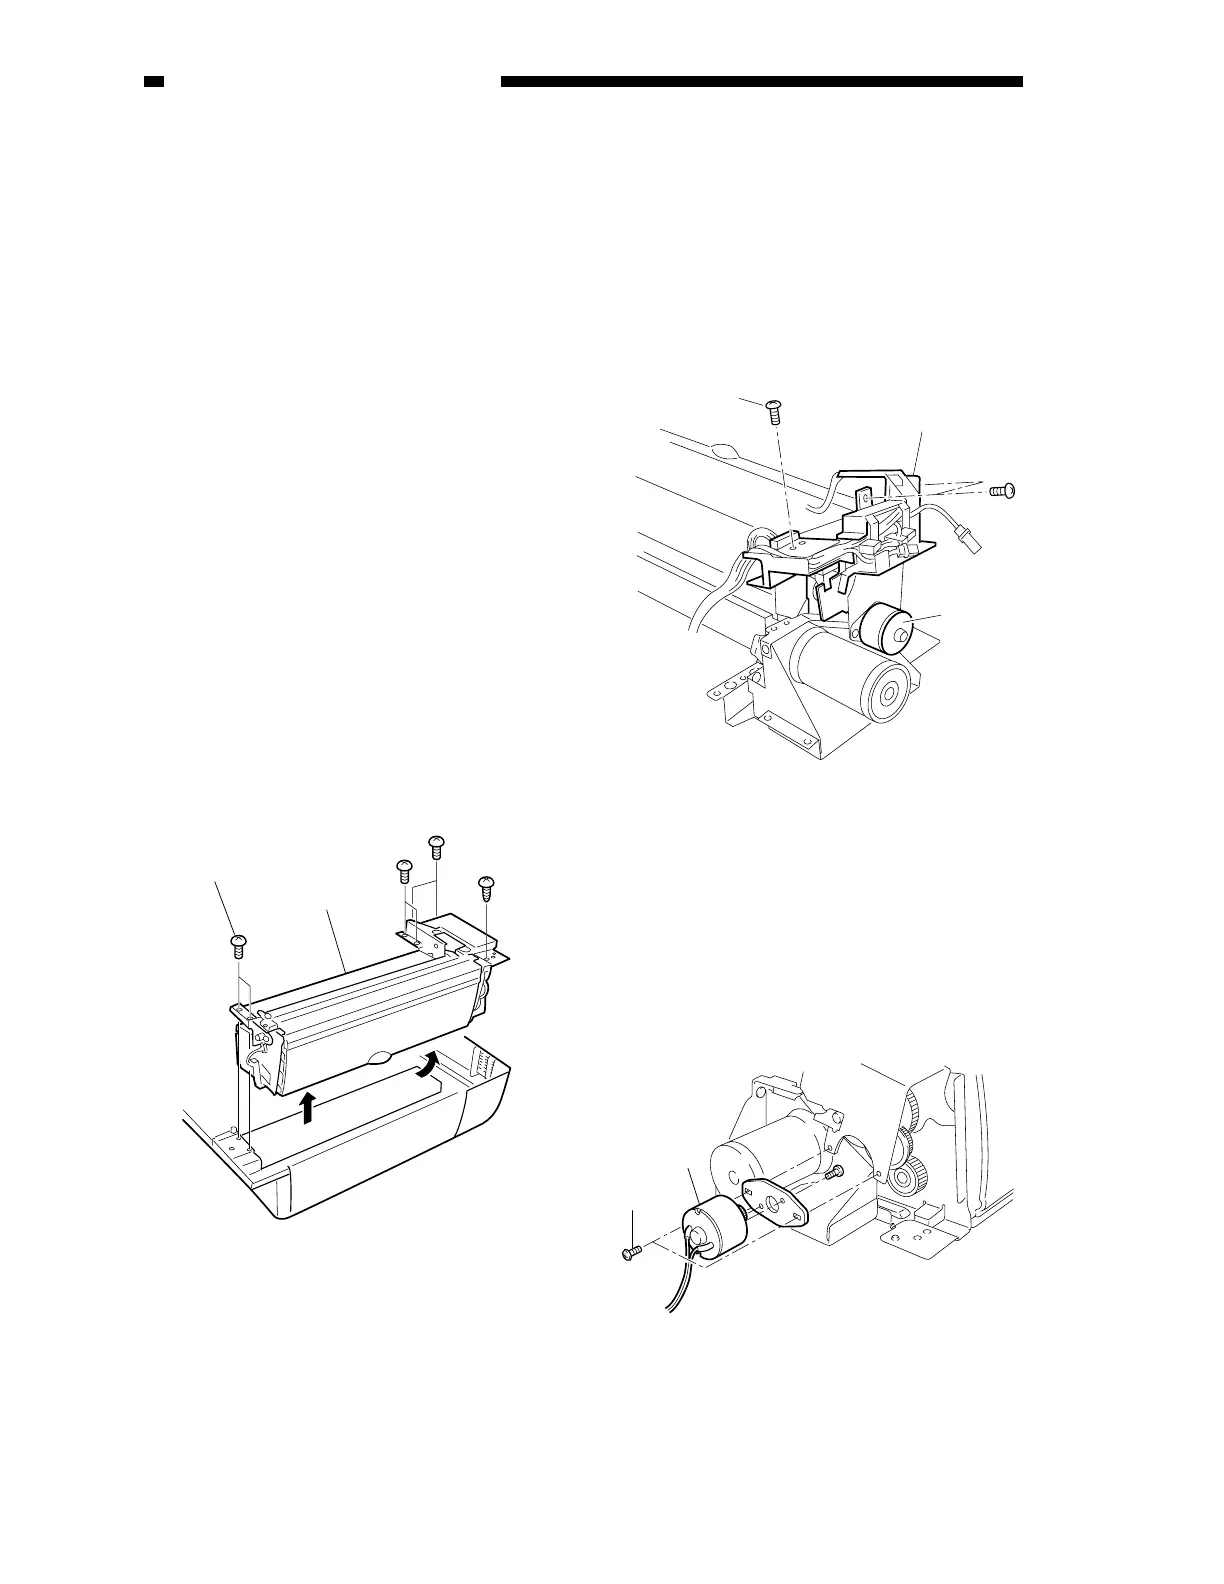
5) Remove the seven mounting screws [2],
and detach the pickup unit [1].
To do so, lift the pickup unit cover side at
an angle, and put your hand underneath to
pull out the cable from the groove while
detaching it.
Figure 3-201
B. Removing the Separation
Motor(M1)
1) Remove the three mounting screws [2].
2) Disconnect the connector connected to the
harness guide [1].
3) Shift the harness guide [1] upward.
Figure 3-202
4) Detach the timing belt from the separation
motor [3].
5) Remove the two screws [4], and detach the
separation motor [3].
Figure 3-203
[1]
[2]
[2]
[1]
(M1)
[3]
[4]
 Loading...