8
SETUP AND CALIBRATION
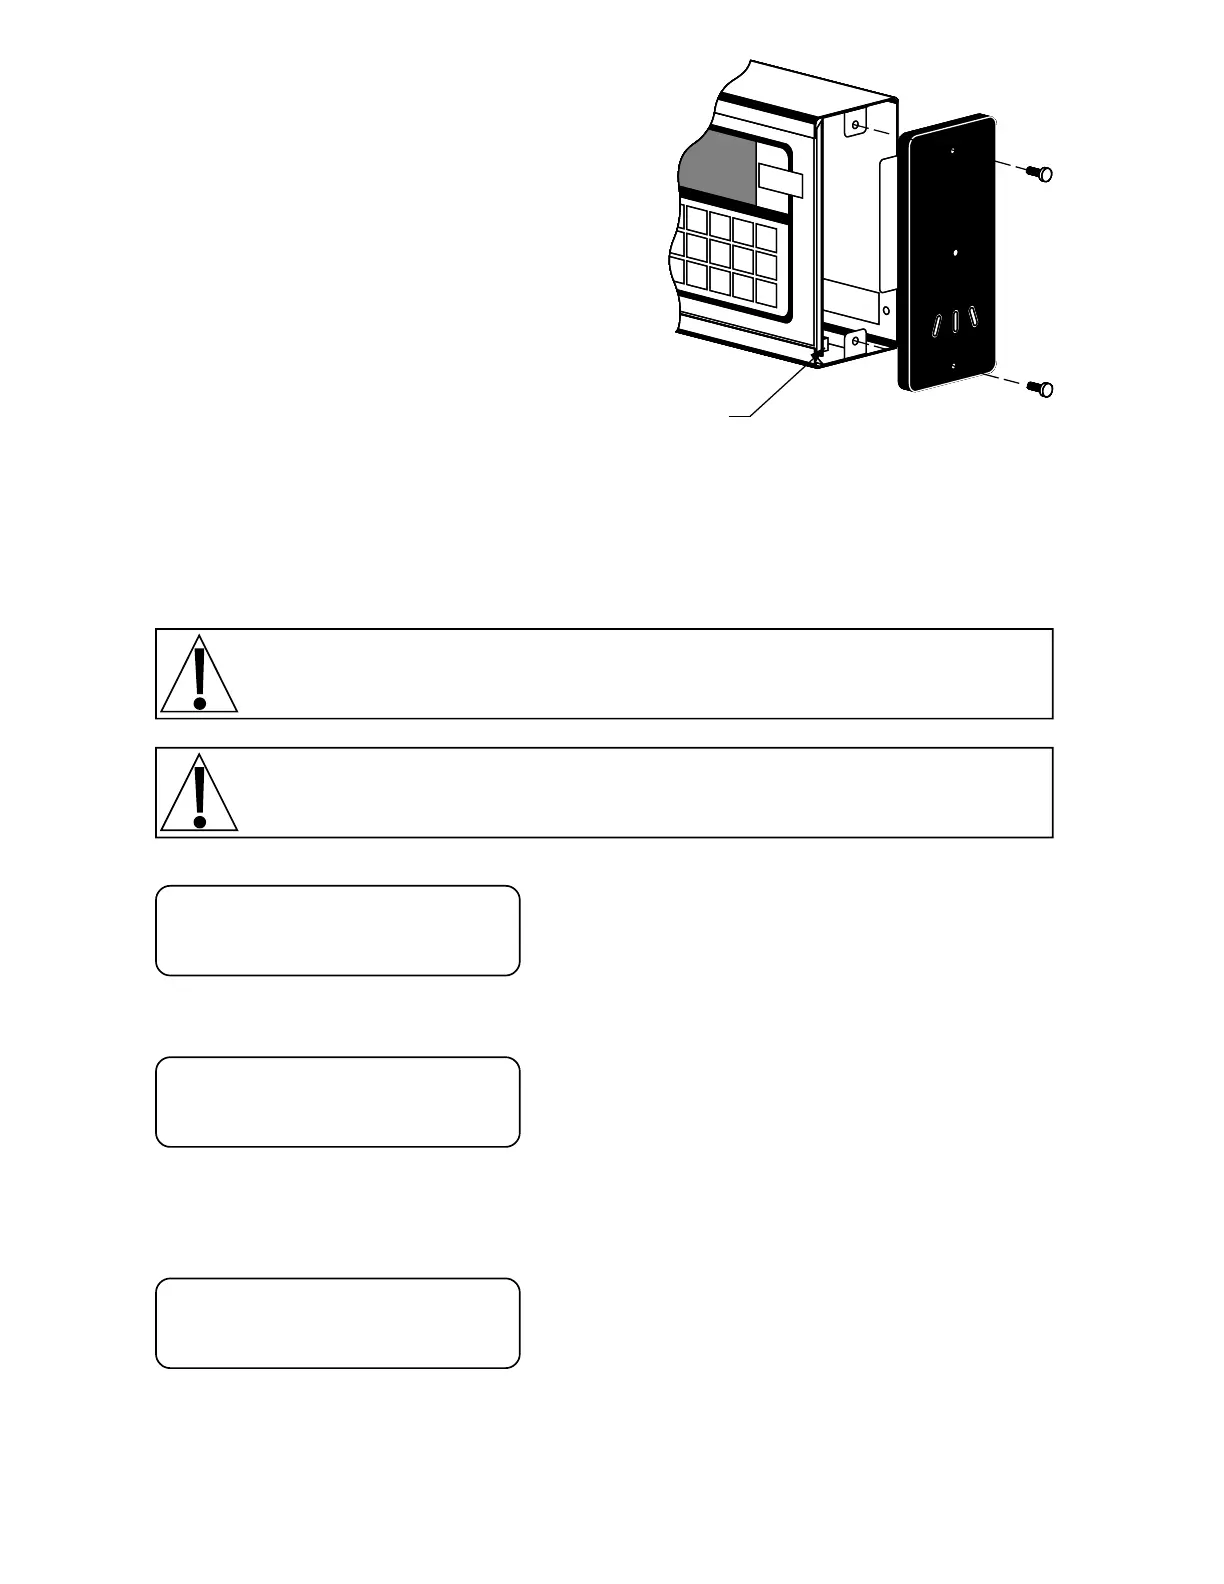
Calibration of the 708 Weight Indicating Instrument
is accomplished by turning on the instrument with
the calibration switch set to the CAL position. The
calibration switch is mounted on the printed circuit
board and is behind the right-hand end cap (as
viewed from the indicator front) of the desktop
enclosure. See Figure No. 11 for location of the
switch. To gain access to the switch, first remove
the instrument from the gimbal mounting by
removing the two (2) large knobs and sliding the
enclosure from the bracket. Remove the top and
bottom screws from the end cap as shown.
Access to the calibration switch in the NEMA 4X enclosure is gained through the front cover of the
enclosure. Refer to Figure No. 9 for the location of the switch.
Once the calibration switch has been located, make certain the instrument is turned off, then set the
calibration switch to the CAL position. Press the ON key. When the display shows int= release the
calibration switch to the OPR (operation) position. The instrument is now ready for setup and
calibration.
NOTE! During the setup and calibration process it will be necessary to respond with
either a YES or NO to questions asked by the indicator. Pressing the 1 key will display a
YES response while pressing the 0 key is a NO response.
The membrane keyboard is not to be operated with pointed objects (pencils, pens,
fingernails, etc.). Damage to keyboard resulting from this practice will
NOT
be covered
under warranty.
INTERNAL VALUE
press the ENTER key to show the current setting. If you
wish to change the setting, press the 1, 2, or 5 key to
select the new interval value then press the ENTER key.
To leave the value displayed unchanged, press the
ENTER key again without entering a new value.
DECIMAL POINT
press the ENTER key to show the current setting. If the
current setting is acceptable, press the ENTER key
again to save it, otherwise, press the 0, 1, 2, or 3 key to
select the new location and then press the ENTER key
to save the new setting.
0 = XXXXX 2 = XXX.XX
1 = XXXX.X 3 = XX.XXX
CAPACITY
press the ENTER key to view the current setting. If the
value shown is acceptable, press the ENTER key again
to save it, otherwise, use the numeric keys to enter the
new scale capacity up to 99,999 and press the ENTER
key to save the new value.
Calibration
Switch
int=
dP=
CAP=
Figure No. 11