19
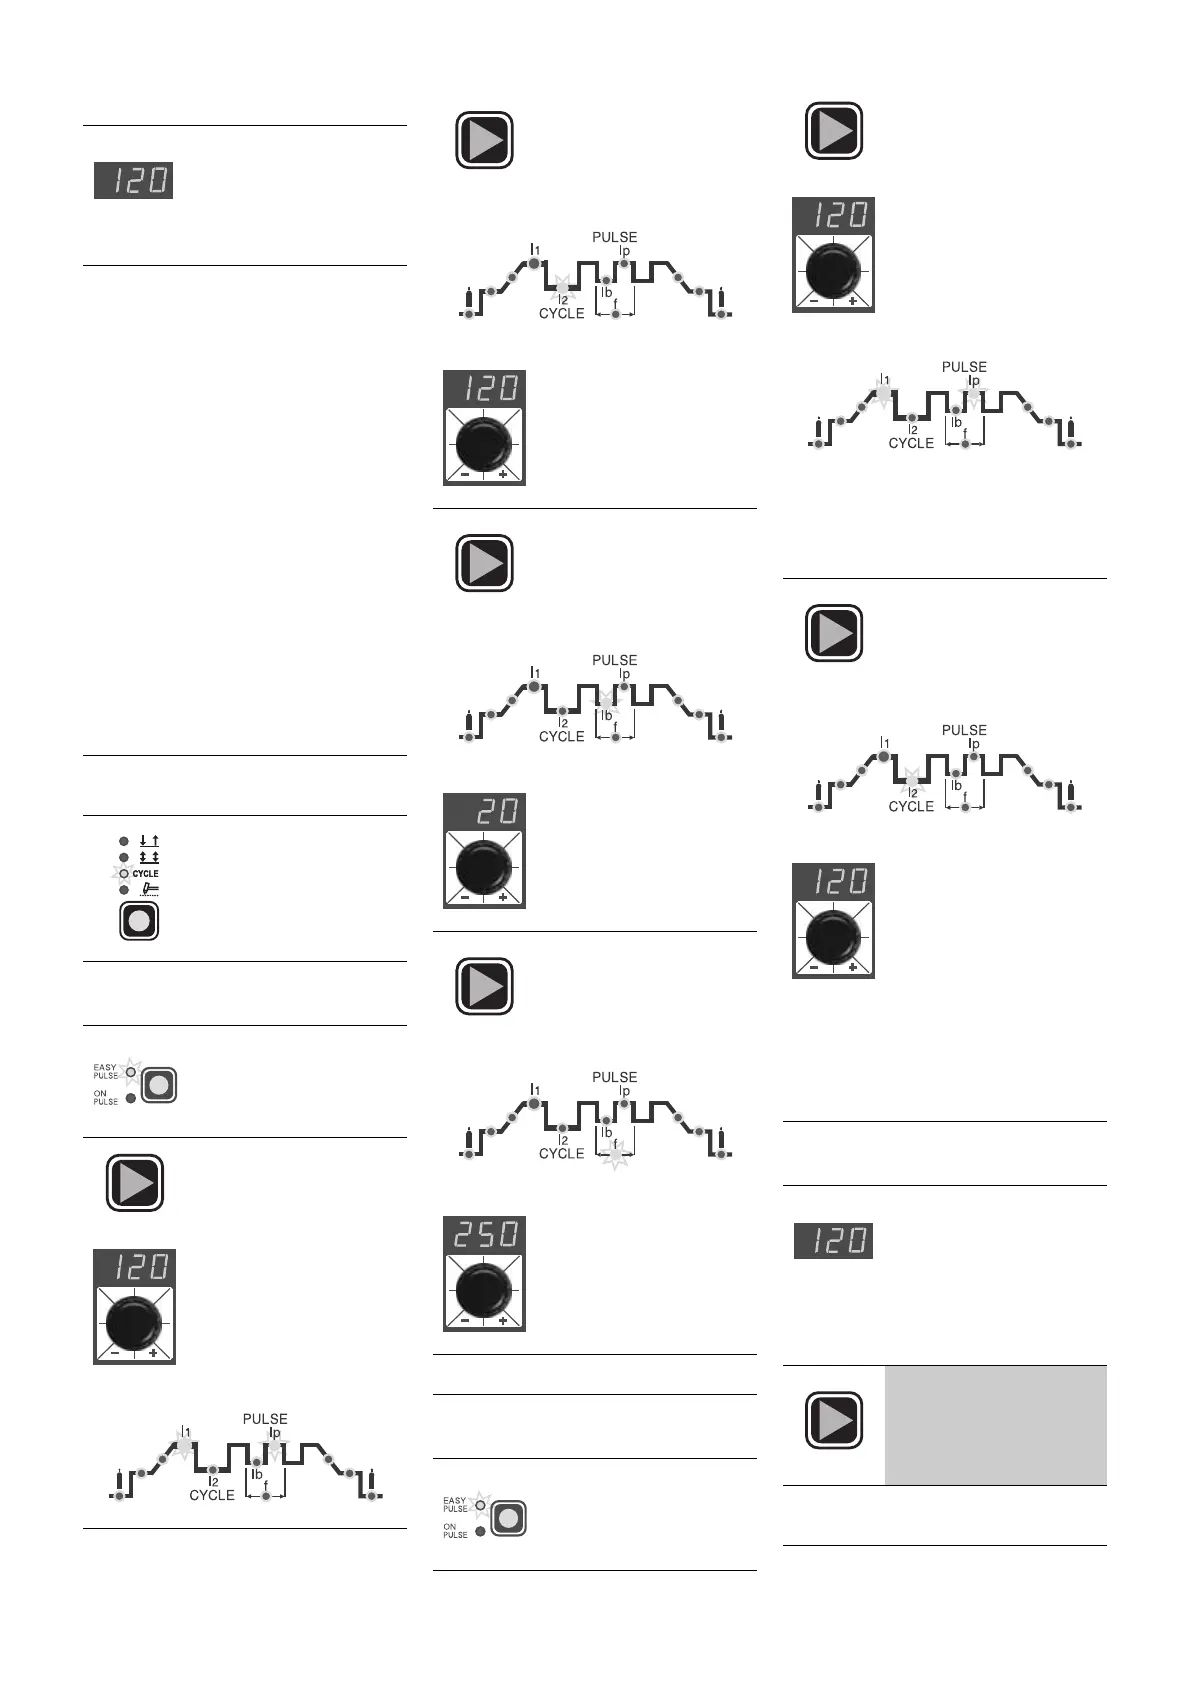
TIG PULSATING WELDING WITH
CYCLE FUNCTION ON
Two different levels of pulsating current
(
I
1
and
I
2
) can be used for welding with
this function. Here also welding can be
done in the two ways
ON PULSE
and
EASY PULSE
.
It is also necessary to set the 2
nd
level
PEAK CURRENT (
I2p
) (apart from the
pulsating parameters
Ib
,
Ip
,
f
) with the
CYCLE function on. The other 2
nd
level
pulsating parameters (BASIC CUR-
RENT
I
2b
and FREQUENCY
f
) are
obtained in synergy. FREQUENCY
remains constant while the 2
nd
level
BASIC CURRENT (
I
2b
) is in proportion to
the ratio between the 1
st
level currents.
ON PULSE AND EASY PULSE
METHODS
ON PULSE METHOD
EASY PULSE METHOD
4) TIG
-weld as desired
NOTE:
The RED Ip and
GREEN
I
1
leds will stay on
continuously during the
weld process and the dis-
play will visualize the cur-
rent value used for welding
1)
Start up the welder by turning the
main switch to position
I
2)
Press the "weld mode"
button and set on
CYCLE
3A)
Press the "pulsation"
button until the
ON
PULSE
function is
working
4A)
Press the
SET
key until
the GREEN led
I
1
and
the RED led
I
p
will start
flashing; adjust the 1
st
level PEAK CUR-
RENT
I
1p
(5 ÷ 250 A);
value by turning the
special dial.
5A)
Press the
SET
key until
the RED led of the 2
nd
level of PEAK CUR-
RENT
I
2p
(5 ÷ 250 A)
starts flashing
• Adjust the parameter by
turning the special dial
6A)
Press the
SET
key until
the RED led of the 1
st
level BASIC CUR-
RENT (5 ÷ 125 A)
starts flashing
• Adjust the parameter by
turning the special dial
7A)
Press the
SET
key until
the RED led of the
PULSATION FRE-
QUENCY (0.5 ÷ 500
Hz) starts flashing
• Adjust the parameter by
turning the special dial
WARNING:
go on to point
8)
3B)
Press the "pulsation"
button until the
EASY
PULSE
function is
working
4B)
Press the
SET
key until
the GREEN led
I
1
and
the RED led
I
p
will start
flashing; adjust the 1
st
level PEAK CUR-
RENT
I
1p
(5 ÷ 250 A);
value by turning the
special dial.
WARNING:
with
EASY PULSE
working
and adjusting the value of the 1
st
level
PEAK CURRENT (
I
1p
) you will have the
values of the other 1st level parameters
(
I
1b
,
f
) in synergy
5B)
Press the
SET
key until
the RED led of the 2
nd
level PEAK CUR-
RENT
I
2p
(5÷200 A)
starts flashing
• Adjust the parameter by
turning the special dial
WARNING:
adjusting the value of the
2
nd
level PEAK CURRENT (
I
2p
) while
EASY PULSE
is working, you will have
the values of the other 2nd level para-
meters (
I
2b
,
f
) in synergy
8)
If you want a test weld,
the led of the selected
parameter will flash
and the value of the
parameter being set
will be visualized on
the display while this is
being done
9)
Keep pressing the
SET
key for more than 1
second to leave the
weld parameter setting
phase
10)
Use the
CYCLE
function for
PUL-
SATING TIG
welding
 Loading...