20
INPUT STORAGE
PROGRAMMED WELDING
Once the programme has been memo-
rized the operator can only weld with the
pre-set values and cannot change any
of the parameters. Go to
MANUAL
welding to make any changes.
MANUAL WELDING
To return to set/modify selected parame-
ters or to create a new programme, do
as follows:
CALLING UP STORED
PROGRAMMES
VISUALIZING SET PARAMETRES
Maintenance
WARNING:
Before carrying out any ins-
pection of the inside of the generator,
disconnect the system from the supply.
SPARE PARTS
Original spare parts have been specially
designed for our equipment. The use of
non-original spare parts may cause vari-
ations in performance or reduce the
foreseen level of safety.
We decline all responsibility for the use
of non-original spare parts.
GENERATOR
As these systems are completely static,
proceed as follow:
• Periodic removal of accumulated dirt
and dust from the inside of the gener-
ator, using compressed air. Do not aim
the air jet directly onto the electrical
components, in order to avoid damag-
ing them.
• Make periodical inspections in order to
individuate worn cables or loose con-
nections that are the cause of over-
heating.
Error signals
E01:
flashes on the control panel display
when the machine is connected to cool-
ing system and its pressure switch does
not close the circuit due to pressure lack
in the hydraulic circuit.
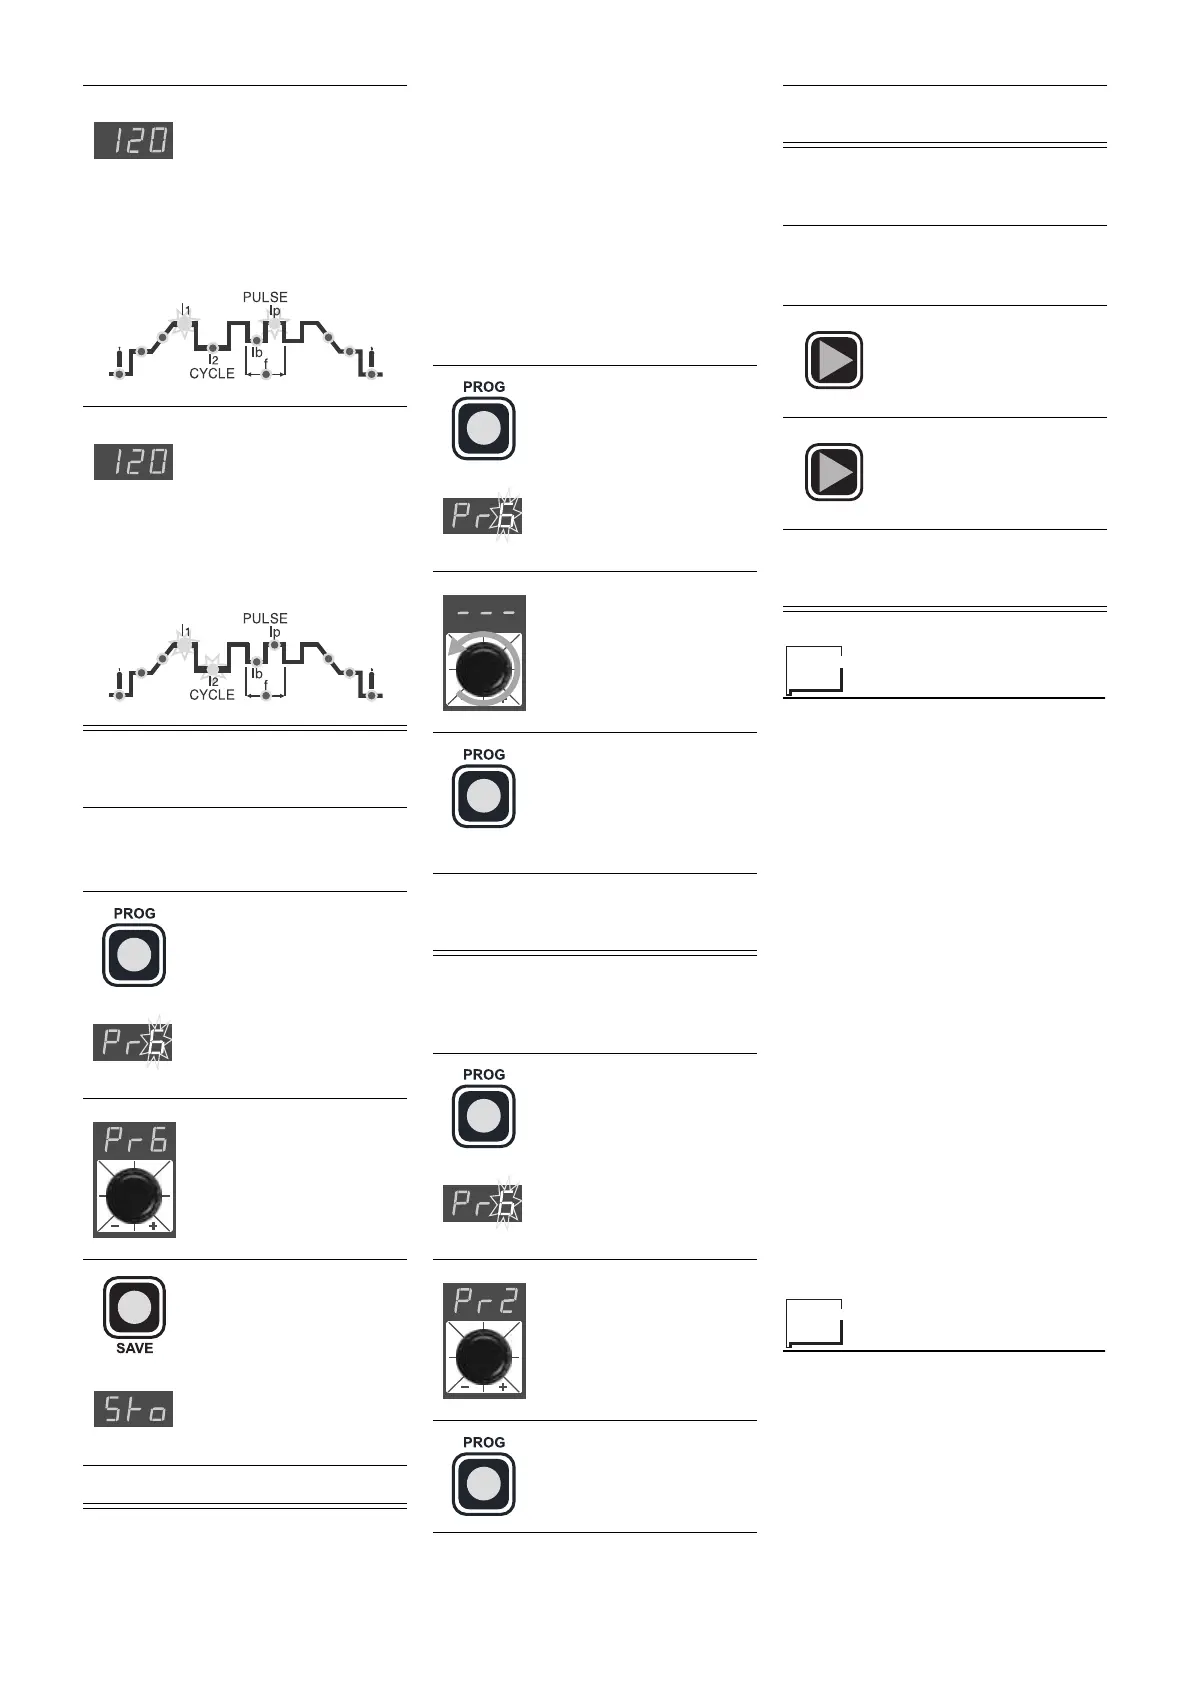
NOTE:
The RED LED
I
p
and the GREEN LED
I
1
remain on continuously
during the welding process
and the current value
being used for welding will
be visualized on the dis-
play
NOTE:
The RED LED
I
2
and the GREEN LED
I
1
remain on continuously
during the welding process
and the current value
being used for welding will
be visualized on the dis-
play
WARNING:
The GREEN LED
I
1
must
be on continuously to enter the input
storage phase
1)
Keep pressing the
PROG
key (for about 3
seconds) until the let-
ters
Pr
appear on the
display
2)
Turn the dial to select
the number of the pro-
gramme where input
must be stored
3)
Keep pressing the
SAVE
key until the let-
ters
Sto
appear on the
display
4)
Input has been stored
1)
Keep pressing the
PROG
key (for about 3
seconds) until the
number of the selected
programme starts
flashing
2)
Turn the dial anti-clock-
wise until 3 dotted lines
appear on the display
3)
Pressing and releas-
ing the
PROG
key, the
machine will go back to
the original operation
(GREEN LED on con-
tinuously)
4)
Any of the parameters may now be
set or modified or new programmes
created
1)
Keep pressing the
PROG
key (for about 3
seconds) until the let-
ters
Pr
with the number
of the programme
appear flashing on the
display
2)
Turn the dial until the
number of the pro-
gramme required
appears on the display
3)
Press and release the
PROG
key to call up
the number of the
selected programme
4) PROGRAMMED
welding can now
be done
1)
Call up the required programme
(see "STORED PROGRAMME
CALL UP")
2)
Press and release the
SET
key to visualize
the set parameters in
sequence
3)
Keep pressing the
SET
key for more than a
second to return to the
selected programme
NOTE:
you will automatically leave pro-
gramming if the set parameters are
changed
 Loading...