9. PERFORMING THE TEST
This paragraph explains how to operate the DRS to perform a complete test.
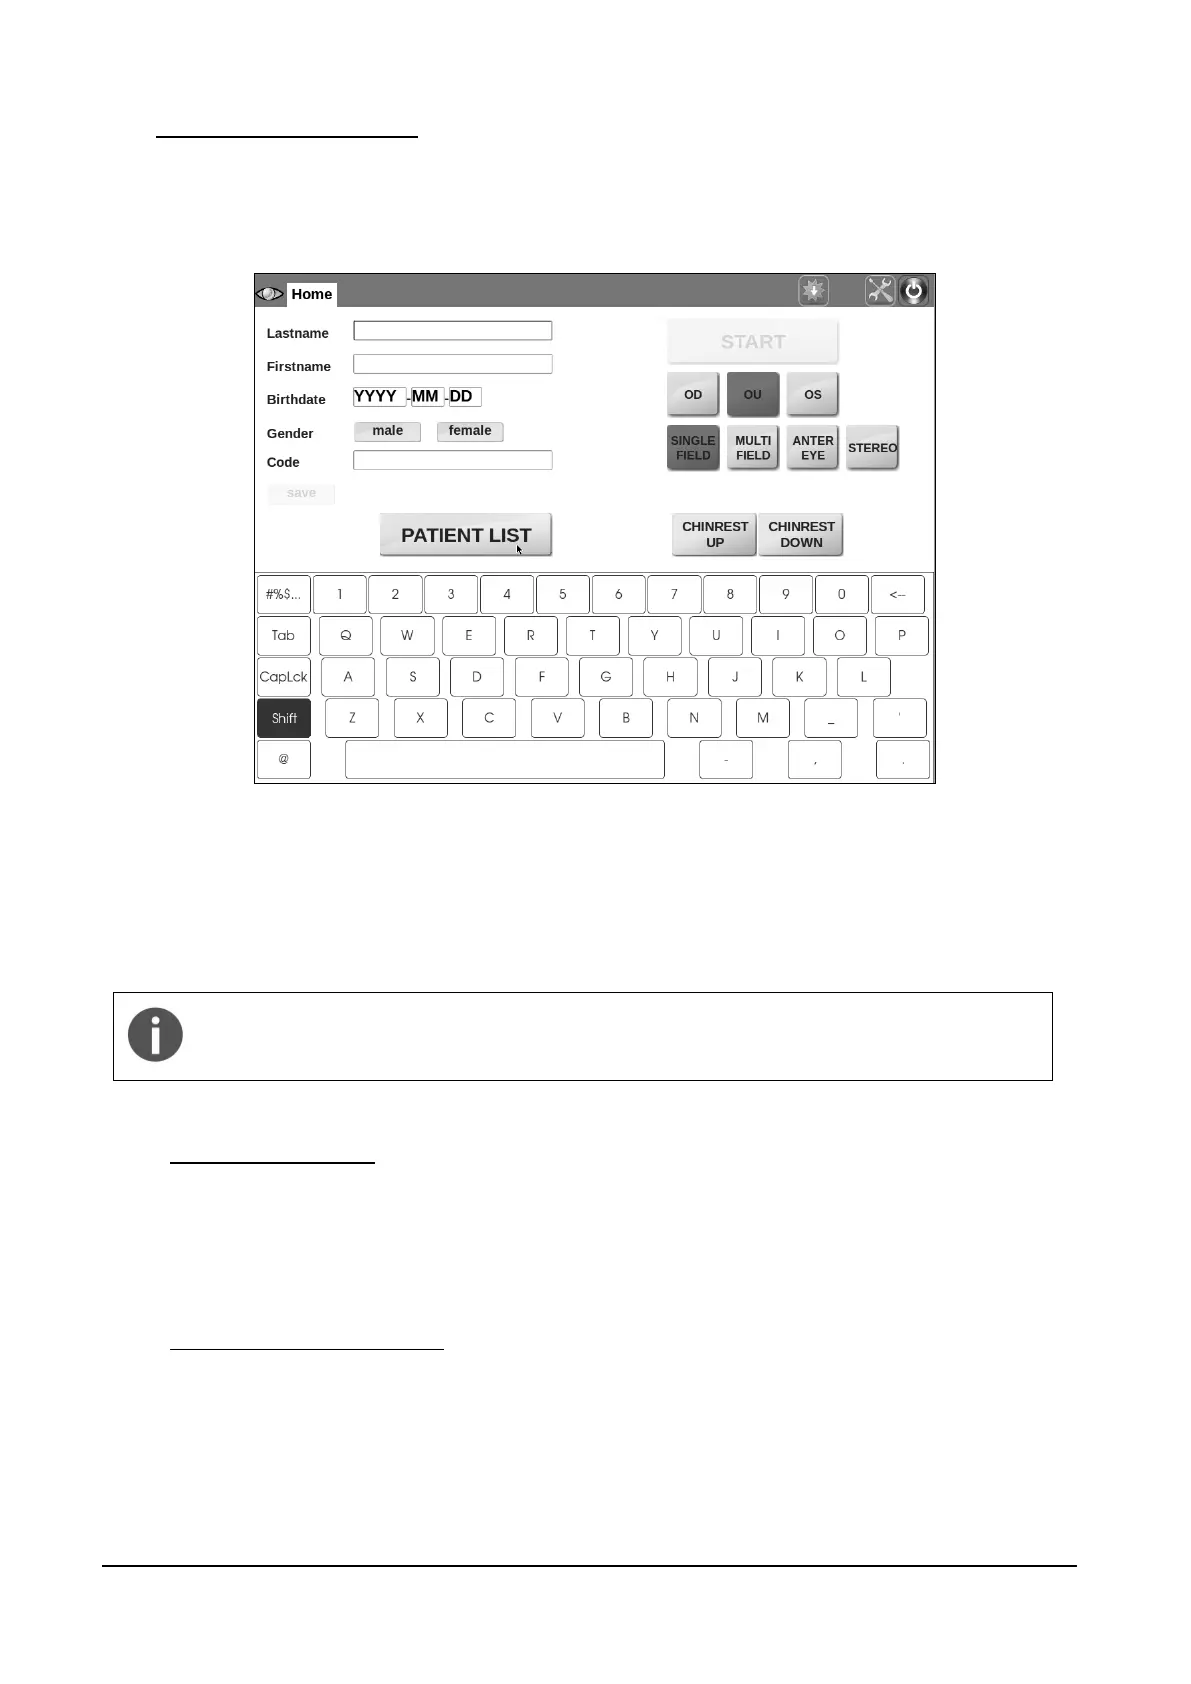
When the unit is turned on and the boot process is over, the Home screen shows up (see Figure
8).
Figure 8 - Home screen
Several options are available at this point, such as:
- adding a new patient (see 9.1 below);
- selecting an existing patient from the list (see 9.2 below);
- starting the image acquisition process without identifying the patient (see 9.3 below).
When the DRS is enabled for data transmission to EKN a new icon appears in the
home screen top bar, providing data upload status information. See also par. Settings
>> EKN and Appendix C for additional information regarding the EKN.
9.1 Adding a new patient
To add a new patient to the list, type the last name (mandatory), first name and date of birth in the
corresponding boxes. Optionally select the gender and type a Code of your choice and any patient
related notes. Then click on save.
9.2 Selecting an existing patient
To select an existing patient from the list, click on the PATIENT LIST button: the complete list of
stored patients will show up (see Figure 9).
The following mechanisms are available to find a specific patient:
scroll the list by dragging the screen up or down;