Figure 34 - Exam tab in settings (Home >> Settings >> Exam >> SAVING)
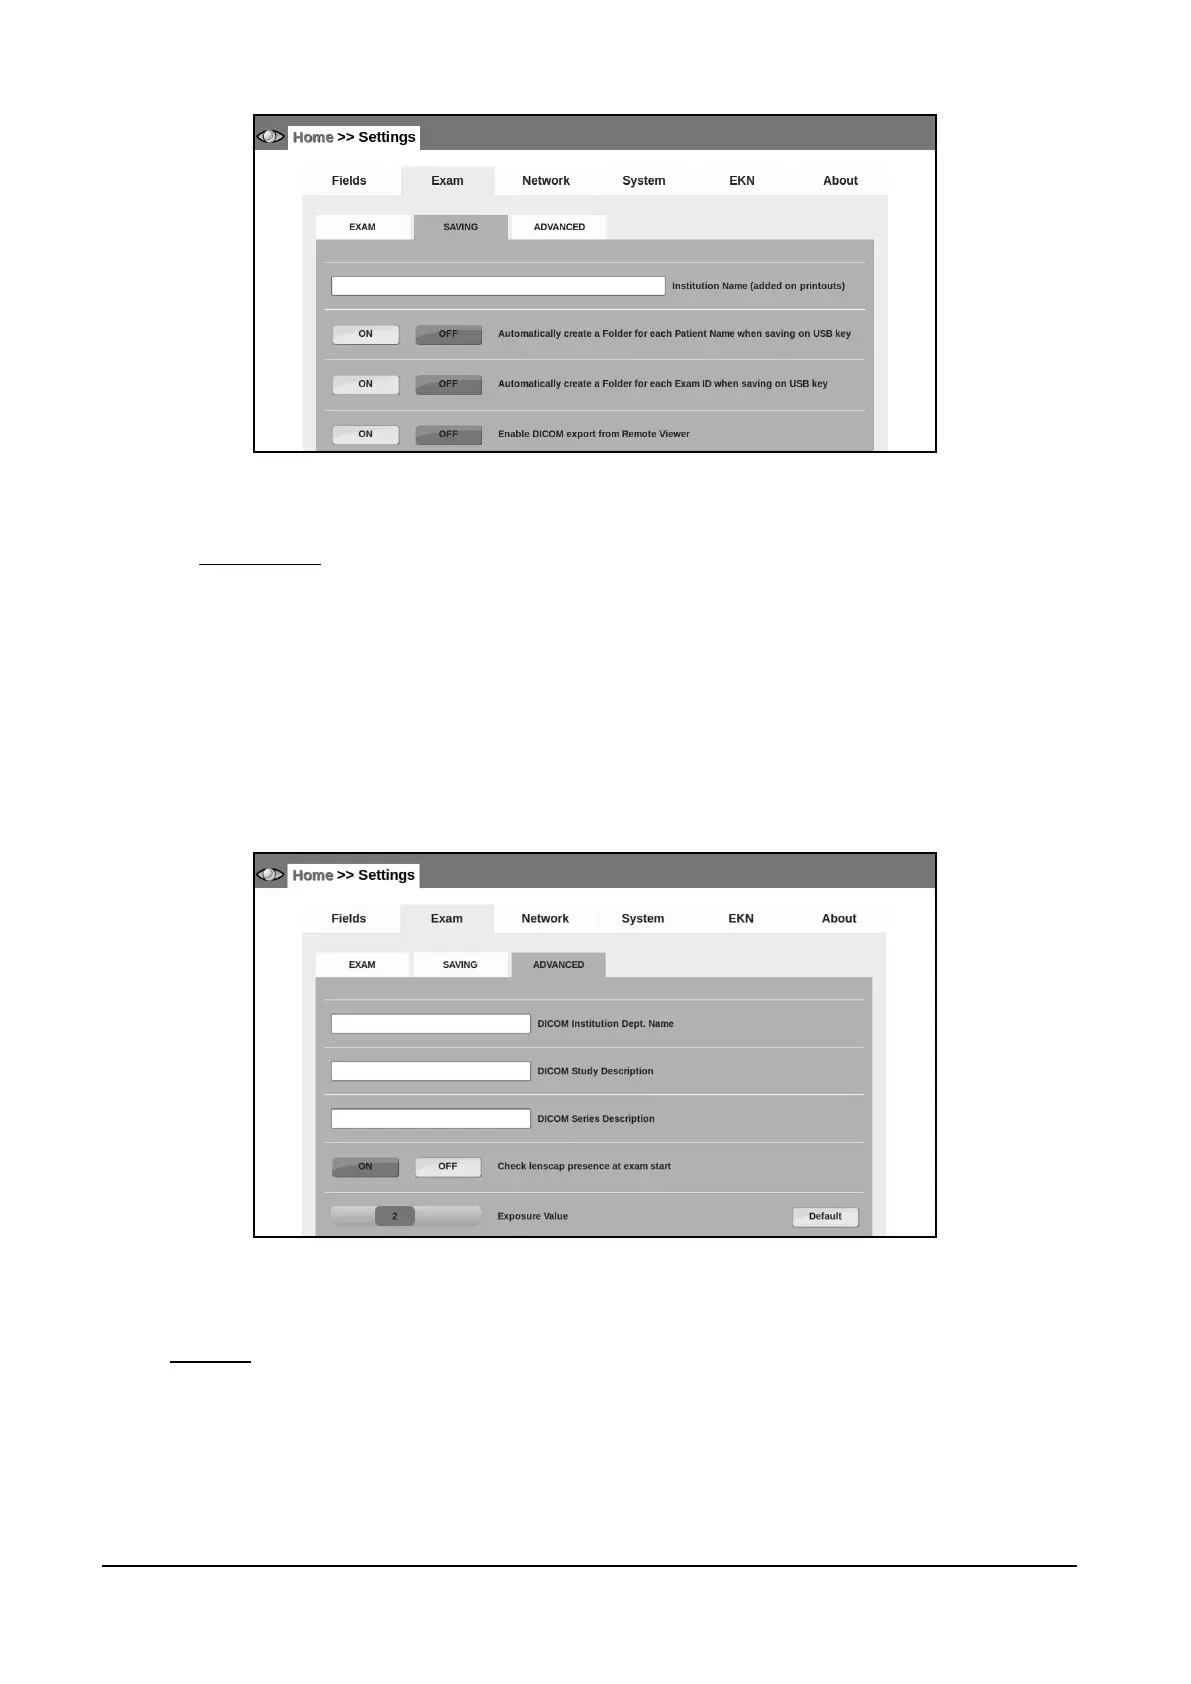
14.2.3 ADVANCED
Use this tab (see Figure 35) to:
enter the Institution Dept. Name: this value is saved in the DICOM tag 0008,1040;
enter the Study Description: this value is saved in the DICOM tag 0008,1030;
enter the Series Description: this value is saved in the DICOM tag 0008,103e;
find the option to disable the lens cap detection at the start of the exams.
set the threshold of the auto-exposure meter (Exposure Value box). The higher the value
specified, the brighter the flash level. The value can be set from 0.5 to 5.0. The “default”
button sets the value to the default level (2.0).
Figure 35 - Exam tab in Settings (Home >> Settings >> Exam >> ADVANCED)
14.3 Network
Each time the “Network” tab is selected, a network test is performed. Once it completes, the result
is displayed on the screen next to the Current network status label. The result can be any of the
following (see Figure 36):
Internet connection fully available on address xxx.xxx.xxx.xxx: the DRS is fully connected to
the Internet (required for EKN connection and support purpose, see Settings >> EKN).
LAN working on IP xxx.xxx.xxx.xxx: a valid network is set and the local network is ready.