No working connection: the DRS is not connected to any network.
The Network tab has 4 sub-tabs: GENERAL, WIRELESS, SHARED-FOLDER and LAN ACCESS.
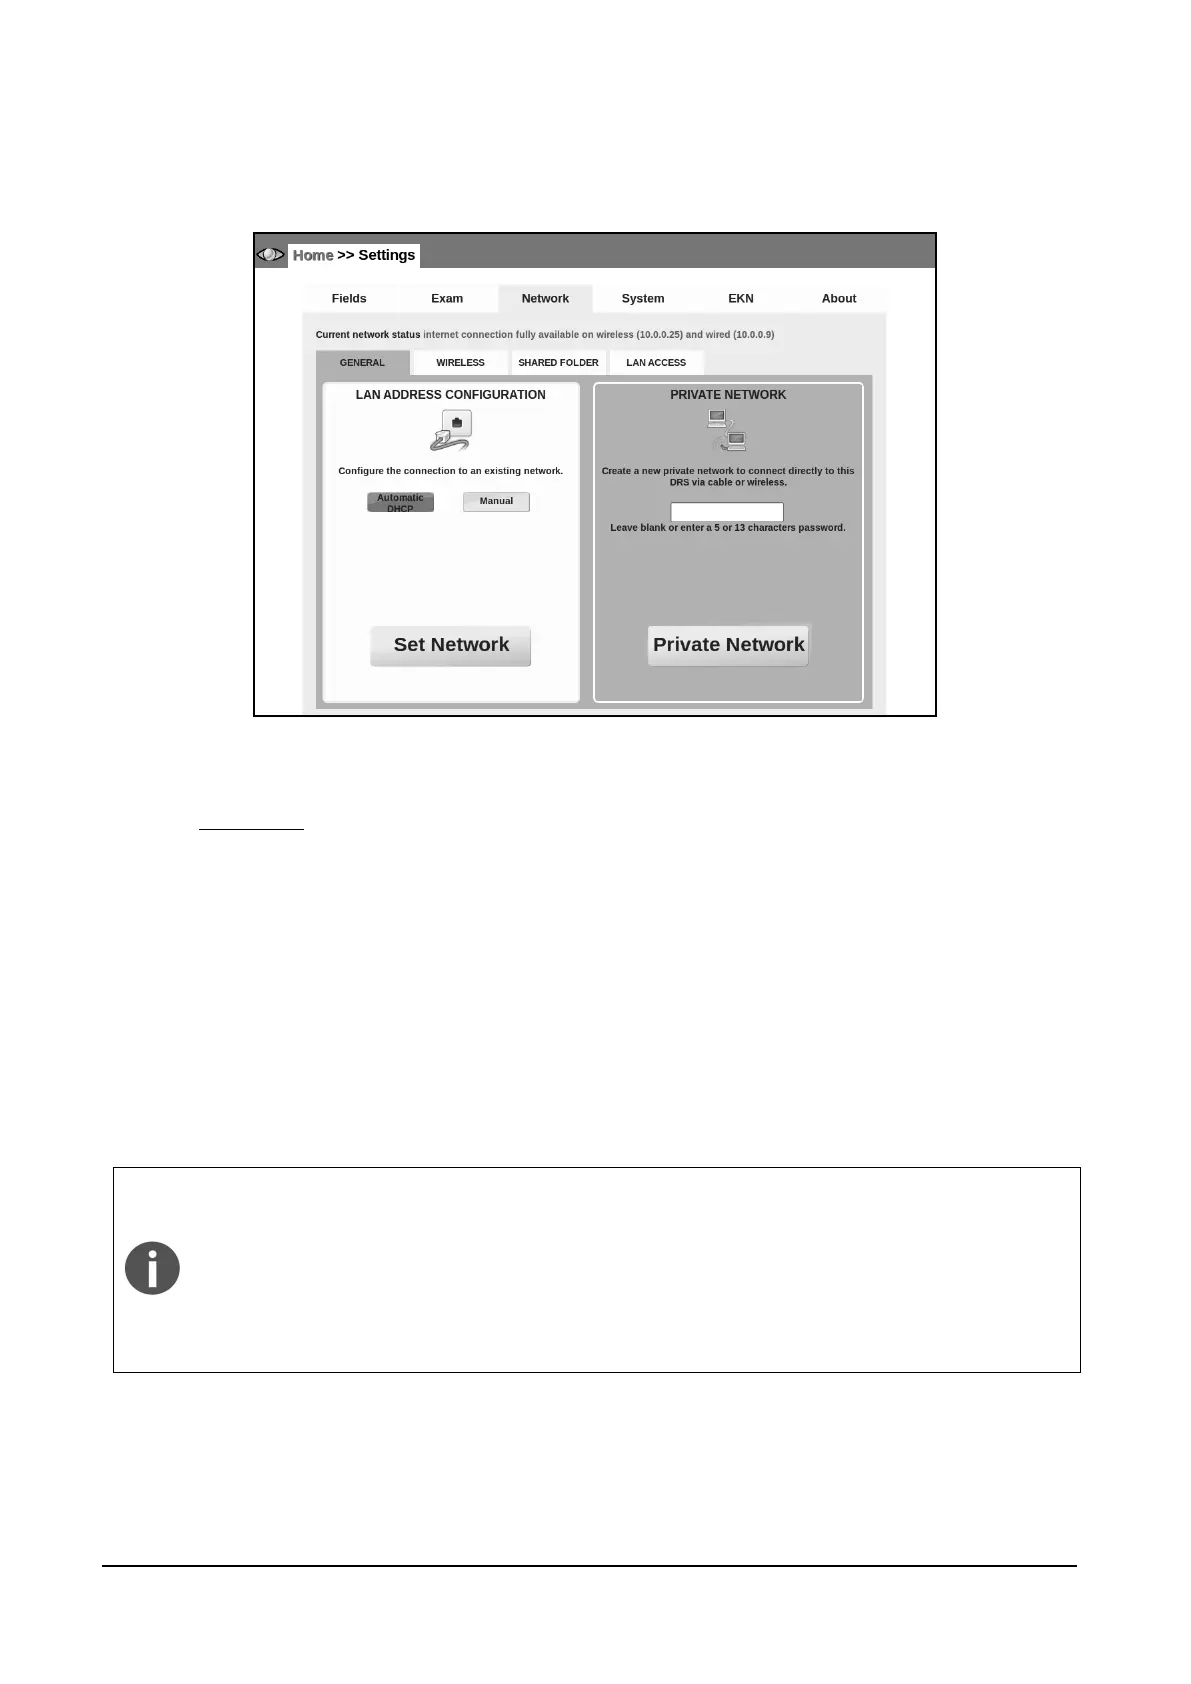
Figure 36 – Network tab in Settings (>> GENERAL)
14.3.1 GENERAL
To enable a wired connection, plug a network cable into the DRS and wait a few seconds. Press
“SET NETWORK” to refresh the network configuration. Most networks do not require the operator
to set the IP address manually, but in case it’s needed, click on the Manual button and enter the
IP address (mandatory), netmask (mandatory), gateway (optional) and DNS (optional). Then select
“SET NETWORK” (see Figure 37).
To allow the DRS to create a private network click on Private Network button (see Figure 37). The
Private Network allows the use of the DRS remote viewer without using existing networks. It can
be used both in wired and wireless configuration. To go back and use an existing network click on
Set Network.
The Private Network always enables the wireless interface. If the DRS is
plugged into an existing network (where another DHCP server is active),
unplug the network cable before enabling the Private Network in order not to
interfere with the existing DHCP server. The DRS wireless Private Network is
compatible with Apple iPad and Microsoft Windows XP, 7, Vista and 8 (up to
version 8.0). Android-based devices and Windows 8.1 have known limitations
that prevent the correct use with the DRS wireless Private Network.