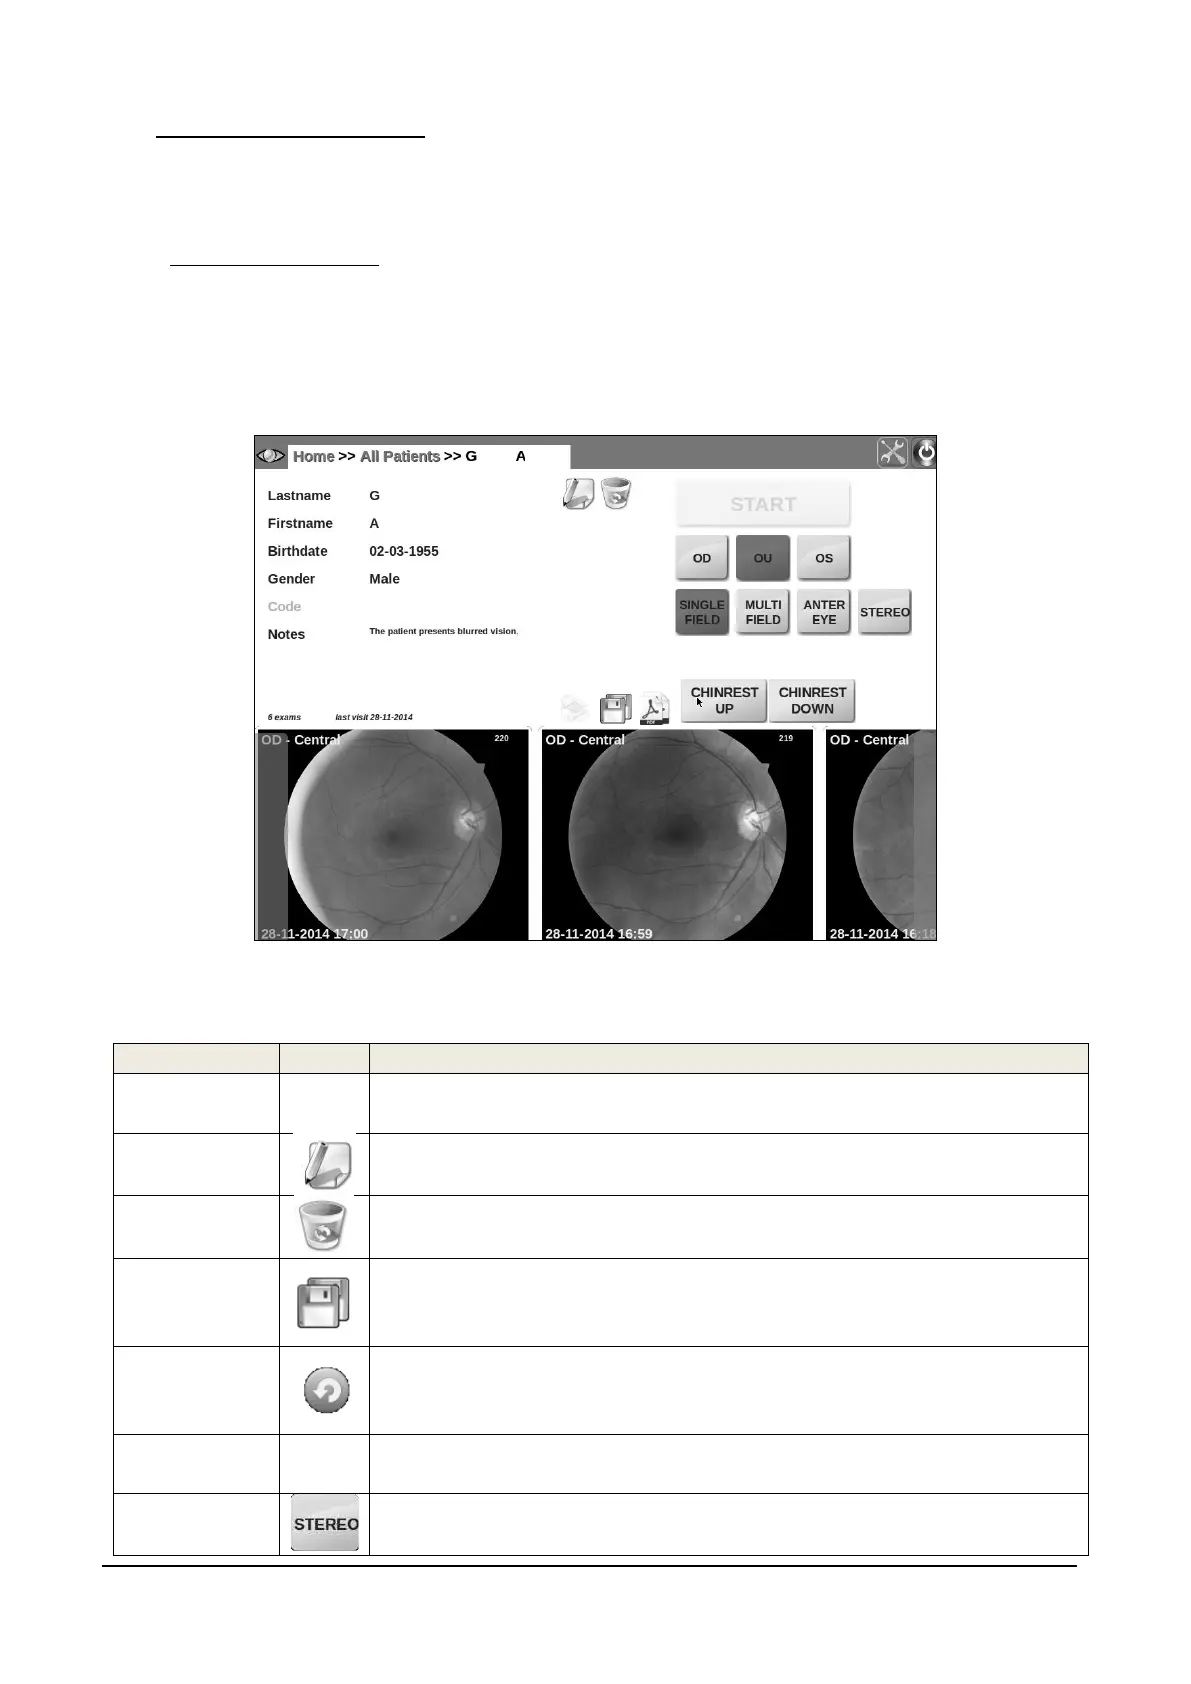
10. REVIEWING THE IMAGES
Once the image(s) has (have) been acquired, the system will open the patient’s individual record
and present a thumbnail view of all the available images (see Figure 23).
10.1 Patient record screen
For each image thumbnail, the following information is displayed:
the eye (OD/OS) and field information, in the top-left corner;
the image number, in the top-right corner;
the acquisition date and time, in the bottom-right corner.
Figure 23 - Patient record screen
Available functions include:
Point on any thumbnail and drag to the left / right or press the left / right
buttons located at the bottom on the sides
Click on this icon to enter the edit mode and correct any mistyped
information or provide additional details
Click on this icon to permanently delete the current patient and all
related exams. A confirmation is required.
Click on this icon to export all images of the selected patient as JPG
files on a USB key (only available if a USB key is plugged in any of the
USB ports)
Click on this icon to select one or more images to be retaken. When all
images have been selected, click on RETAKE. Images can be retaken
within 5 minutes after they have been captured.
Click on the corresponding thumbnail to open the full image screen
Click on the STEREO button between the two thumbnails of a stereo
couple thumbnail: this command will open the 3D viewer. Only