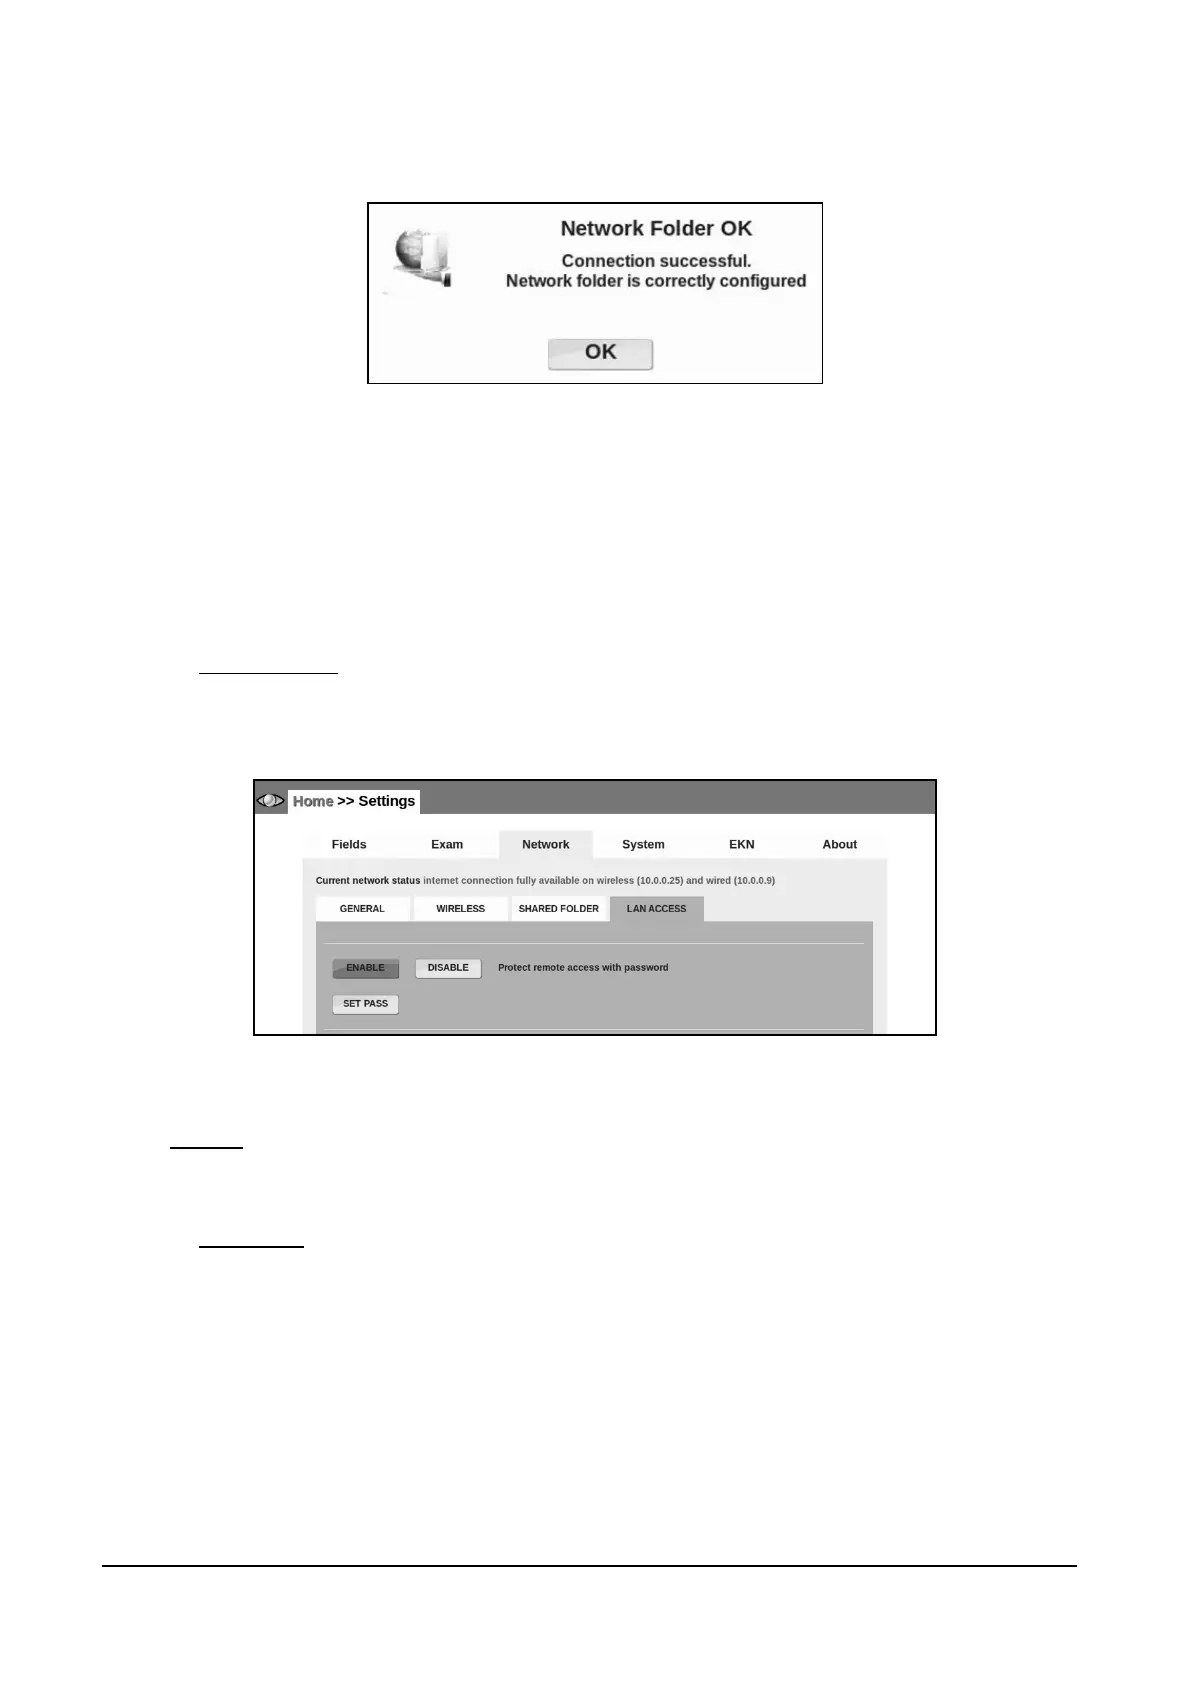
In case of correct setting a dialog box like the one in Figure 42 will appear. Press OK to confirm
and save the network folder setup.
Figure 42 - Remote Folder Configuration – Connection Successful
The most important difference between the two type of shared folder (internal and remote) is where
the data is stored and how it can be accessed. The Internal option is the easiest to set up, but the
data is available only as long as the DRS is powered on and connected to the network. The
Remote option might require additional information and special permissions (especially in complex
networks) but the data is available even when the DRS is powered off or disconnected.
14.3.4 LAN ACCESS
The LAN ACCESS sub tab lets you set a password for the Remote Viewer access to the DRS, to
prevent access to the data by unauthorized persons.
Figure 43 – Network tab in Settings (>> LAN ACCESS)
14.4 System
The System tab has five sub-tabs: GENERAL, TIME, BACKUP, PRINTERS and SERVICE.
14.4.1 GENERAL
Use this tab to:
Enable, disable and configure the screensaver: the delay can be between 5 and 60 min.
If the screensaver is enabled it can be protected by a password: the operator will also be
prompted for the password when the DRS starts;
Enable third party EMR systems to interface the DRS using their web programming
interface. This feature can be enabled only if a valid license is installed.
Enable or disable the “DARK MODE”: a configuration that reduces the emission of light,
useful when using the device in a dark room.