If the MANUAL option is selected, a new button will be shown in the upper right corner of the Full
image screen. This button allows you to save the exam in the shared folder (Figure 39).
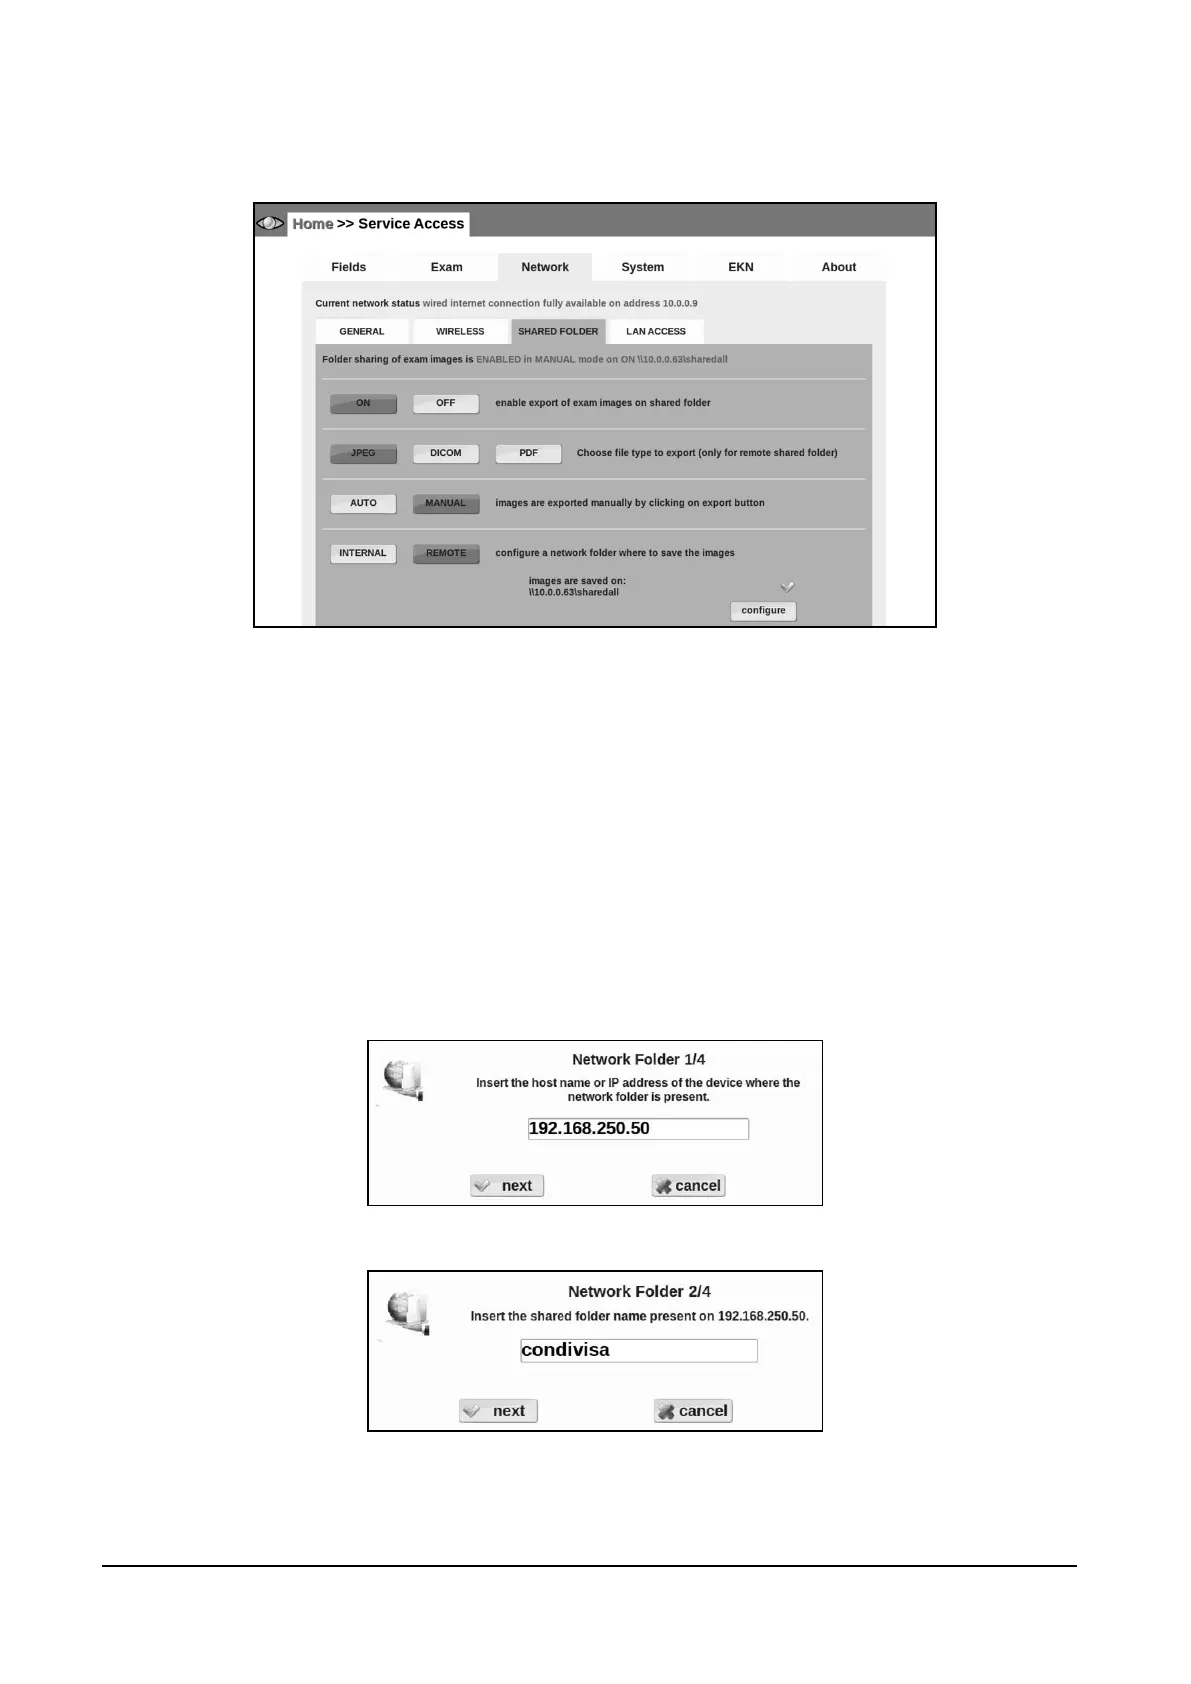
Figure 39 – Network tab in Settings (>> SHARED FOLDER)
As shown in Figure 39 you can set the export function to save the images in a folder inside the
DRS (by pressing the INTERNAL button) or in a remote folder (by pressing the REMOTE button).
When INTERNAL is selected, data is saved in a folder inside the DRS. This folder can be reached
from a regular PC by searching a network resource named \\DRS-ID\shared (e.g. \\drs-0010\shared).
In case of complex networks, it may be necessary to insert the IP address of the DRS instead of its
name (e.g. \\192.168.1.10\shared). In this case you might need to seek the support of your local IT
staff.
When REMOTE is selected, the DRS needs to be configured with the name of the remote host, the
name of the share, and the username (and its password) of a user that has the necessary rights to
access the remote folder. The following figures (Figure 40, Figure 41) show the messages that will
be displayed to the operator.
Figure 40 - Remote Folder Configuration – step 1
Figure 41 - Remote Folder Configuration – step 2
A third step may require you to insert username and password on the remote folder.