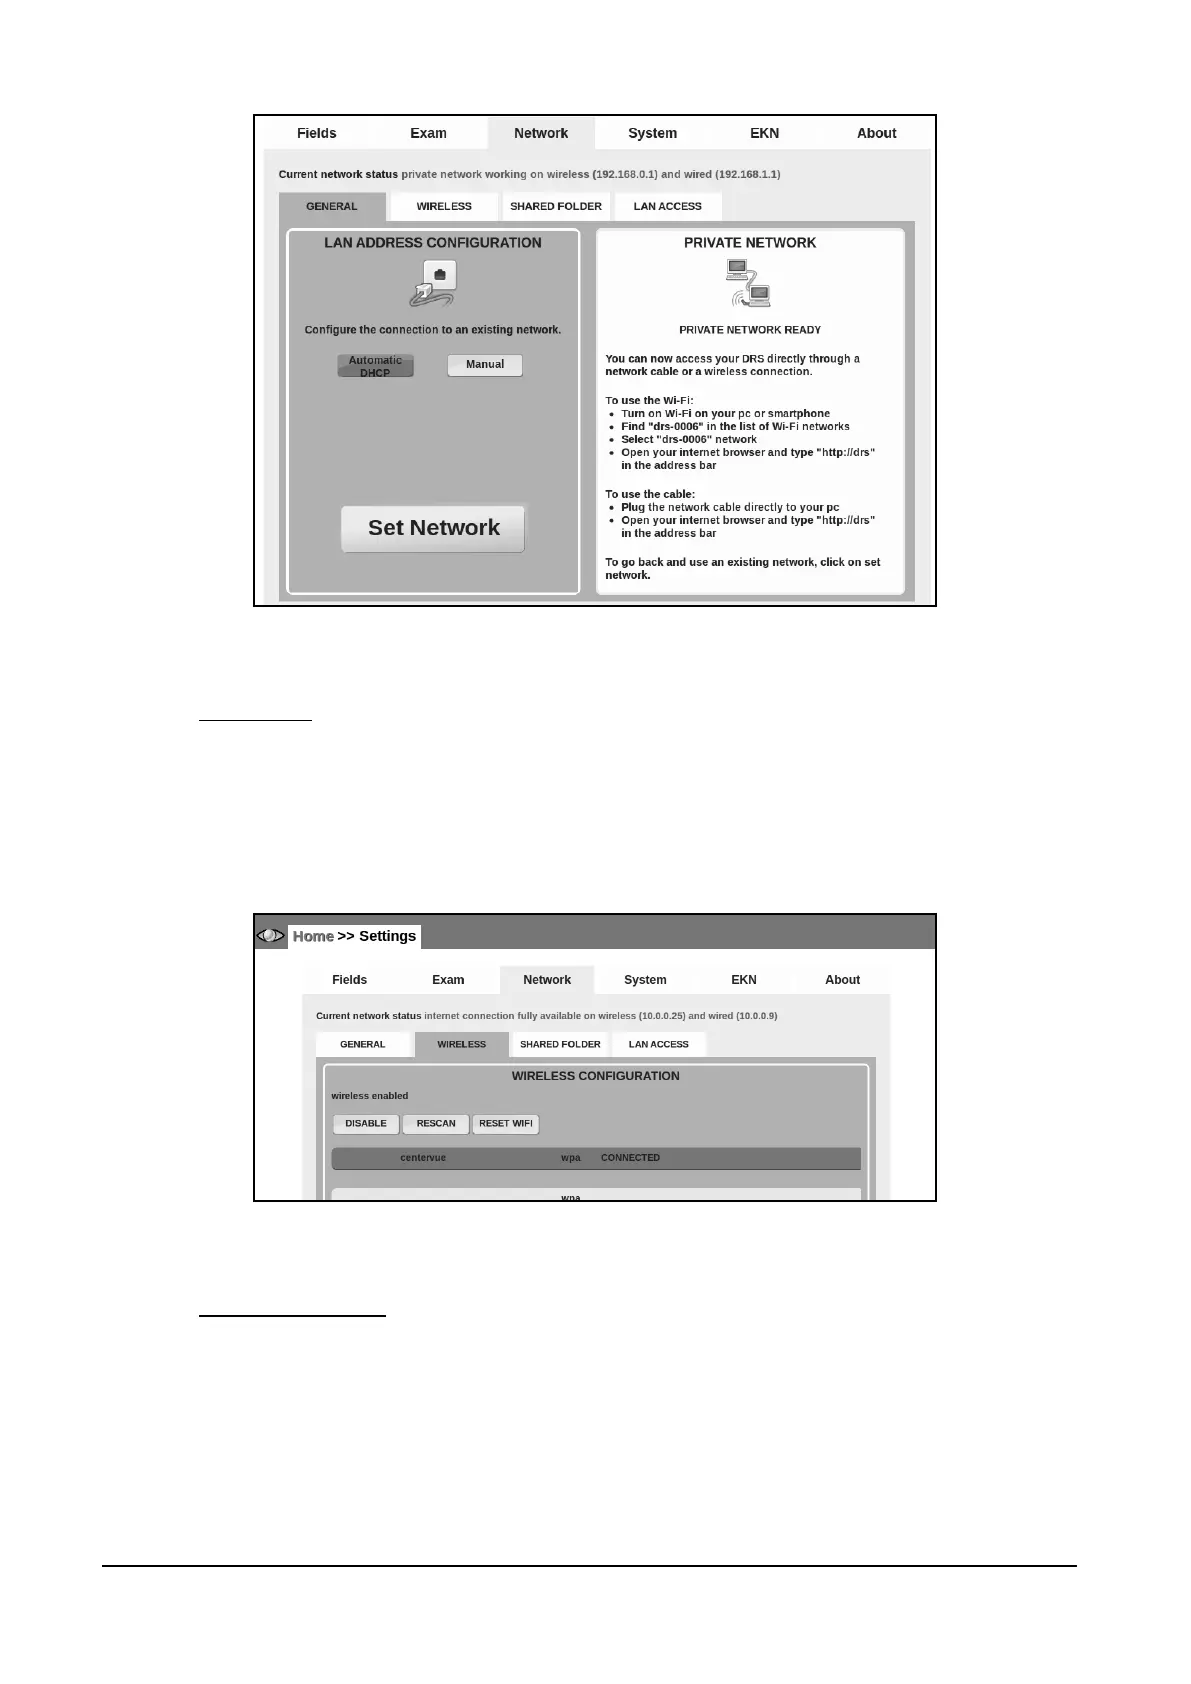
Figure 37 – Network tab in Settings when a private network has been set-up
14.3.2 WIRELESS
To enable the wireless network select the WIRELESS tab and click the ENABLE button. Make sure
that no cable is plugged into the Ethernet port: this could create problems in wireless connection.
Press RESCAN to refresh the list of available networks, then select the network you want to
connect to. Enter the WiFi password/key and click “Connect” to establish the wireless connection.
See example in Figure 38.
Figure 38 - Network tab in Settings (>> WIRELESS)
14.3.3 SHARED FOLDER
The DRS can export images into a shared network folder. To enable exporting to shared folder
select the SHARED FOLDER tab and then press ON.
Choose the format type to be exported (JPEG, DICOM or PDF) and the mode (MANUAL or
AUTO). If the AUTO mode is chosen, at the end of each exam, a copy of the photo will be
automatically saved to the shared network folder. The images in the shared folder can be deleted
at any time by the operator or by a program without altering the database and files inside the DRS.
The exported files are saved by creating a file whose name follows the following format:
patientID_lastname_firstname_date_time_drsNumber_eye_fieldNumber_examNumber.<ext>