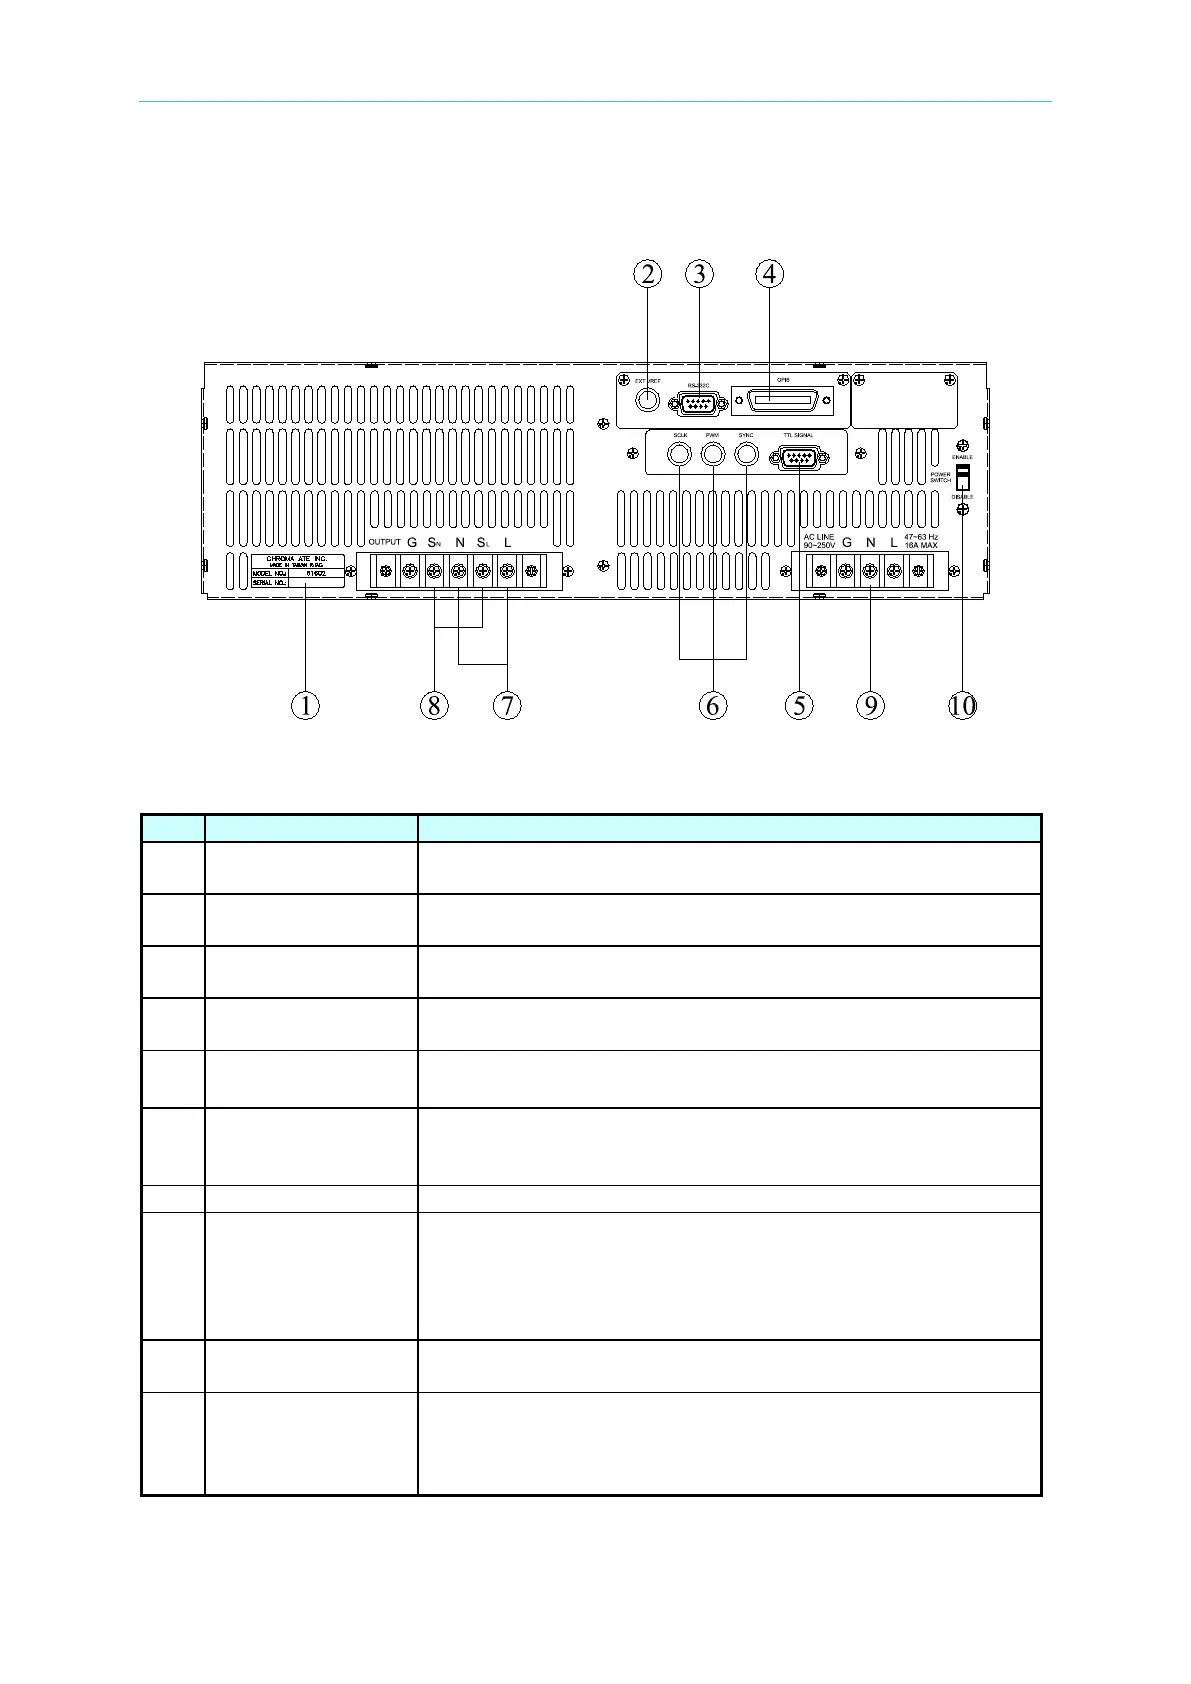
Installation
2-1
2. Installation
2.1 Inspection
After unpacking the instrument, please inspect any damage that may have occurred during
the shipment. Save all packing materials in case the instrument has to be returned one day.
If any damage is found, please file a claim with the carrier immediately. Do not return the
instrument to the factory without obtaining the prior RMA acceptance from Chroma.
2.2 Preparation for the Use
In the beginning, the instrument must be connected with an appropriate AC line input. Then,
since it is intelligently cooled by fans, it must be installed in sufficient space for circulation of
air. It should be used in an area where the ambient temperature does not exceed 40°C.
2.3 Requirements of Input Power
2.3.1 Ratings
Input Voltage Range : 190-250 V
LL
, 3 phases 4 wires ∆, or
329-433 V
LL
, 3 phases 5 wires Y
Input Frequency : 47-63 Hz
Max. Current : 220V 3~ (type) 25 A, per phase
380V 3~ (Y type) 14 A, per phase
Caution: The AC source will be damaged if it is operated at an input voltage that is outside its
configured input range.
Input Connection needs to be footnoted the specifications for using with Circuit Breaker.
220V 3~ ( type) Max 25A/Phase
(This type wiring needs to use with Circuit Breaker spec. 220Vac/25A minimum.)
380V 3~ (Y type) Max 14A/Phase
(This Y type needs to use with Circuit Breaker spec. 380Vac/14A minimum.)
Maintenance & Cleaning: Remove all connected wires and cables on the instrument
before cleaning. Use a brush to clean the dust on it and if there are stains on the
chassis that cannot be removed by brush, wipe it with volatile liquid (such as Cleaning
Naphtha). Do not use any corrosive liquid to avoid damaging the chassis. Use a damp
cloth with soap water or soft detergent to clean the LCD front panel. For internal
cleaning, use a low-pressure air gun to vacuum the dust inside or send it back to our
agent for cleaning.
Common Environment Conditions
(1) Indoor use.
(2) Altitude up to 2000m.