Overview
1.5 Fuse
There is one fuse installed in the rear panel, please be aware of the following when replacing
it:
(1) First turn off the power and unplug the power cord before changing the fuse.
(2) Since visual check cannot ensure the fuse to be used is appropriate, it is necessary to test
its resistance to see if it is below 15Ω which is normal when checking.
(3) When replacing the fuse, use a finger or a flat screwdriver to press the cover of fuse
holder gently and turn it counter clockwise for 60 degree, the cover will be unlocked
from the holder for 3mm.
(4) Remove the over and replace the fuse with a new one (must be same as the original fuse.)
(5) Press the cover down into the holder by a finger or a flat screwdriver and turn it
clockwise for 60 degree to secure it.
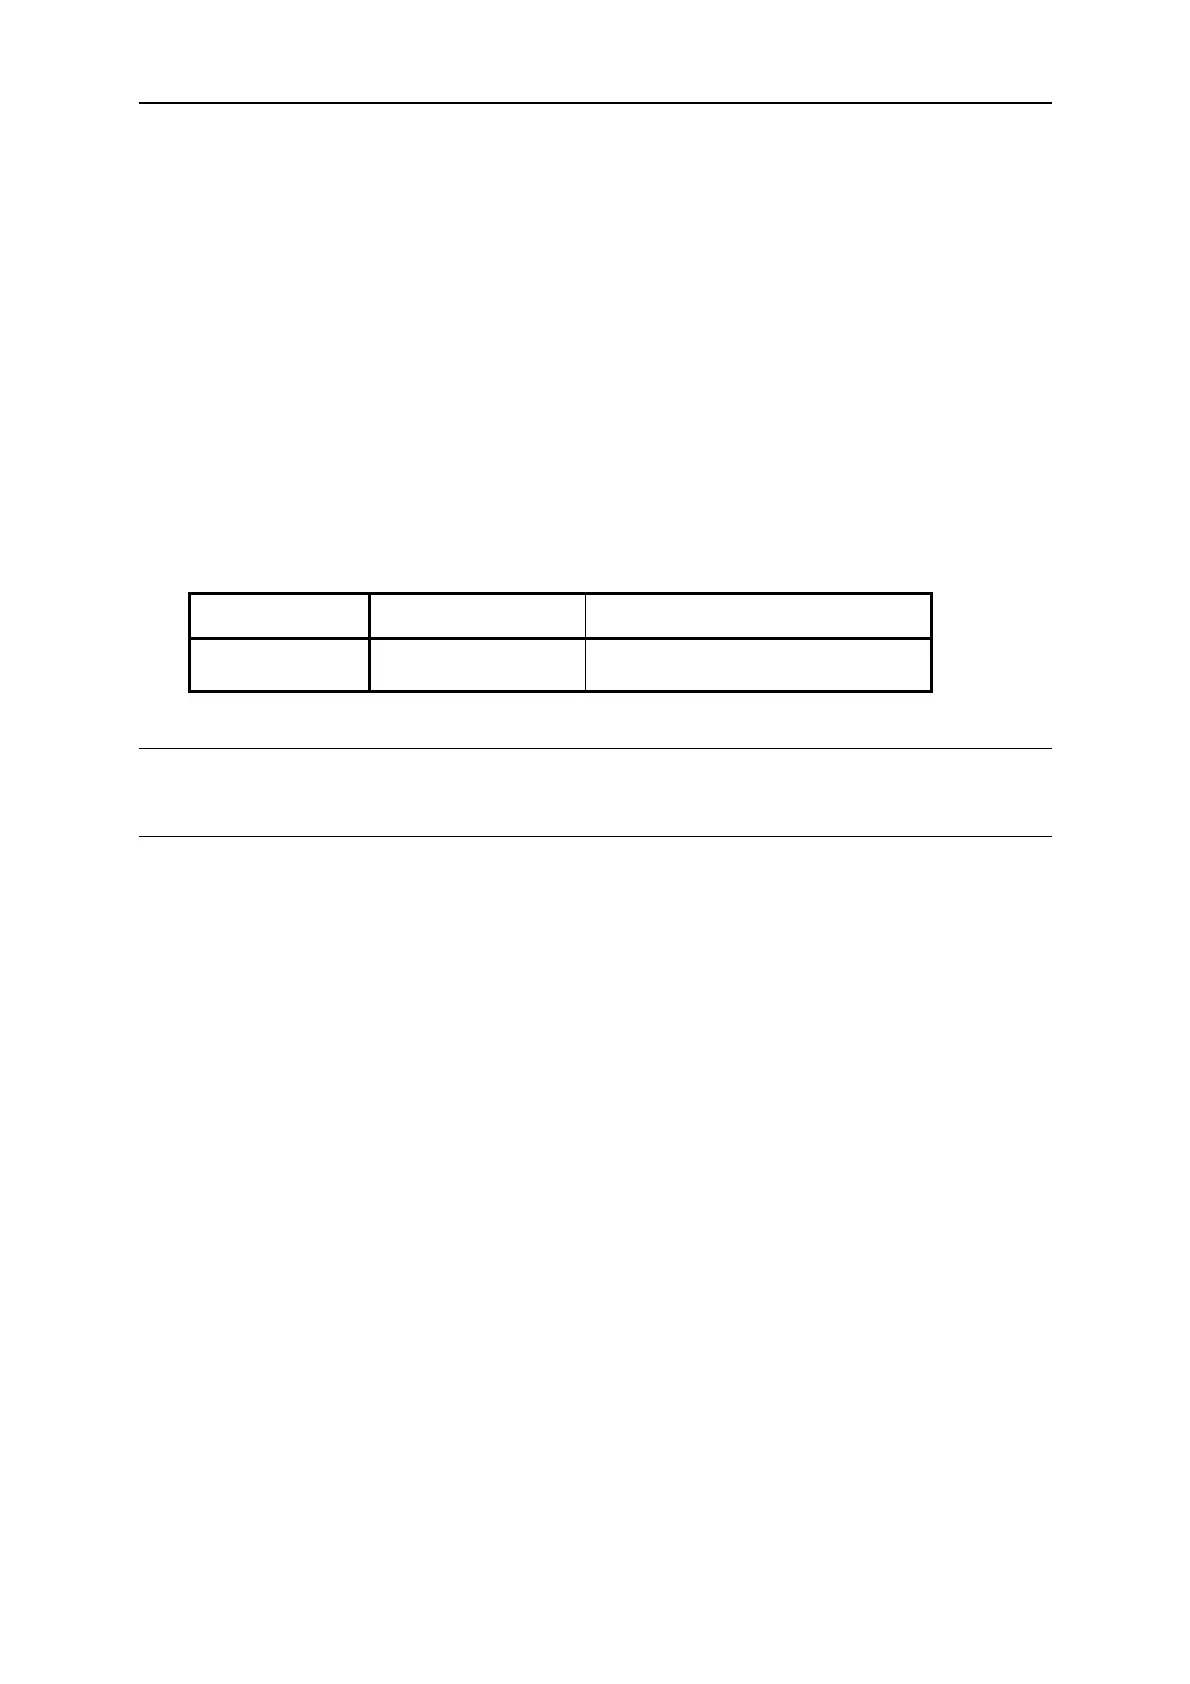
Specification Note
Power Fuse Slow blow 0.5A Applicable for AC 190V ∼ 250V
Table 1-1 Specification of Fuse
a
CAUTION
To prevent fire from occurring it is required to use the fuse of same type and same
specification when replacing it.
1.6
1.7 Cleaning
Time for Warm-Up
All functions of this meter are active when it is powered on; however, to meet the accuracy
listed in the specification it is suggested to warm-up for at least 60 minutes.
Ensure all cables and power cords are removed before cleaning the hardware. Use a dry
cloth to clean the chassis. As the rear panel of power meter connects to the internal circuit
board, to avoid damaging the hardware due to short circuit internally it is not allowed to wipe
it with damp cloth.
1-3
 Loading...