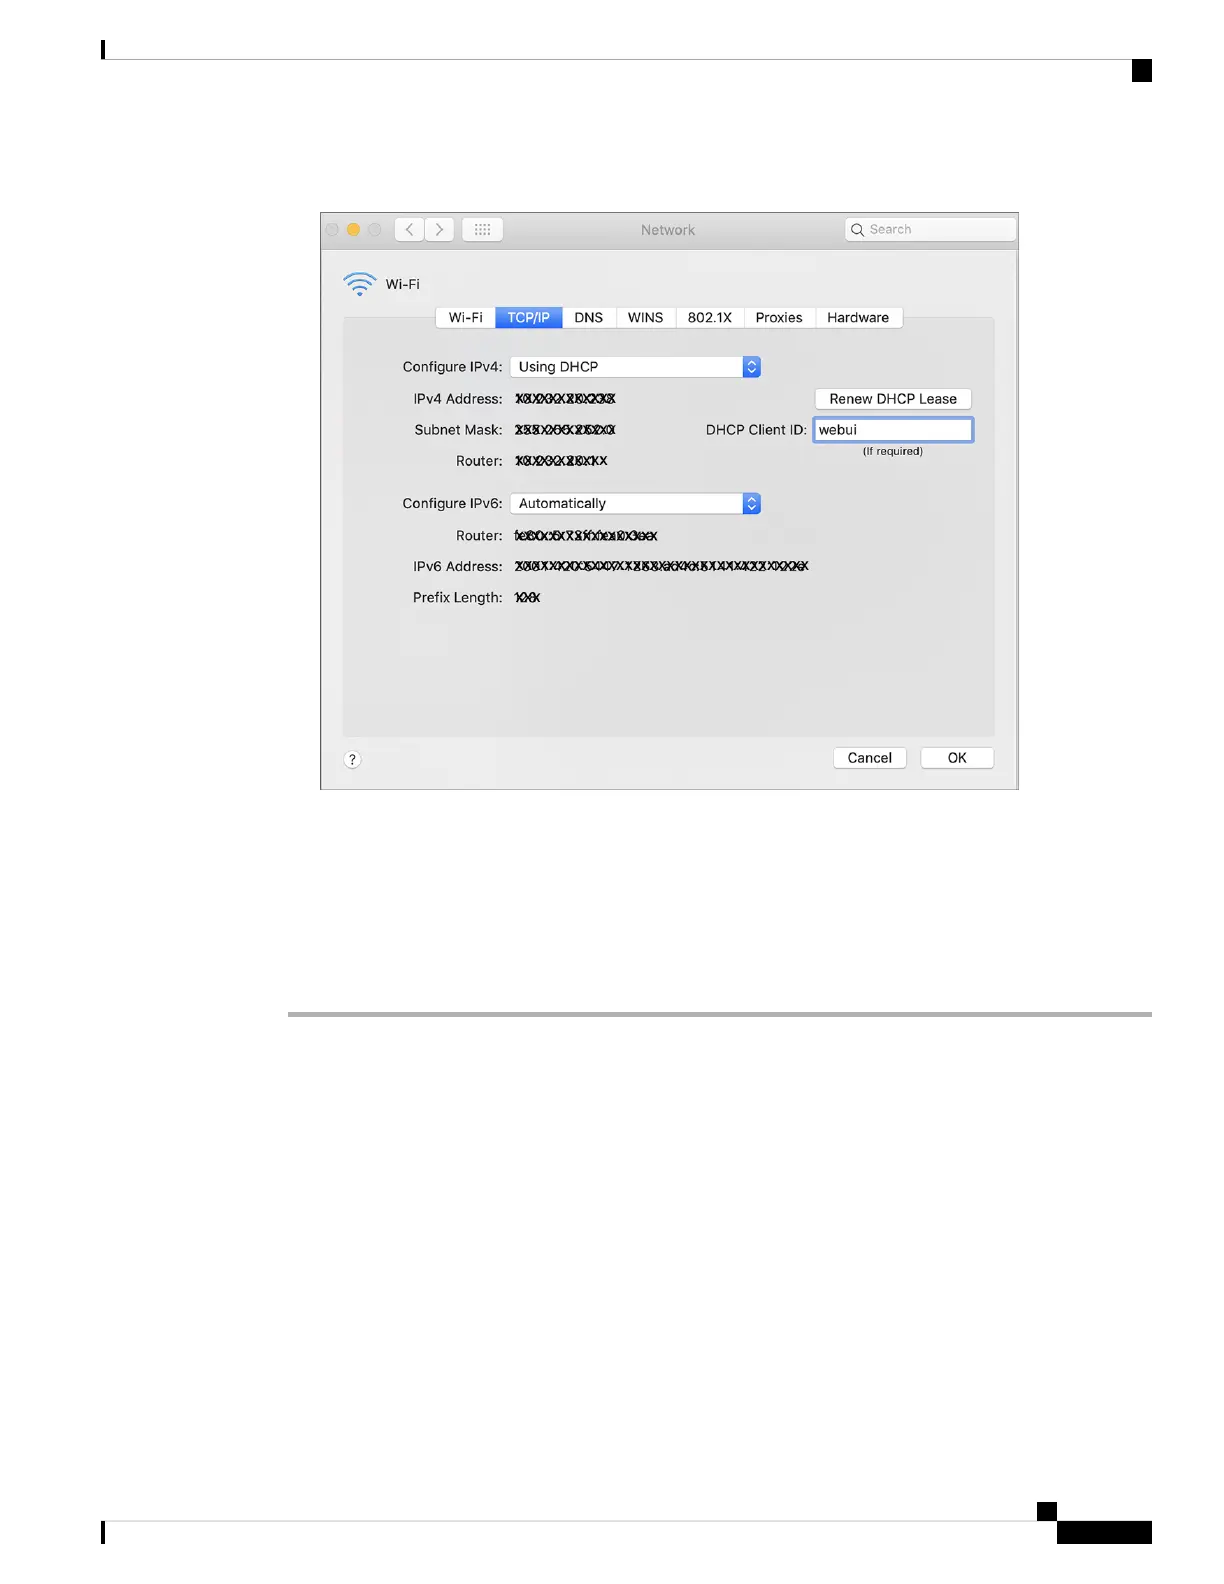
Figure 36: Setting up DHCP Client Identifier on MAC
2. Click OK to save the changes.
The bootup script runs the configuration wizard, which prompts you for basic configuration input: (Would
you like to enter the initial configuration dialog? [yes/no]: ). To configure Day 0 settings using the web
UI, do not enter a response. Perform the following tasks instead:
Procedure
Step 1 Make sure that no devices are connected to the switch.
Step 2 Connect one end of an ethernet cable to one of the downlink (non-management) ports on the active supervisor
and the other end of the ethernet cable to the host (PC/MAC).
Step 3 Set up your PC/MAC as a DHCP client, to obtain the IP address of the switch automatically. You should get
an IP address within the 192.168.1.x/24 range.
Cisco Catalyst 9200 Series Switches Hardware Installation Guide
55
Configuring the Switch
Connecting to the Switch
 Loading...