Chapter 5 Web GUI Setup and Monitoring
6 From the Enable/Disable drop-down list, choose Yes to report the alarm
message. Choose No to disable the alarm message and the Relay and Trap
settings are ignored.
Note: Enable/Disable must be set to Yes for the Relay and Trap settings to be
functional.
7 If current alarm is enabled, choose Yes from the Trap drop-down list and the
SNMP trap message will be sent when the alarm is set or cleared.
Note: No is a read only value that indicates the setting is Yes, but is currently
being suppressed because the alarm is disabled (Enb is set to No).
8 If current alarm is enabled, choose Yes from the Relay drop-down list to trigger
the rear panel alarm relay when the alarm is set or cleared.
Note: No is a read only value that indicates the setting is Yes, but is currently
being suppressed because the alarm is disabled (Enb is set to No).
9 Click Apply.
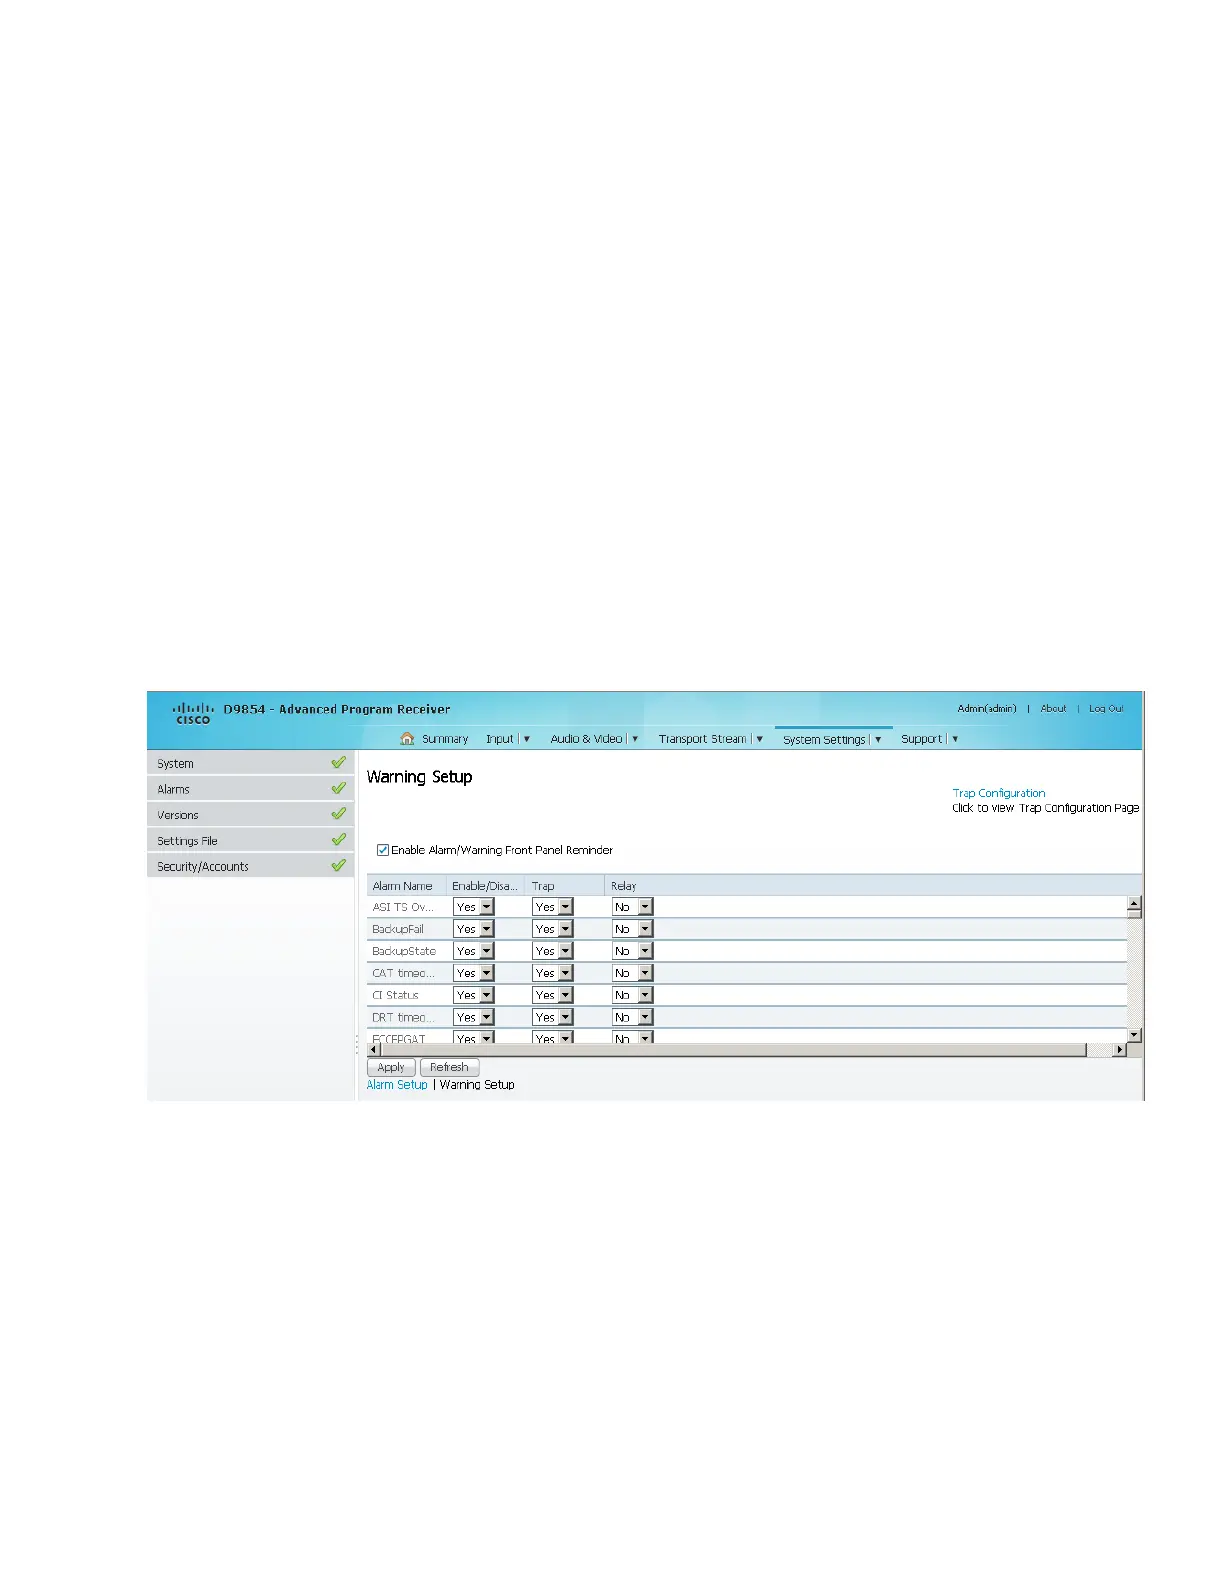
To Set Up Warnings
1 From the Alarm Setup page, click the Warning Setup link at the bottom left hand
corner of the page. The Warning Setup page is displayed.
2 Check the Enable Alarm/Warning Front Panel Reminder check box and the
warning flashes on the LCD display for a two-second interval every 10 seconds.
The warning will continue to flash periodically until it is either cleared or the
Enable Alarm/Warning Front Panel Reminder is de-selected.
3 The Warning Setup area displays a list of the warning messages. For more
information on warning messages, refer to D9854/D9854-I Receiver Alarm
Messages (on page 306).
4 From the Enable/Disable drop-down list, choose Yes to report the warning
message. Choose No to disable the warning and the Relay and Trap settings are
ignored.
 Loading...