Connecting the RF Cables to the Chassis
To Connect RF Cables for Each Module
Complete the appropriate procedure below to connect RF cables for the module.
Note: This procedure assumes that the chassis is mounted in a rack.
Standard Prisma II Chassis
Note: This procedure assumes a host module with receivers in both lower and upper
half-slot positions. If only one receiver installed, it is not necessary to connect RF
cables for the unused position.
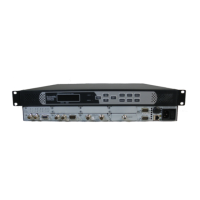
1 Locate the RF ports on the chassis connector panel. The connector panel is on the
front of a front-access chassis, and on the rear of a rear-access chassis. The figure
below shows the connector panel for a rear-access chassis.
2 Connect RF cables to the Port A and Port C connectors for the chassis slot in
which the host module will be installed. These are the RF output connections for
the module in the lower half-slot position. Hand-tighten the connectors.
3 Route the RF cables from Ports A and C (for the lower half-slot module) to the
appropriate RF destinations.