64 Clare Controls IP Network Camera User Guide
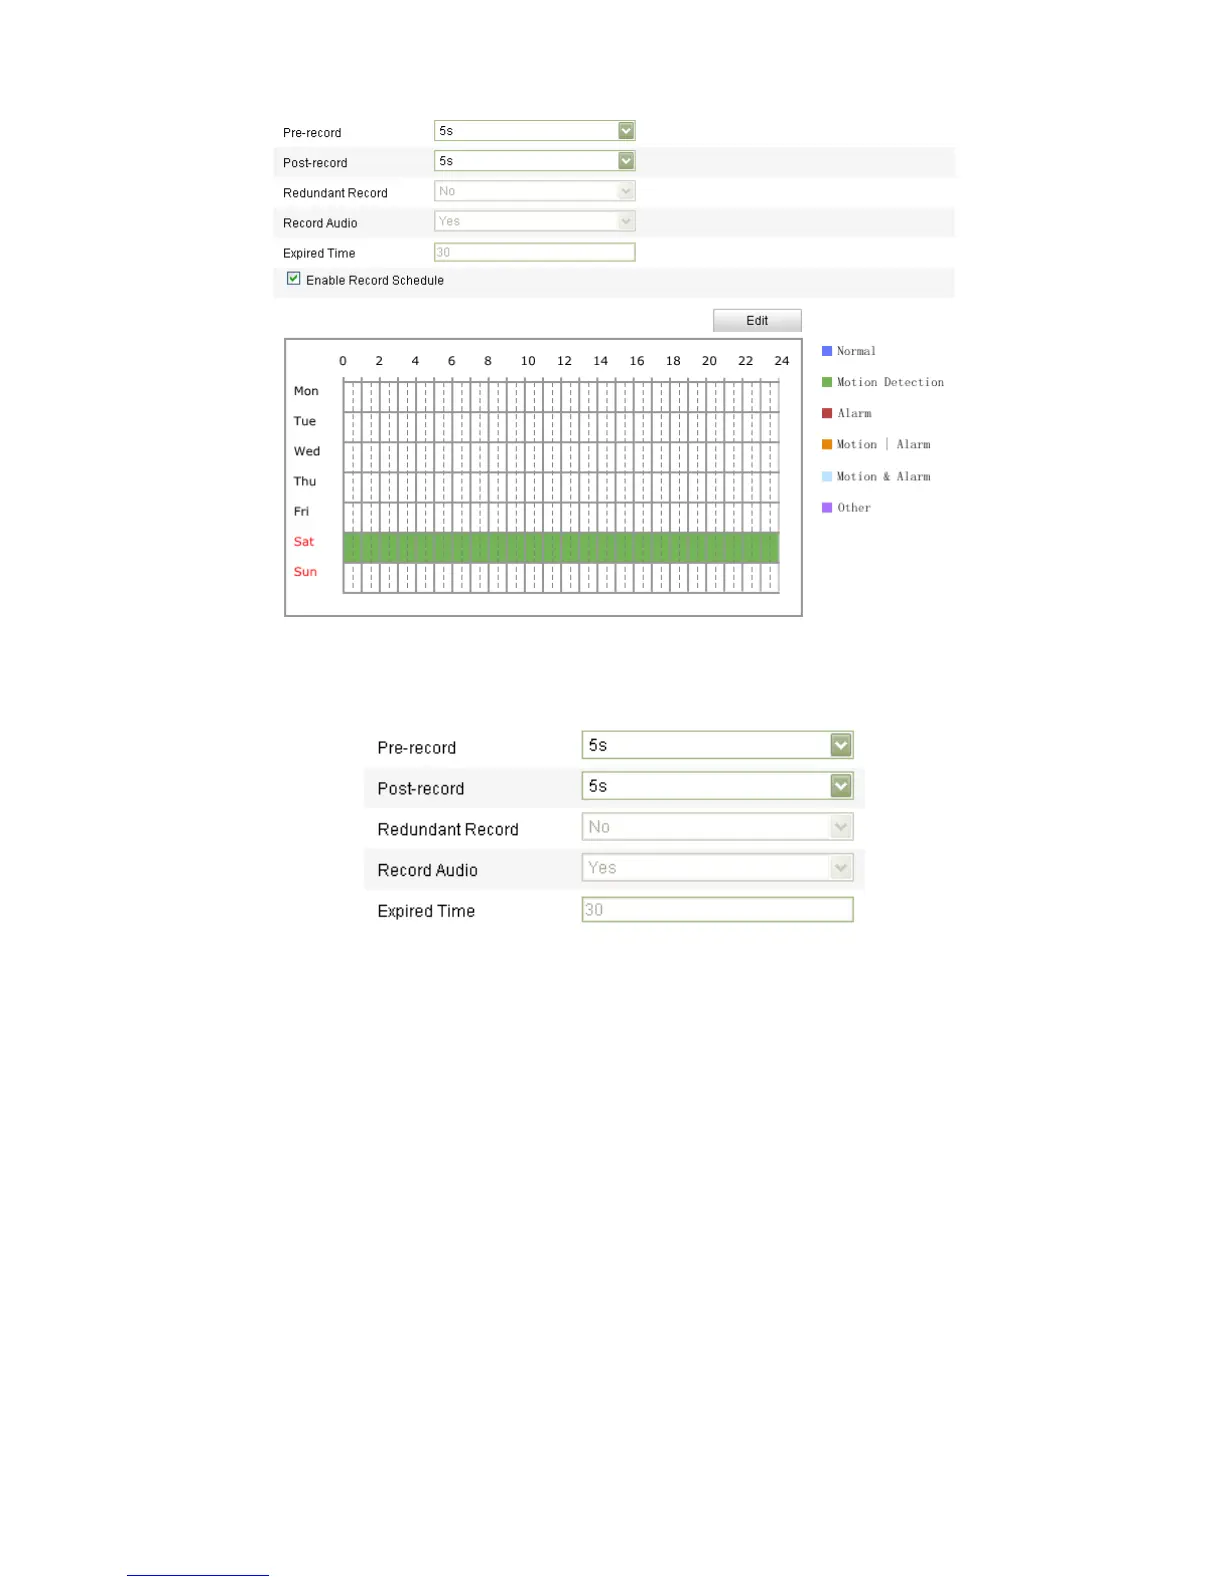
2. Select the Enable Record Schedule checkbox to enable scheduled recording.
3. Set the recording parameters of the camera.
Pre-record: This is the time you set to start recording before the scheduled time for
the event. For example, if an alarm triggers recording at 10:00, and the pre-record
time is set as 5 seconds, the camera starts to record at 9:59:55.
The Pre-record time can be configured as No Pre-record, 5 seconds, 10 seconds,
15 seconds, 20 seconds, 25 seconds, 30 seconds, or not limited.
Post-record: The time you set to stop recording after the scheduled time for the
event. For example, if an alarm triggered recording ends at 11:00, and the post-
record time is set as 5 seconds, the camera records until 11:00:05.
The Post-record time can be configured as 5 seconds, 10 seconds, 30 seconds,
1 minute, 2 minutes, 5 minutes, or 10 minutes.
Note: The record parameter configurations vary depending on the camera model.
4. Click Edit to edit the record schedule.