4
Operation
(continued)
Operation l 4-17
Control Function Descriptions - RW
Configuration
(continued)
Hopper Set-up Screen
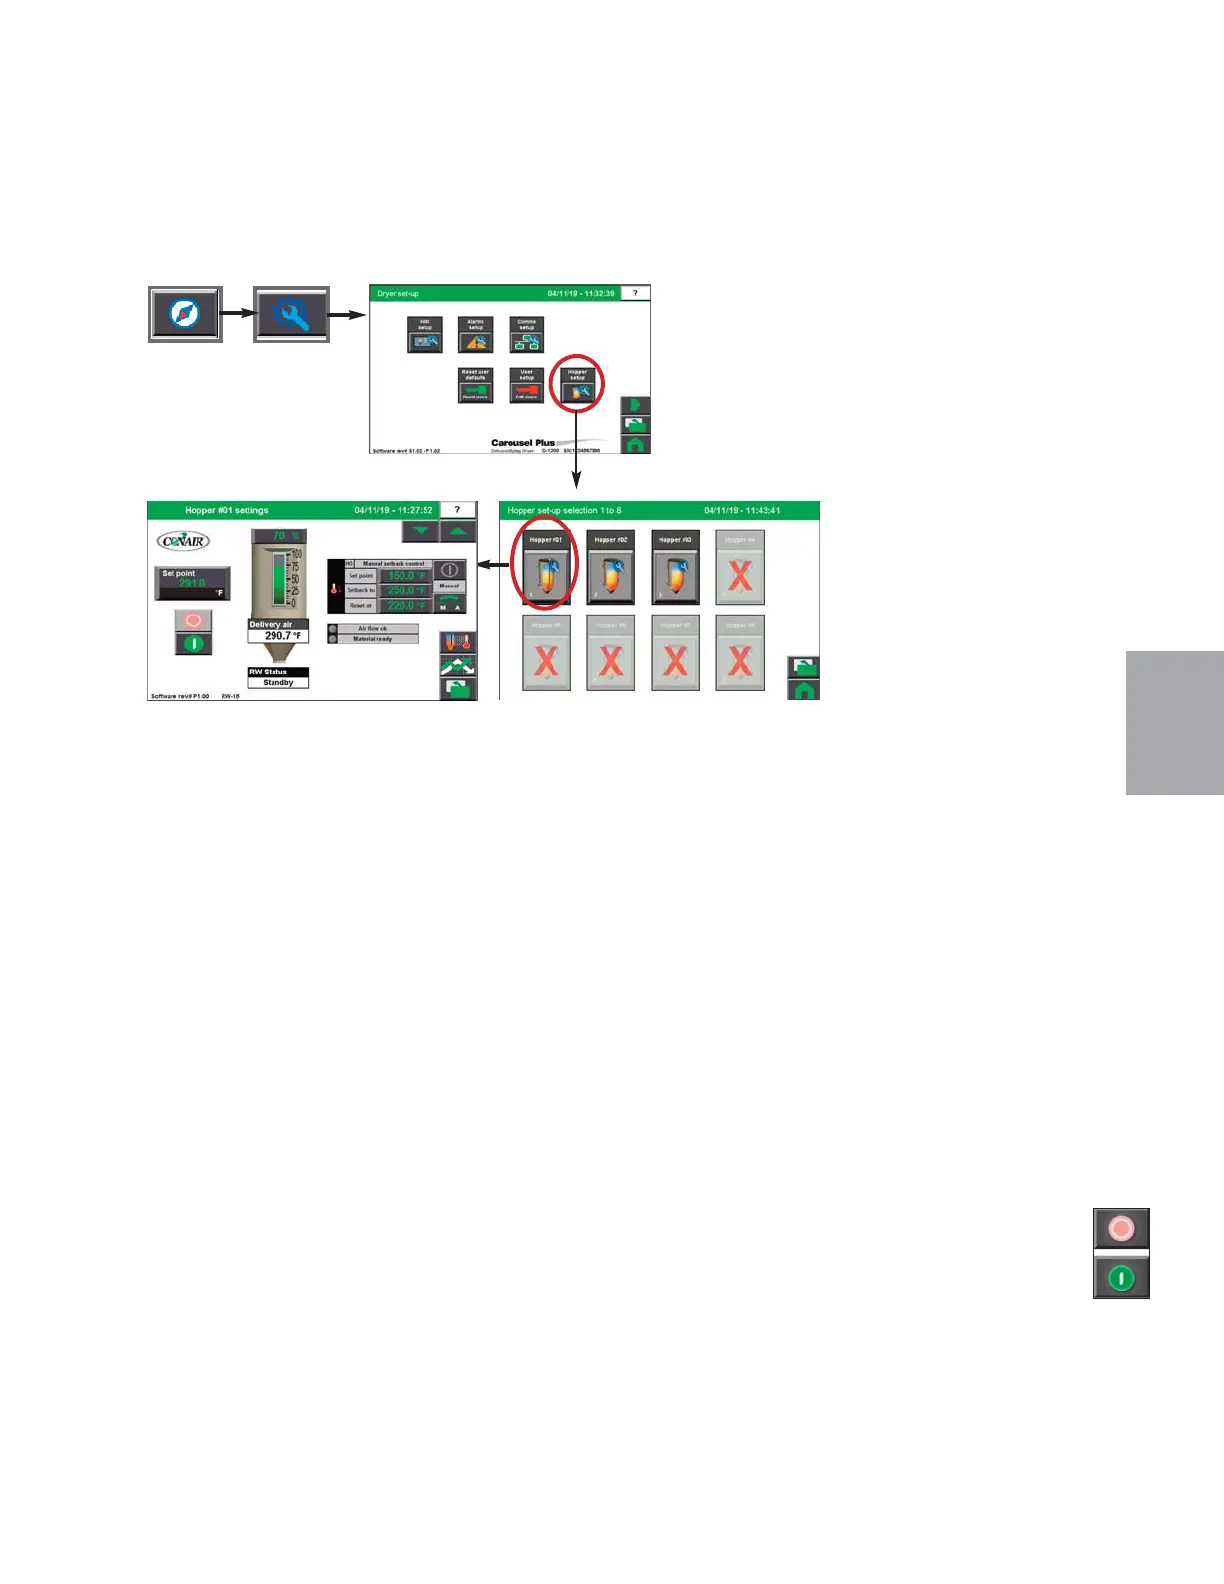
To access the Hopper Set-up screen:
1 From the Home screen Press the Navigation button.
2 Press the Wrench (setup) button on the Navigation screen to get to the Dryer Set-up
screen.
3 Press the Hopper Set-up button to go to the Hopper Set-up Selection screen.
The Hopper Set-up screen provides the user with the list of enabled hoppers. Selecting the
individual hopper takes you to a Hopper Settings screen where hopper parameters can be set
and the hopper heater can be stopped or started using the red (stop) and green (start) buttons.
NOTE: Depending on
which options your dryer
has been configured with,
whether or not you have
the Drying Monitor enabled,
and your user level, your
screens and icons may be
different from what is
shown here. For example,
if your ResinWorks system
is Drying Monitor equipped,
your hoppers will display as
Drying Monitor hoppers (as
shown in these graphics).
0
NOTE:
See the Appendix of this
User Guide for more information
about using the Drying Monitor.
0
NOTE: In addition to starting and
stopping the dryer, the Start and
Stop buttons indicate whether
the dryer can currently be
started or stopped. A faded or
not vibrant button indicates that
the dryer is not ready/able to
complete that function. For ex-
ample, a faded Stop button indi-
cates the dryer is not ready to
stop.
0


 To Next Page