66
7.2 LISTING PLAN
X: Mounting above:
-the maximum water level in the storage
-the backlog level of the congested Canal network
Figure 7.2.1 List plan
7.3 SETTING UP CONDITIONS
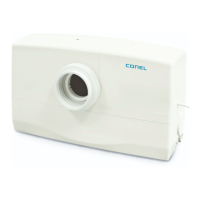
• Install the Conel Flow Rain-Champion in a dry frost-free room away from heat sources;
• Protect from dirt/dust and vibrations;
• Do not expose direct sunlight;
• In this room there must be a floor drain with connection to the public sewer network or a lifting
system (flood protection);
• In this room there must be an outflow (at least DN70) to connect the n emergency overflow located
in the Conel Flow Rain-Champion;
• Make sure that the DN 70 pipe adheres to a vertical drop distance of at least 50 cm before a bow is
placed – here through, in the event of an emergency overflow, the water can run smoothly if it is not
possible;
• As an odour closure, we recommend optionally inserting an additional siphon ;
• Install the Conel Flow Rain-Champion horizontally on a flat wall with sufficient distance to the ceiling
(minimum distance 30cm,if possible more – required for maintenance and service work);
• Be careful because the mounting height of the Conel Flow Rain-Champion (lower edge of the Conel
Flow Rain-Champion) is above the maximum water level of the storage (flood risk);
• Make sure that the installation height of the Conel Flow Rain-Champion is located above the
backlog level of the public sewer network (risk of flooding from the sewer network);
• To reduce pressure shocks in the piping system and to reduce unnecessary starts /stops of the Conel
Flow Rain-Champion, we generally recommend the use of as membrane expansion vessel in the
pressure line system – relieves the piping system and increases the service life of all components and
components used.
x