91, proceed to section 3.4). It is essential to ensure
the pumping system is primed and the oil pressure is
properly adjusted in order to assure smooth operation.
Before starting your compressor, check and fill the
crankcase with the proper quantity of lubricating oil.
(Refer to section 2.6)
When the compressor is first started, observe the
crankcase oil pressure gauge. If the gauge fails to
indicate pressure within 30 seconds, stop the machine
and loosen the oil filter. Restart the compressor and run
until oil comes out and tighten the filter.
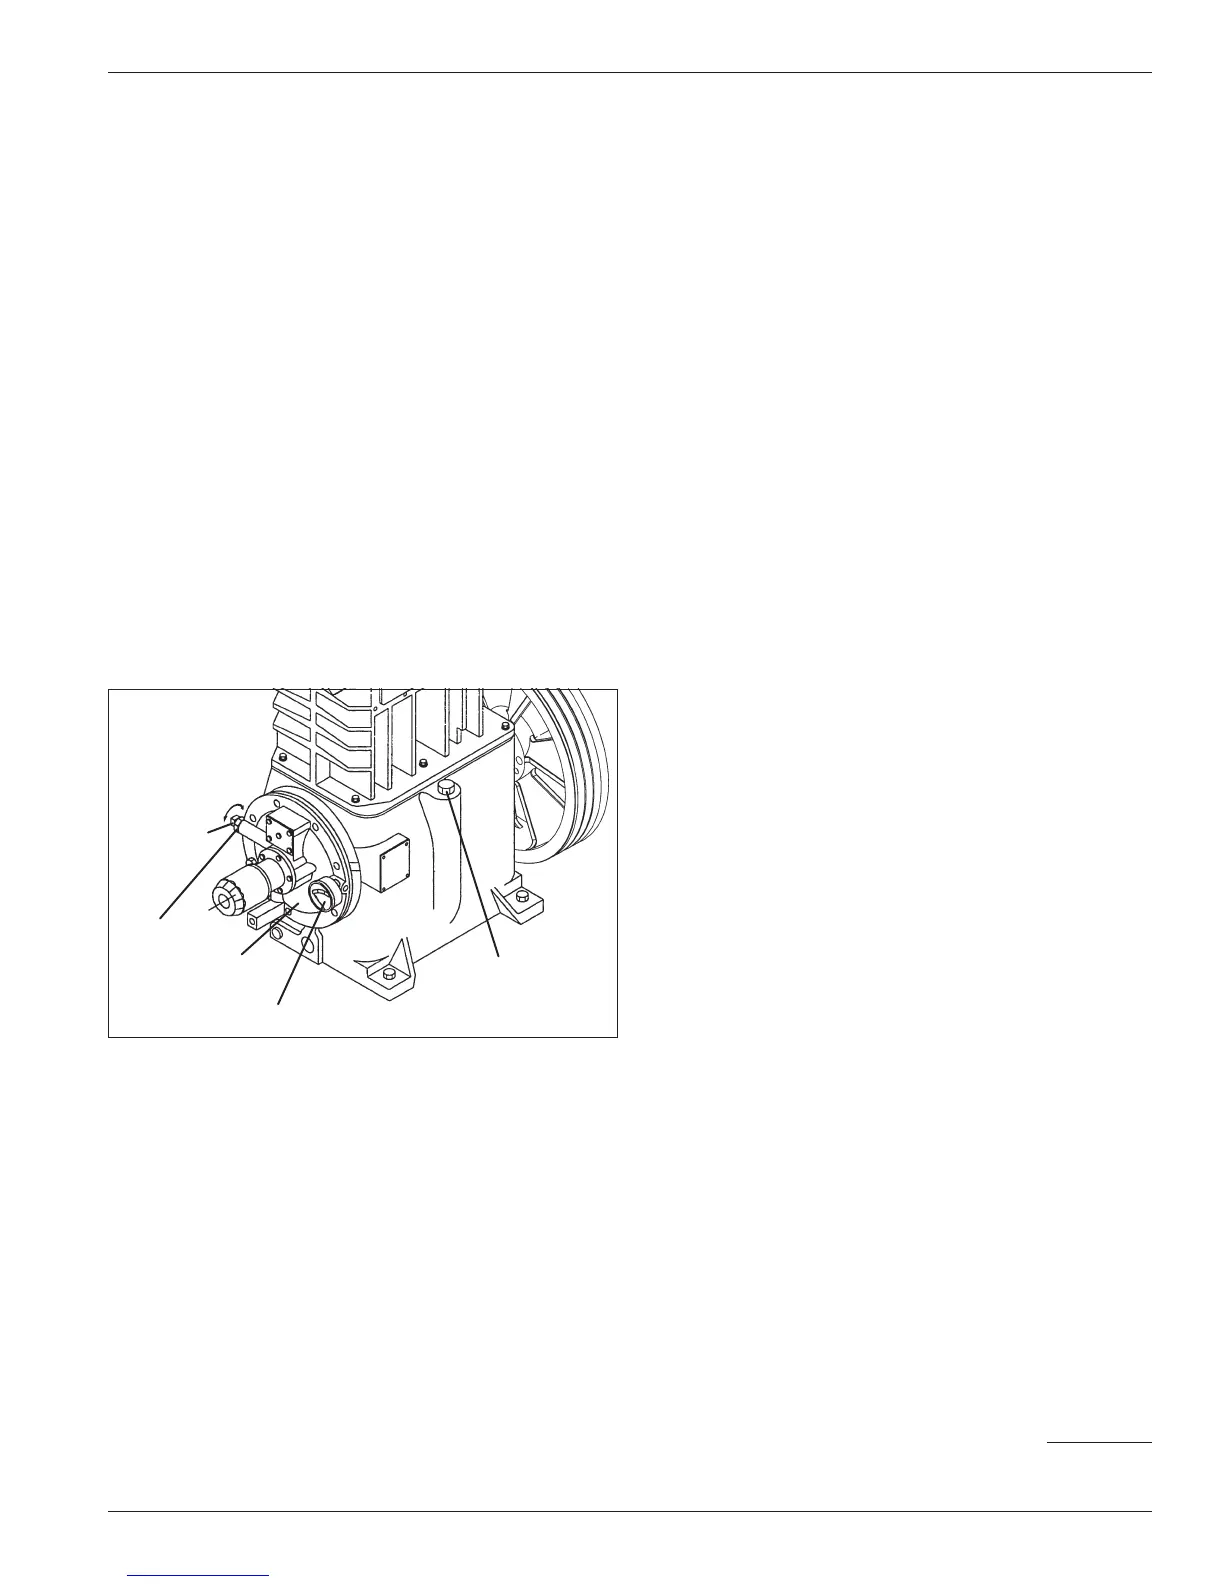
The oil pressure should be about 20 psi (1.4 bars)
minimum for normal service. If the discharge pressure
is above 200 psi (13.8 bars) the oil pressure must be
maintained at a minimum of 25 psi (1.7 bars). A spring-
loaded relief valve mounted on the bearing housing
opposite the flywheel regulates the oil pressure. As
shown in figure 3.3A, turn the adjusting screw clockwise
to increase the oil pressure and counterclockwise to
lower it. Be sure to loosen the adjusting screw locknut
before trying to turn the screw and tighten it after making
any adjustment.
Oil Pressure Gauge
Oil Level Bayonet
Lock Nut
Oil Pressure
Adjusting
Screw
+
-
Oil Pump Cover
Figure 3.3A: Oil pressure adjustment.
3.4 Startup Check List
Please verify all of the items on this list before
starting your compressor! Failure to do so may result
in a costly (or dangerous) mistake.
Before Starting the Compressor
1. Become familiar with the function of all piping
associated with the compressor. Know each line’s use!
2. Verify that actual operating conditions will match the
anticipated conditions.
3. Ensure that line pressures are within cylinder
pressure ratings.
4. Clean out all piping.
5. Check all mounting shims, cylinder and piping
supports to ensure that no undue twisting forces exist
on the compressor.
6. Verify that strainer elements are in place and clean.
7. Verify that cylinder bore and valve areas are clean.
8. Check V-belt tension and alignment. Check drive
alignment on direct drive units.
9. Rotate unit by hand. Check flywheel for wobble or play.
10. Check crankcase oil level.
11. Drain all liquid traps, separators, etc.
12. Verify proper electrical supply to motor and panel.
13. Check that all gauges are at zero level reading.
14. Test piping system for leaks.
15. Purge unit of air before pressurizing with gas.
16. Carefully check for any loose connections or bolts.
17. Remove all stray objects (rags, tools, etc.) from
vicinity of unit.
18. Verify that all valves are open or closed as required.
19. Double-check all of the above.
After Starting Compressor
1. Verify and note proper oil pressure. Shut down and
correct any problem immediately.
2. Observe noise and vibration levels. Correct
immediately if excessive.
3. Verify proper compressor speed.
4. Examine entire system for gas, oil or water levels.
5. Note rotation direction.
6. Check start-up voltage drop, running amperage and
voltage at motor junction box (not at the starter).
7. Test each shutdown device and record set points.
8. Test all relief valves.
9. Check and record all temperatures, pressures and
volumes after 30 minutes and 1 hour.
10. After 1 hour running time, tighten all head bolts, valve
holddown bolts, and baseplate bolts. See Appendix B
for torque values.
17