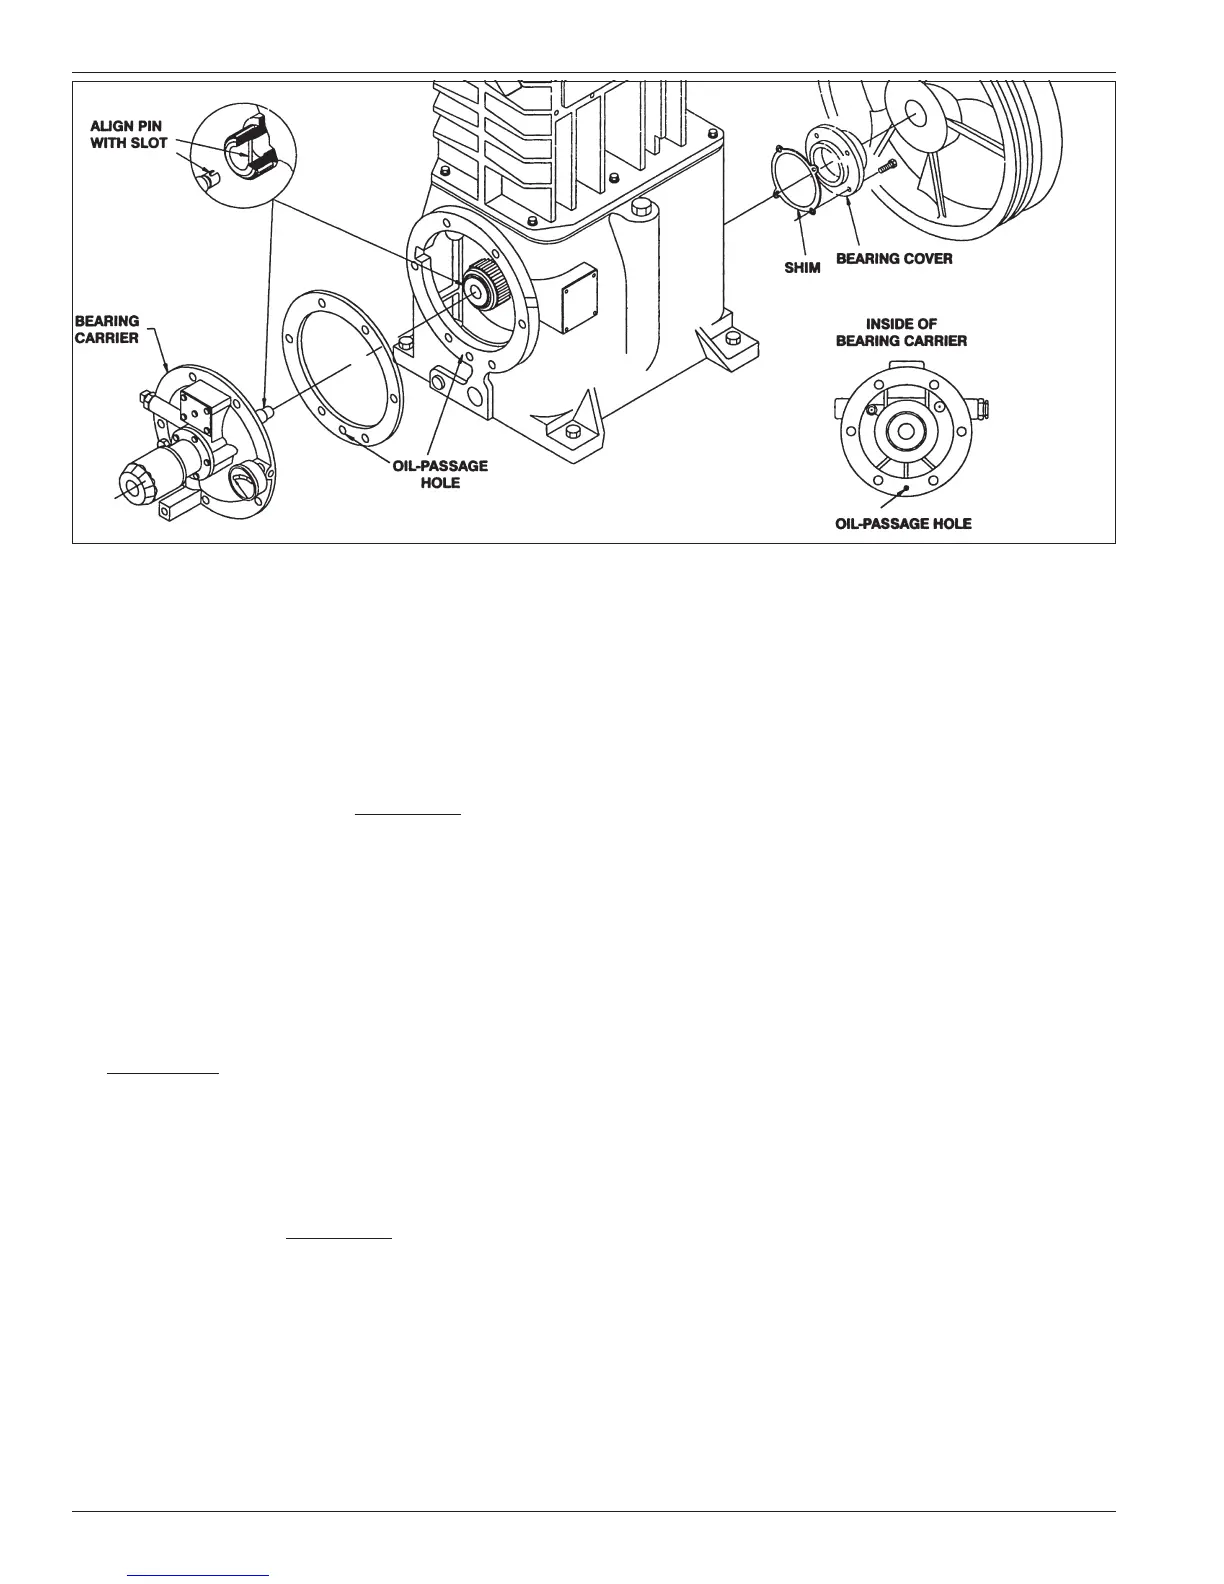
pump shaft slot is aligned with the pin in the crankshaft.
Make sure to install the bearing carrier gasket so the oil
passage hole is not blocked (see figure 5.7.3).
3. In order to check the crankshaft endplay, the oil pump
must first be removed (see section 5.8).
4. Press the end of crankshaft towards the crankcase; if
a clicking noise or motion is detected, the crankshaft
has too much endplay. See Appendix B.
5. To reduce endplay, remove the bearing cover and
remove a thin shim. Recheck the endplay after
replacing the bearing cover.
6. When there is no detectable endplay, the shaft must
still be able to rotate freely. If the crankshaft sticks
or becomes abnormally warm, then the crankshaft
bearings are too tight. If the crankshaft is too tight,
add more shims, but make sure not to over shim.
(Appendix B lists the proper crankshaft endplay).
When the crankshaft can be rotated freely by hand
with proper endplay, the rest of the compressor can be
reassembled. If the crankshaft roller bearings are too
tight or too loose, premature bearing failure will result.
7. Reinstall the flywheel on the crankshaft and check the
run out as shown in Appendix B.
5.8 Oil Pump Inspection
If the compressor operates for a prolonged period with
dirty or contaminated crankcase oil, damage to the oil
pump may result.
1. To check the oil pump, unbolt the pump cover and
remove the oil pump, spring guide, spring, and oil
pump shaft adapter as shown in figure 5.8.
2. Inspect the gears in the oil pump for corrosion or
pitting and replace if necessary.
3. Inspect the oil pump shaft bushing in the bearing
carrier. If the bushing is corroded, pitted or worn, the
oil pump shaft bushing should be replaced.
4. Before reassembling the oil pump mechanism, replace
the O-rings in the oil pump cover and on the oil pump
adapter shaft (see figure 5.8).
5. Rotate the drive pin in the crankshaft to a vertical
position for easiest reassembly.
6. Insert the shaft adapter so it engages the drive pin.
7. Next, insert the spring, spring guide, and oil pump
assembly. The tang on the oil pump must align with
the slot in the shaft adapter.
8. Install the pump cover so the pin on the case is in the
opening on the oil pump assembly as shown in figure
5.8. When you are sure the pin is properly aligned,
install the cover bolts finger tight.
9. Rotate the crankshaft by hand to ensure smooth
operation. Then rotate it in opposite directions,
listening for a click, which indicates proper alignment
of the oil pump’s pins and slots.
10. Finally, tighten the bolts in an alternating sequence. See
section 3.3 for directions on oil pressure adjustment.
Figure 5.7.3: Bearing carrier replacement.
26