140
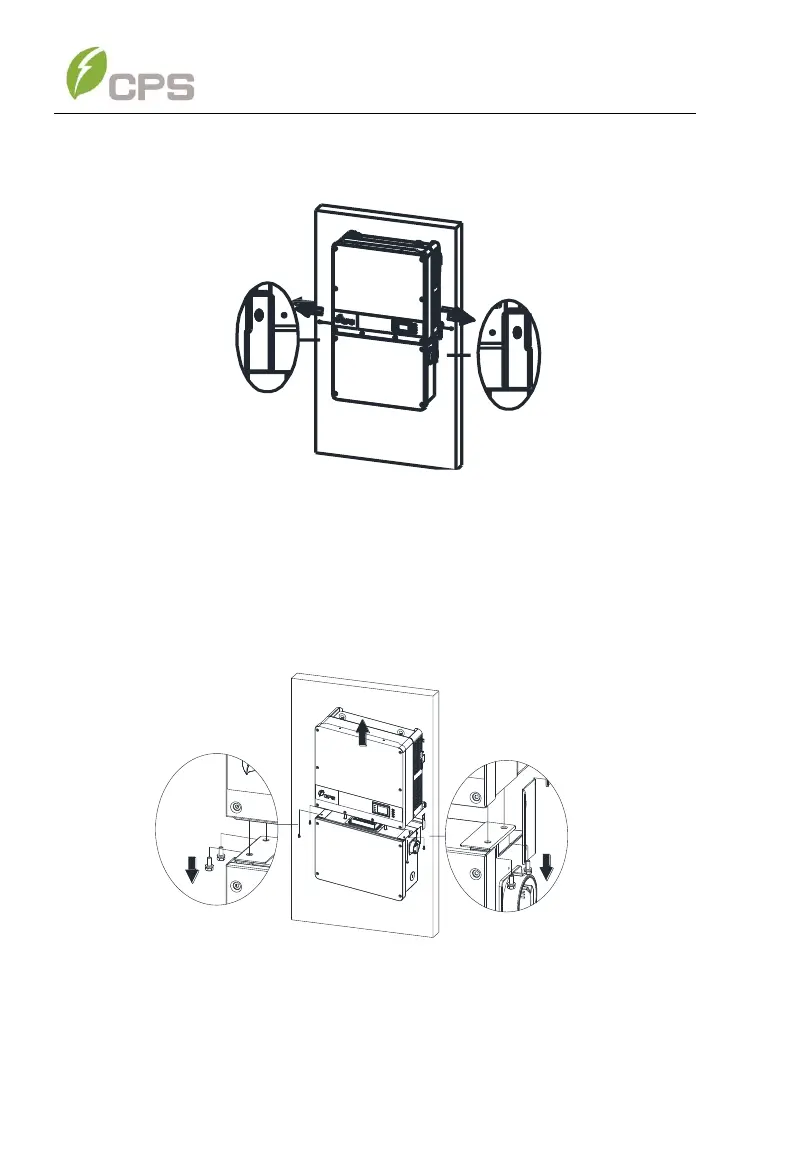
2. Use a No. 3 Phillips head screwdriver to unscrew the 2 screws on both
sides of the inverter.
Figure 8-3 Remove the screws on both sides
3. Use a No. 10 Hex wrench to remove the 4 screws between the
inverter and the wiring box. Lift the inverter enclosure and disconnect
from the wiring box.
Figure 8-4 Disconnect the main housing from the wiring box
4. If the replacement inverter is onhand and to be installed immediately,
skip this step and refer to section 3.2 for installation of the inverter.