ASSEMBLY
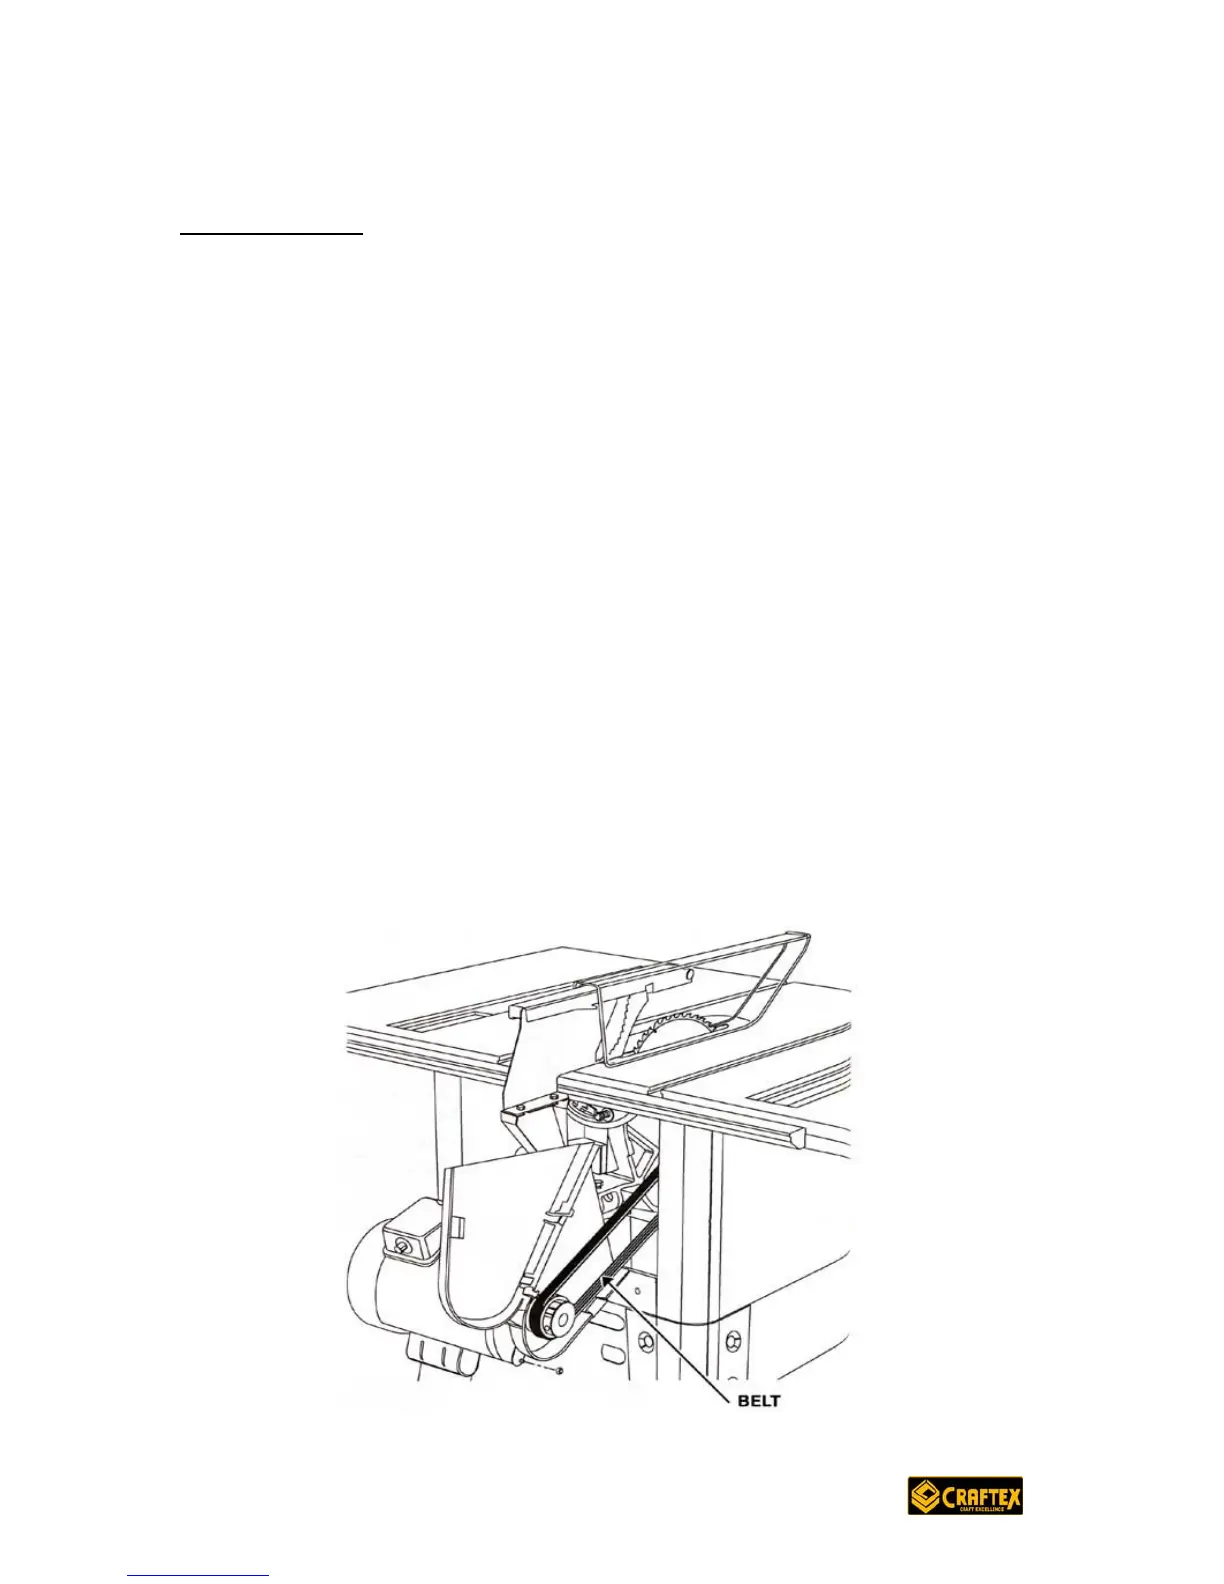
Installing the Belt
First, lower the blade by turning the blade height hand wheel in a
counterclockwise direction and set the bevel to ‘0’.
Now, place the belt on the saw pulley and the motor pulley. Check along both
pulleys to make sure the belt is parallel to the edges of both pulleys.
If it is not parallel, use a hex key to loosen the set screw on the motor pulley.
Now you can readjust the motor pulley to get the right fitting and firmly tighten the
set screw when finished.
Place your hand halfway around the belt between the two pulleys and squeeze
tight with you hand until the two sides touch. The motor should move freely at
this point as you squeeze the belt. If you notice the motor is stable and not
moving, you will need to reposition the motor.
In order to reposition the motor you will need to loosen the hex nuts on the
mounting brace and either push the motor inwards or pull it out as required. At
this point, also check the maximum elevation.
DO NOT attempt to tighten the pivot screws as this should be able to move freely
in the slot as the blade is lowered or raised.
Now, close the belt guard and check that the belt clearances on the guard by
raising the blades to its full height. Check the motor clearance by rotating the
bevel adjusting hand wheel until the indicator is set at 45 degrees.
See Figure 18