ASSEMBLY
Installing the Switch Assembly
The switch assembly can be mounted on either side of the fence (left or right)
depending on your preference.
Locate the following from the loose parts
1 Switch Key
2 Square Nuts (10-32)
2 Pan Head Screws with Lock Washers (10-32 x 3/8”)
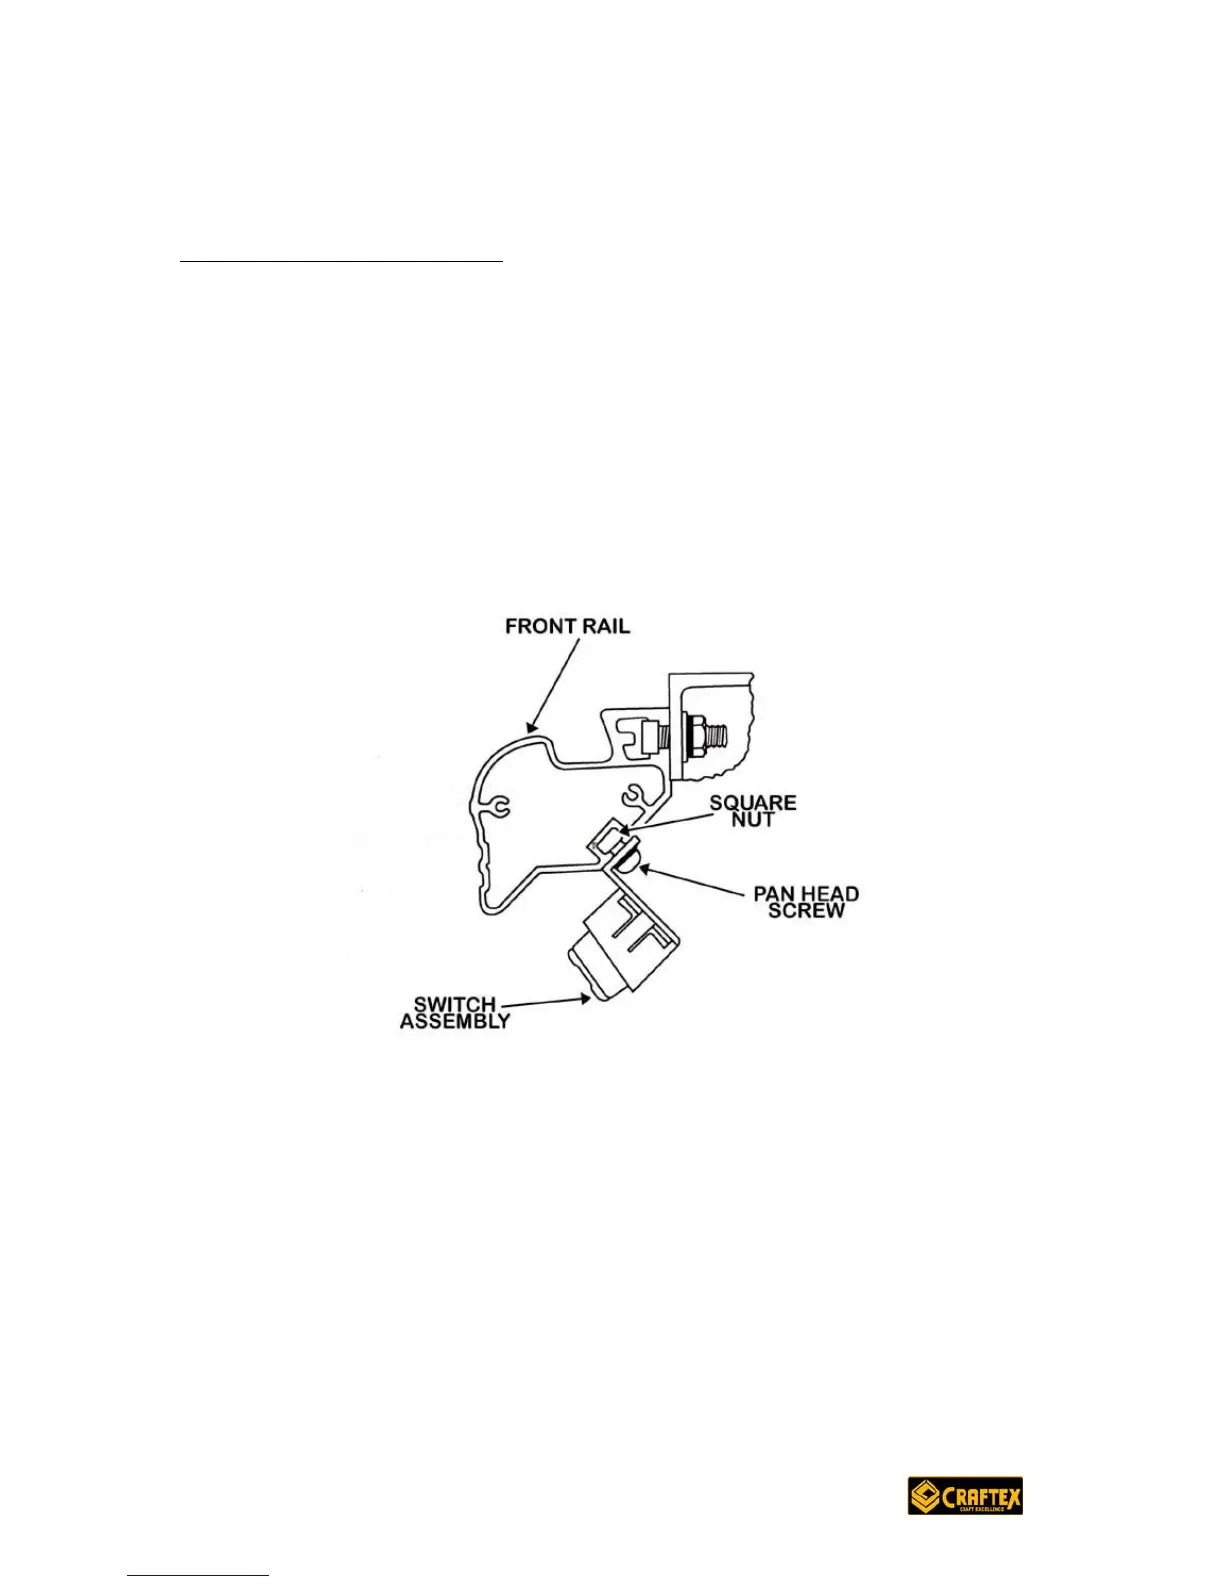
Insert the pan head screws with the lock washers through the holes in the switch
assembly.
See Figure 19
Now, thread the square nuts onto the screws while leaving at least 1/8” clearance
in between the inside of the nut and the top of the switch assembly.
With the switch facing forward, slide the square nuts into the lower slot of the rail
and tighten securely. If the switch is mounted on the left side then the right side
of the switch assembly should be in line with the left side of the table saw base.
Vice versa applies if the switch is mounted on the right side.