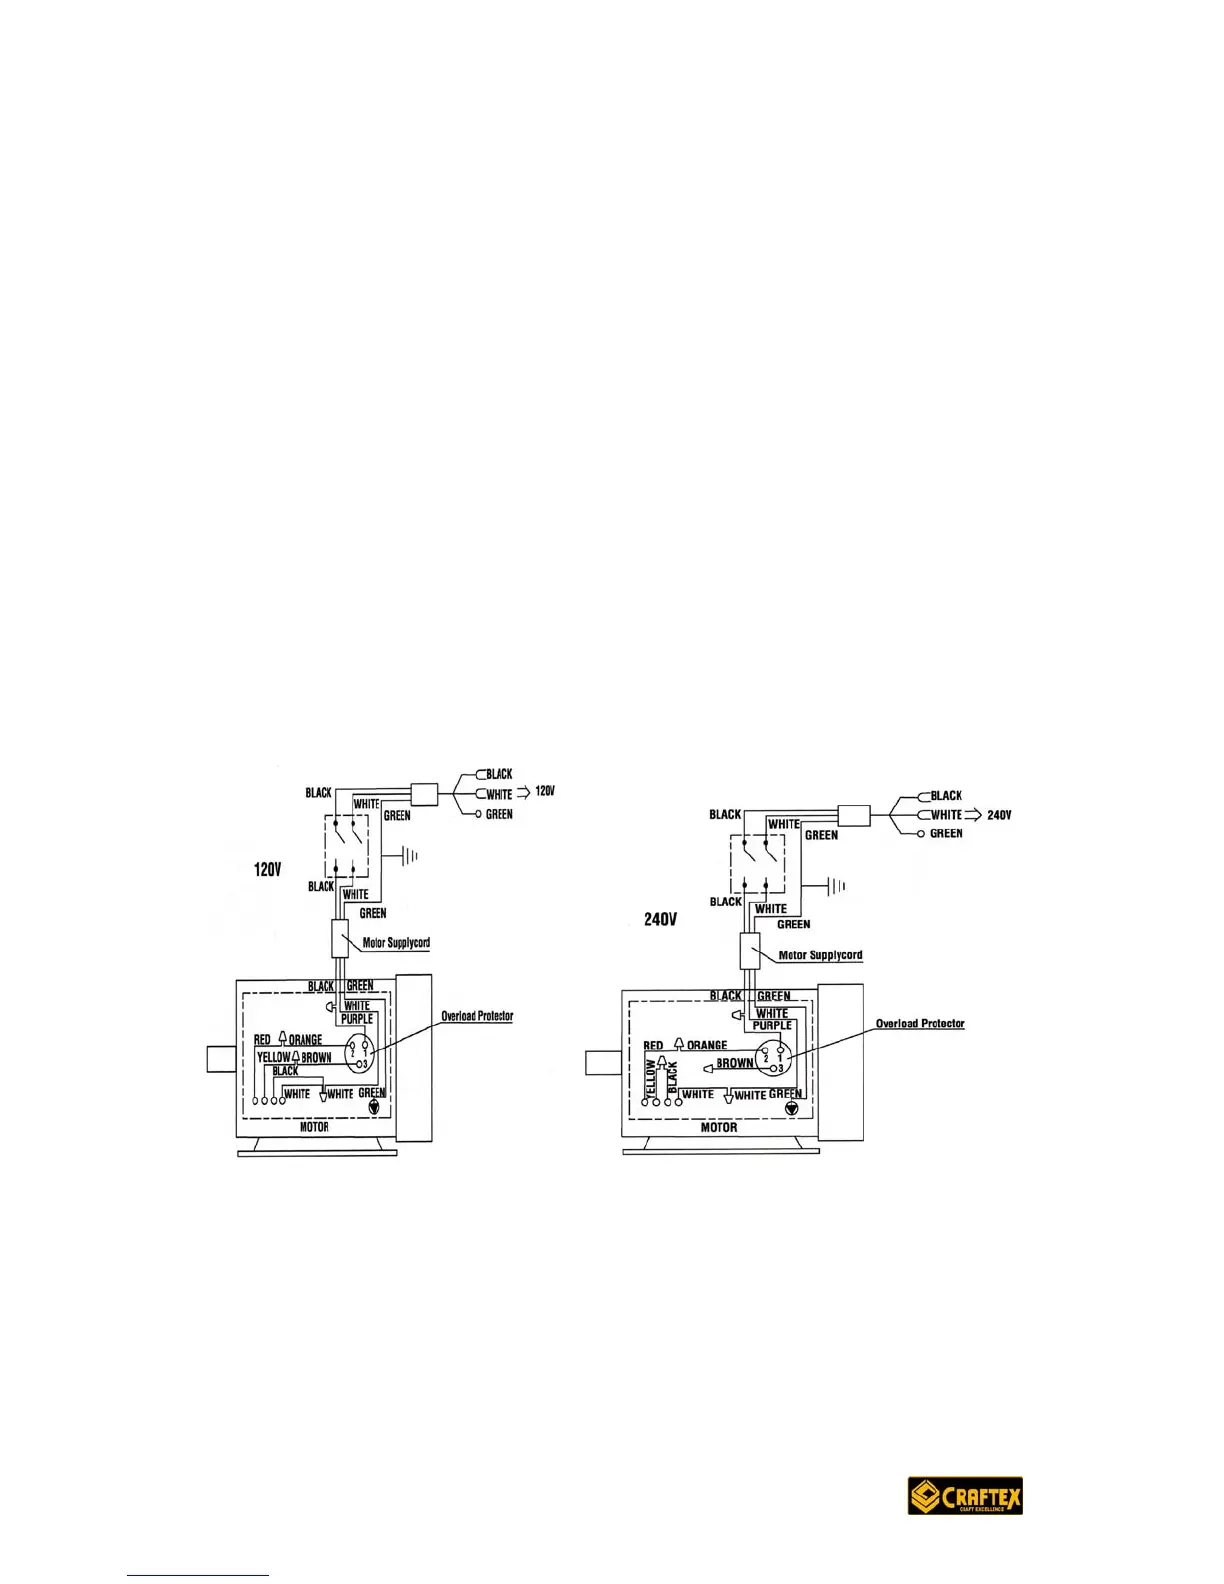
CHANGING FROM 110V TO 220V
This table saw is pre-wired for 110V, 60 Hz. The following diagrams will help
explain the procedure to change over from 110V to 220V. The use of a qualified
technician is needed for this procedure.
First, unplug the saw. Located on the top of the junction box, remove the Philips
screw at the back of the junction box and lift off the cover.
Remove the electric holding tape from the wire connectors and remove the wire
connectors at the same time. Reconnect the leads and re-install the wire
connector. Wrap each wire with new UL approved electrical tape, 2 layers is
sufficient.
Recheck your wiring diagrams and reinstall the junction box cover using the
Phillips screw. At this point cut off the 110V power cord plug and replace it with a
3-prong 220 V 15AMP UL approved plug. Connect the power cord white and
black leads respectively to the hot plug blade terminals. Connect the green
grounding wire to the plug ground prong terminal.
You can now plug your saw into a 220-240V, 15 amp, 3-prong receptacle.
You need to ensure that the power supply is a 240V branch circuit having at least
15 amp capacity and is protected by a 15 amp time-delay fuse or circuit breaker.