Feature Description
Channel Alarm 1 and
Alarm 2 LEDs (L
and M)
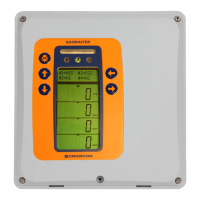
Red LEDs for each channel. Illuminated when the alarm level is
reached on the channel. When the alarm is first raised, the LED
flashes. After the ACCEPT/RESET button is pressed, the LED
goes out if the alarm condition has been cleared. If the alarm
condition still exists, it displays continuously.
Channel Fault LEDs
(N)
Yellow LED for each channel. Illuminated when a fault is detected
on the channel. When the fault is first raised, the LED flashes.
After the ACCEPT/RESET button is pressed, the LED goes out if
the fault has been cleared. If the fault still exists, it displays
continuously.
HOLD (-) Button On front of module. Press to hold the display on the current
mode (section 7.4).
STEP (+) Button
On front of module. Press to step the display to the next channel.
Operates only when HOLD has been selected. Also used to
increase the Reading display in Channel Test mode (section 7.4).
RUN Button On front of module. Press either to restart cycling through the
channels after HOLD has been selected, or to end Channel Test
mode.
ACCEPT/
RESET Button
On front of module. Press to inform Vortex that you have noted
that an alarm or fault condition has occurred. Pressing this button
silences the internal sounder. If the alarm condition has cleared, it
clears any red or yellow LEDs in the channel status display.
LAMP TEST Button On front of module. Press to test all the LEDs on the Display
Module and Node Controller Module. See section 7.5.
CHANNEL TEST
Button
On rear of module. After the HOLD button has been used to select
a channel, use the Channel Test button to display alarm levels
(section 7.4) or for zero adjustment and calibration (sections 3.8
and 7.3). This button can be disabled using VortexPC.
PEAK HOLD CAL
Button
On rear of module. Used for the Peak Hold Calibration (section
7.3). Can be disabled using VortexPC.
CAL Button On rear of module. Used for the Calibration (section 3.8 and
section 7.3). Can be disabled using VortexPC.
ZERO Button On rear of module. Used for the Zero Adjustment (sections 3.8 and
7.3). Can be disabled using VortexPC.
ZONE INHIBIT
Buttons
On rear of module, one button for each zone. Used to prevent the
corresponding output relays from being activated during testing or
calibration (sections 3.8, 7.3 and 7.4). VortexPC can be used to
inhibit individual channels.
Note: Even in the inhibit condition, the alarm LEDs on the display
module are triggered if alarms occur.