BLEEDING FUEL LINE (M)
1. Park the vehicle on level ground
and apply the parking brake rmly.
2. Stop the engine, raise the car-
go bed, and then remove the seat
cushion.
3. Make sure that the fuel is suffi-
cient in the fuel tank. If necessary,
ll the fuel tank with fuel.
The fuel line for the engine is de
-
signed to be bled automatically. If the
engine still cannot be started even
after 4~5 times of cranking, bleed as
followed:
Do not crank the engine for more
than 5 seconds continuously at a
time to protect the start motor and
battery.
4. If there is air in the fuel strainer, turn its fuel cock to the AIR side and wait
for a moment. When the fuel tank is fully lled, the fuel strainer can be lled
with fuel by natural pressure.
5. Turn the fuel cock to the ON position when the fuel strainer is no longer
lled with fuel.
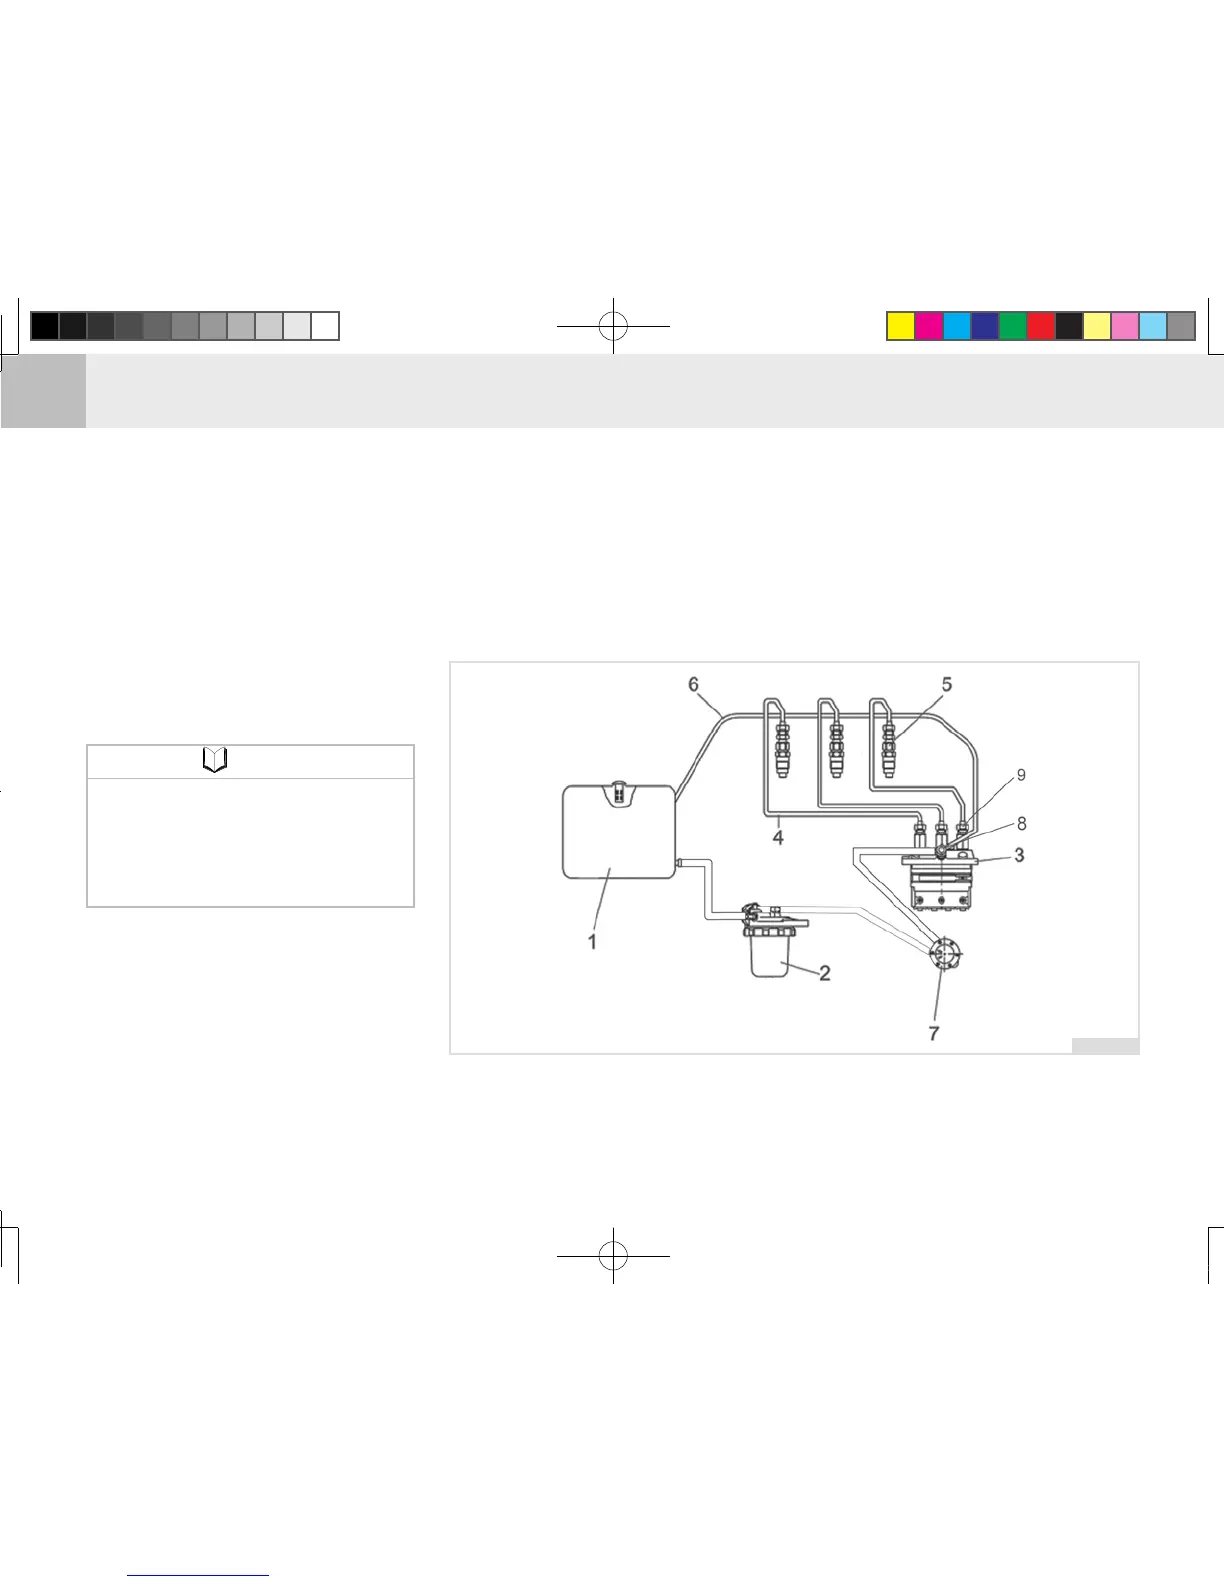
(1) Fuel Tank
(2) Fuel Filter
(3) Fuel Injection Pump
(4) Injection Pipe
(5) Injection Nozzle
(6) Fuel Overow Pipe (Hose)
(7) Fuel Feed Pump
(8) Bleeding Bolt
(9) Nozzle Holder Nut
It is recommended to start servic
-
ing after lling the fuel tank to its
top for easy bleeding, as it might
be needed to bleed the fuel line
after servicing the fuel system.
NOTE
UUVo725b