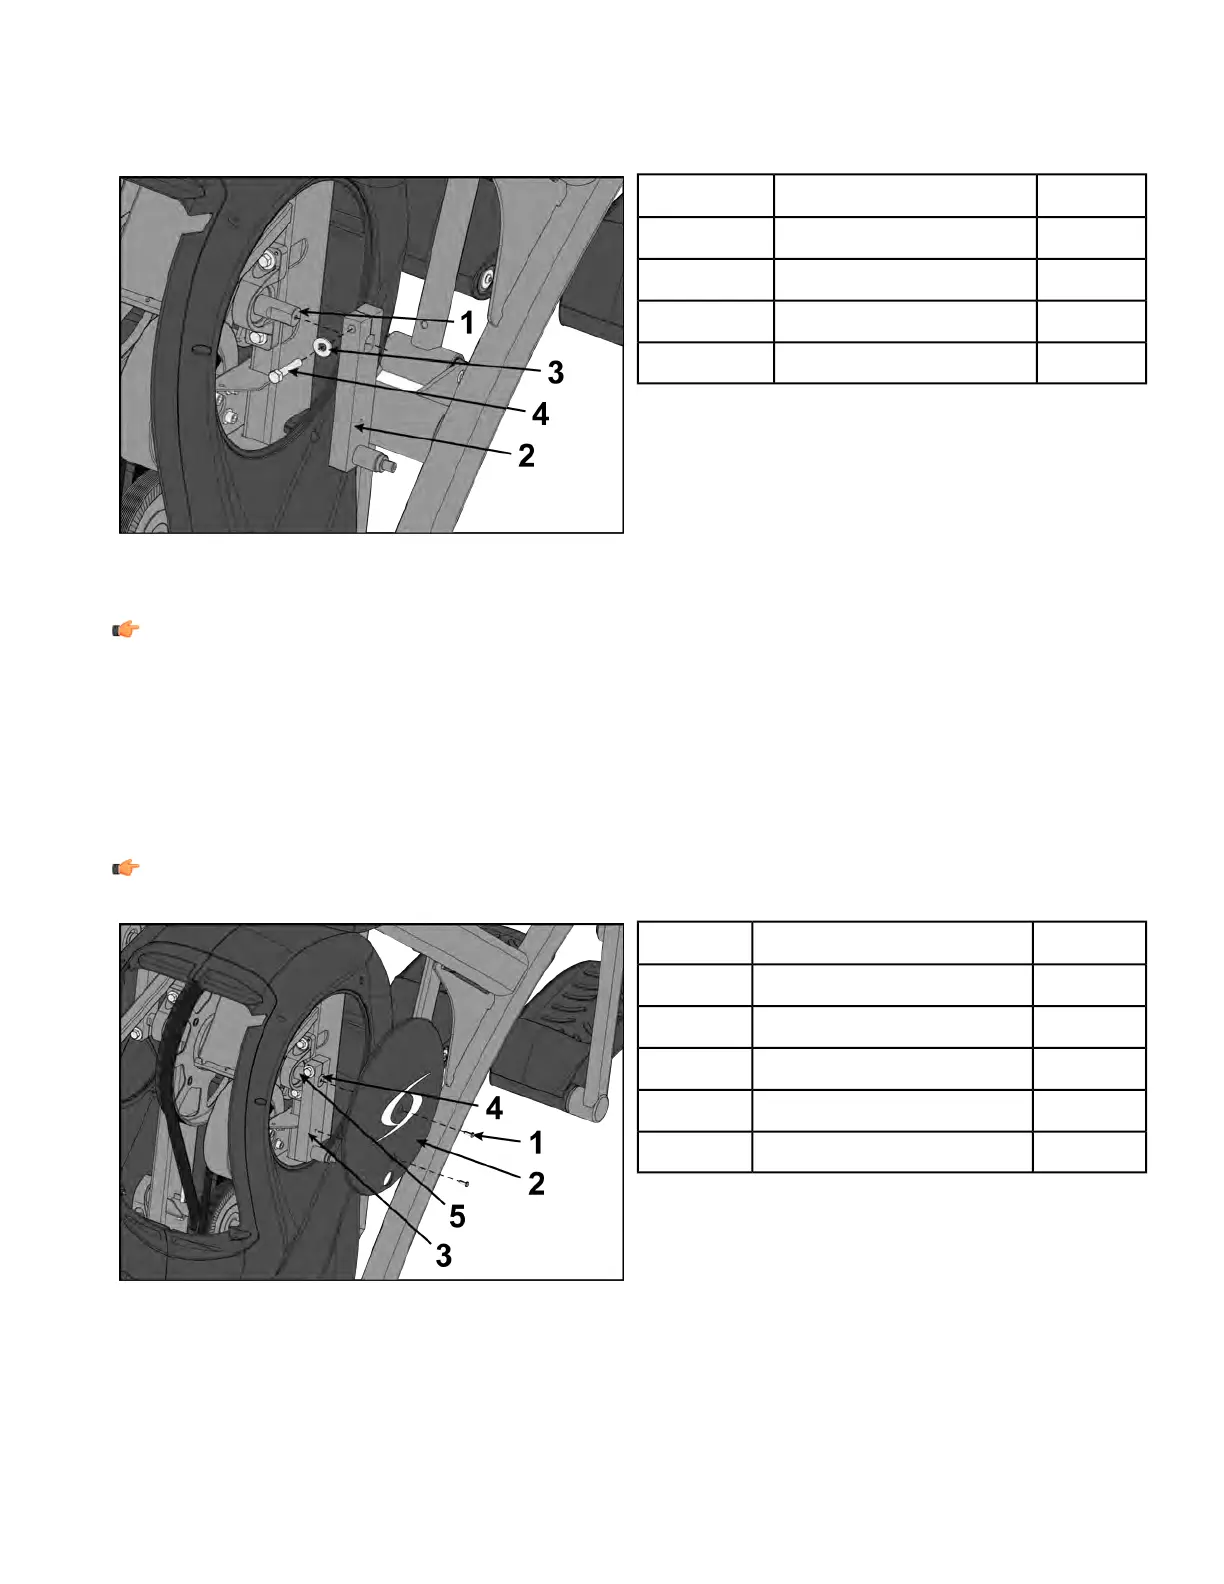
Install crank arms
1. Slide each crank arm in place.
Qty.DescriptionItem
1Crank arm shaft1
2Crank arm2
2Washer3
2HHCS4
The face of each crank arm should be flush with the end of each shaft.
2. Tighten HHCS on each crank arm using a torque wrench with 9/16” socket.
NOTE: HHCS must be tightened to a minimum of 30 lbs-ft.
If HHCS is not tightened properly, there may be to much movement of crank arms or foot plates
during operation.
Install crank covers
1. Inspect crank arm mounting. Crank arm should be flush with crank shaft. Adjust with 9/16” socket
wrench if needed.
NOTE: Crank shaft bolt must be tightened to 30 lbs-ft.
Qty.DescriptionItem
2Screw1
1Crank cover2
1Crank arm3
1Flush mount4
1Crank shaft5
2. Place each crank cover in position.
3. Place Loctite
®
#242 on screws securing crank covers.
4. Install screws securing each crank cover in place using a Phillips screwdriver.
Page 133 of 202
Cybex 772A, 772AT Arc Trainer Part Number
 Loading...