22D-Link DCS-5029L User Manual
Section 2 - Installation
Mounting Instructions
We suggest that you congure the camera before mounting.
Do not overtighten the screws as this may crack the mounting bracket.
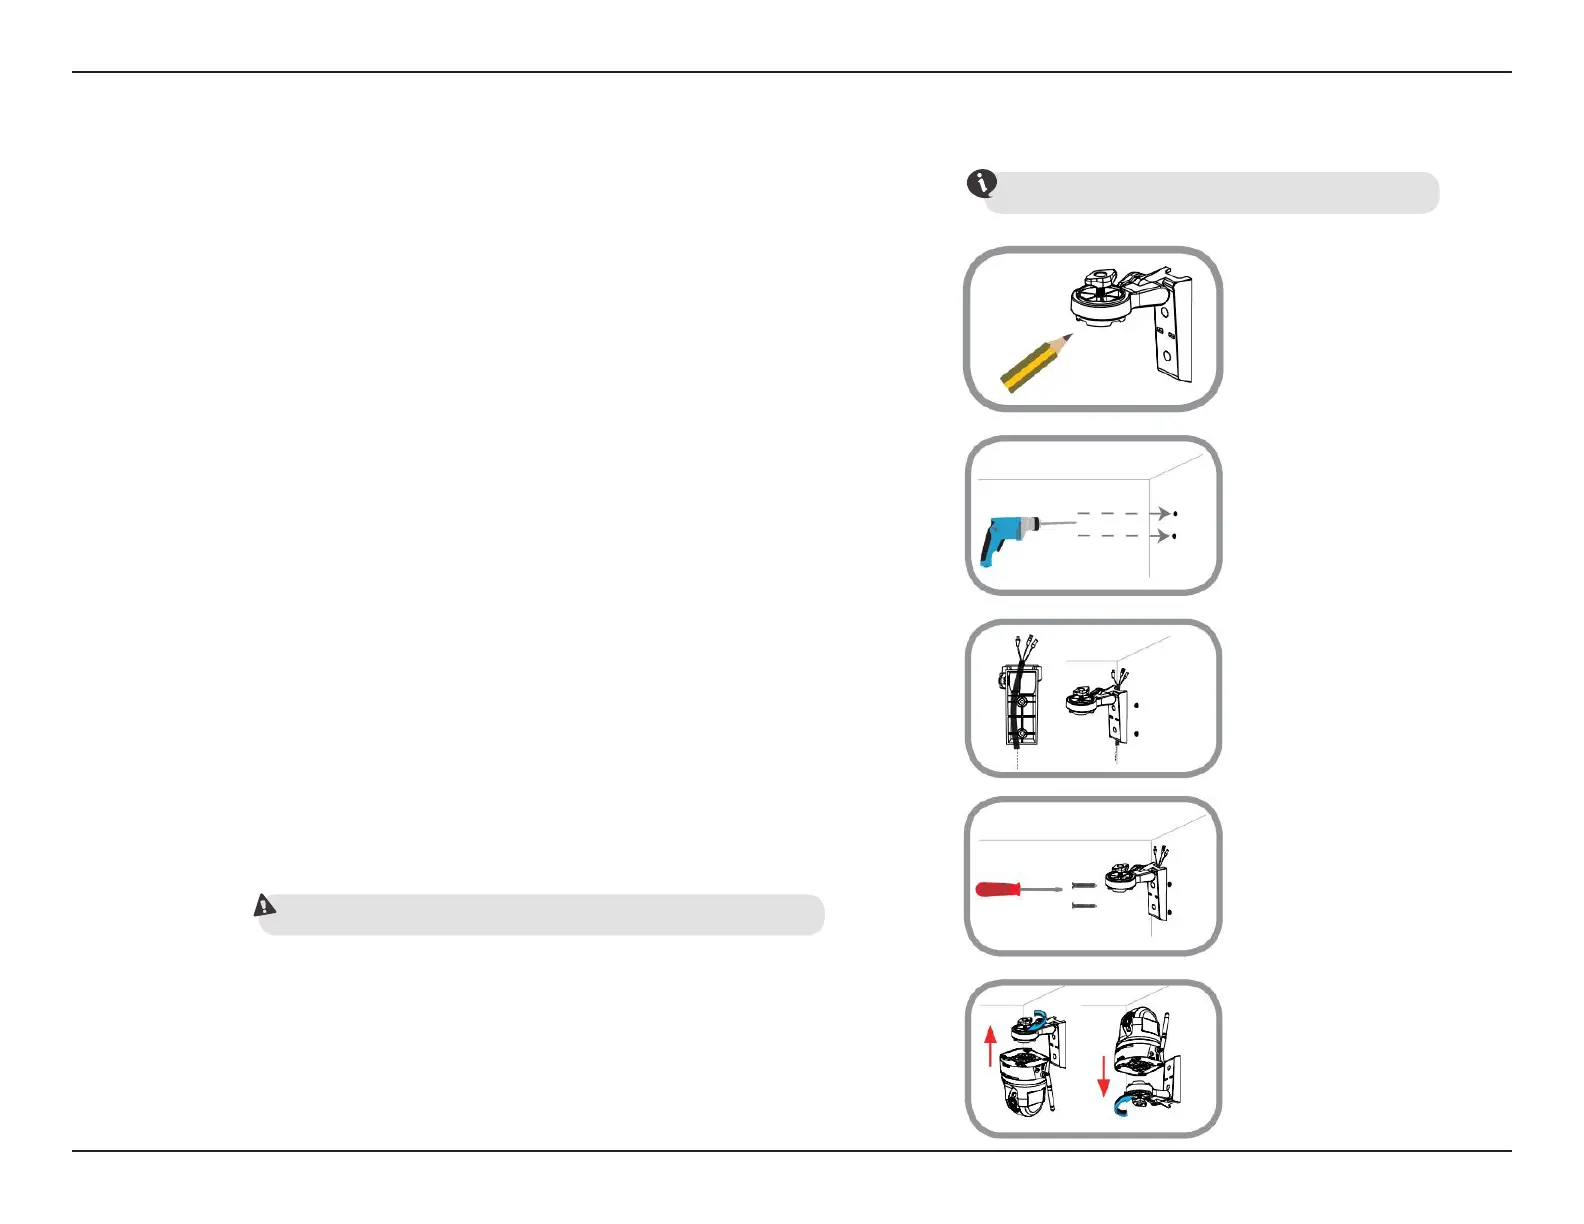
To mount your camera on a wall or ceiling, please follow the steps below.
1. Place the arm mount where you want to position the camera and use a pencil to mark
the holes. Make sure you allow adequate space for the necessary cables to be routed.
The camera can be mounted to either side of the camera shoe.
2. Depending on the material of the wall or ceiling, use a 6mm drill bit to drill two holes
where you marked. If the wall is made out of concrete, after drilling the holes, insert the
plastic anchors, and then insert the screws.
3. The power and Ethernet cables can be concealed behind the mounting bracket. When
you run the cables through the channel, secure them with the built-in guides. Leave
enough cable length protruding from the top to connect the cables to the camera.
4. Fasten the arm mount to the wall using the screws provided. Lightly pull on the arm
mount to make sure it is fastened securely.
5. Align the camera base mounting guides with the camera shoe and thumbscrew on the
arm mount. Tighten the thumbscrew to lock the camera in place.