22D-Link DNR-202L User Manual
Section 2: Assembly and Installation
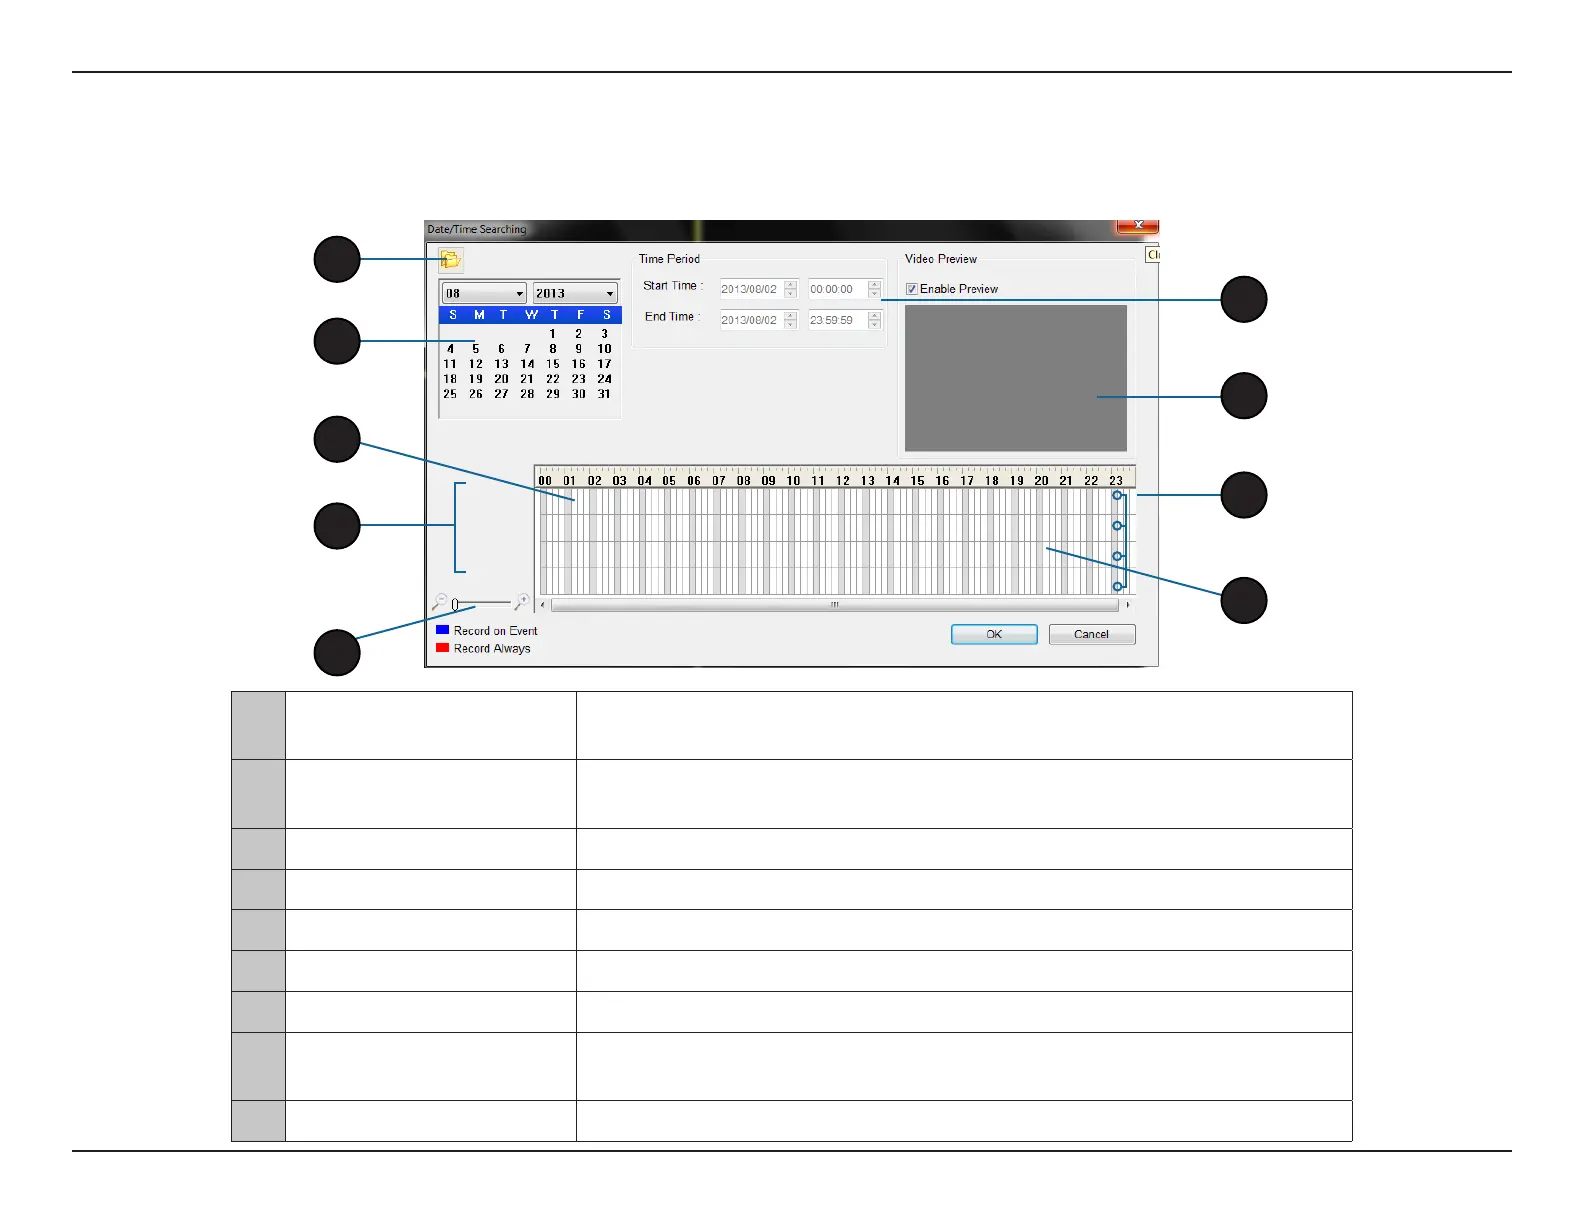
From HDD Viewer application, click the Open Recording Search button to access the Date/Time Searching window, to locate the video recordings
that you would like to review.
Search Recordings
5
9
6
2
1 Select Folder
Use this button to navigate to your video recordings folder. The default
folder name is avdata on your USB hard disk.
2 Date Selection Area
Select the year, month and day of the recording you wish to view. Dates
with recordings available for playback are highlighted blue or red.
3 Time Range Selection Select a Start Time and End Time for the recording you wish to view.
4 Video Preview When Enable Preview is checked, this area will display a preview.
5 Timeline This timeline will adjust according to the level of zoom selected.
6 Available Streams This area will display a list of the recording devices.
7 Zoom Slider Use the zoom slider control to zoom in and out of the timeline.
8 Available Recordings
Recordings are graphed below the timeline. Blue bars indicate an event was
recorded. Red bars indicate the camera is set to always record.
9 Selected Period Click within the timeline to select a recording period.
3
7
4
8
1
 Loading...
