62D-Link DNR-202L User Manual
Section 5: Conguration
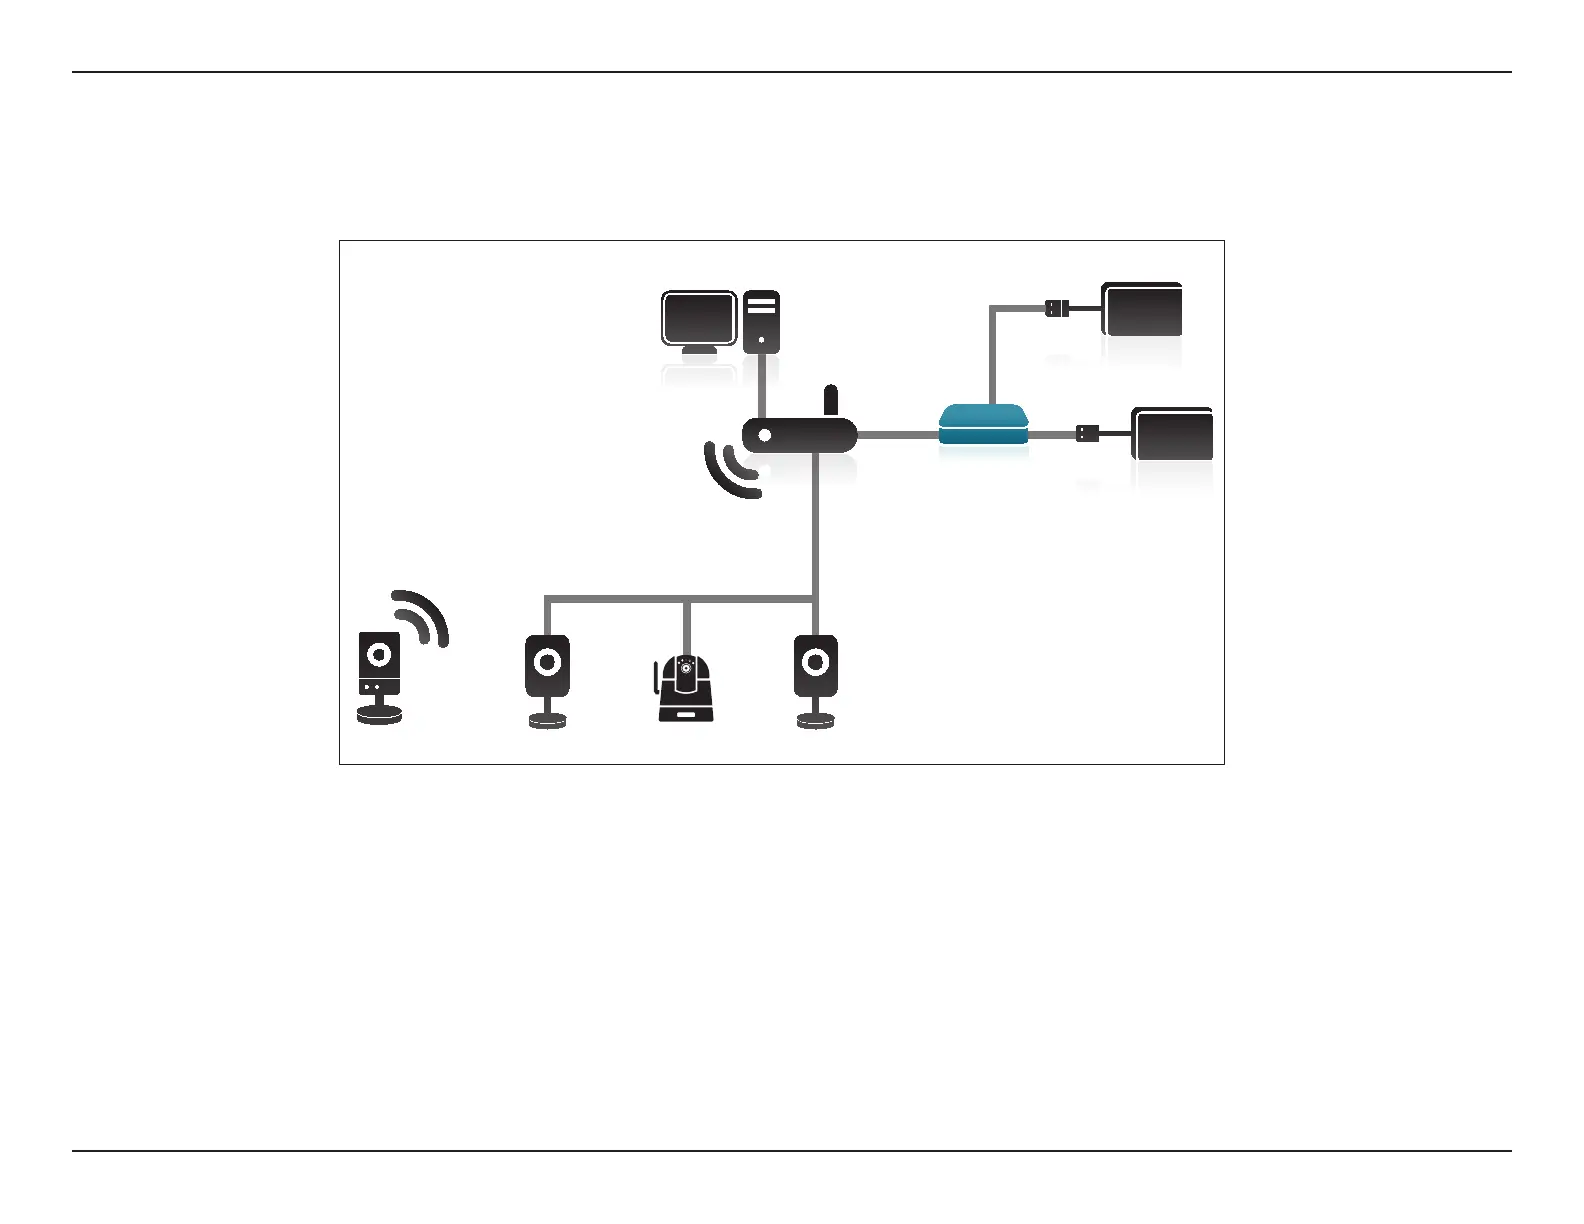
Congure the NVR without Internet
The DNR-202L, mydlink IP cameras, and monitoring PC are installed behind the router, switch or bridge on a local network, as
shown below.
Desktop PC
Router/Switch/Bridge
USB Hard Drive
USB Hard Drive
Room 2
Room 1
Room 3
Room 4
DNR-202L
Step 1
Connect the provided power adapter to the DNR-202L. Plug the power adapter into a wall outlet or power strip.
Step 2
Attach one end of the provided Ethernet cable to the Ethernet port on the NVR. Attach the other end to the router or switch in your network.
Step 3
Attach an external USB HDD to the USB HDD1 port. The NVR will mount the HDD and beep once.
Note: When you want to remove an HDD, press and hold the HDD release button for at least three seconds. The NVR will release the HDD and emit a long
beep. You can now unplug the USB cable.
 Loading...
