63D-Link DNR-202L User Manual
Section 5: Conguration
Step 4
Open a web browser and enter the IP Address of the DNR-202L to access the Web UI. If you have a DHCP-enabled router on your network, you
may need to check the DHCP table to see what IP address the DNR-202L was assigned. If no DHCP server is available on your network, enter the
default IP address 192.168.0.20.
Note: The computer used to access the DNR-202L Web UI must be on the same subnet as the DNR-202L.
Step 5
Enter admin for the User Name and leave the Password blank by default. Click OK. Once you are logged in, click the Setup tab if you want to
congure the basic settings using the Setup Wizard. Click Run Wizard to launch the Setup Wizard. Refer to "Setup" on page 46.
Step 6
Add the mydlink IP cameras to the NVR.
Unsecured cameras that are not set up with a password: Press the Auto Scan button on the front of the DNR-202L for three seconds to start
the scanning. Release the button when the scan is complete. (You will hear a long beep.) The IP cameras on the same network will be added to
the DNR-202L, and will start recording automatically.
Note: It is strongly advised that you set up passwords for all of your cameras.
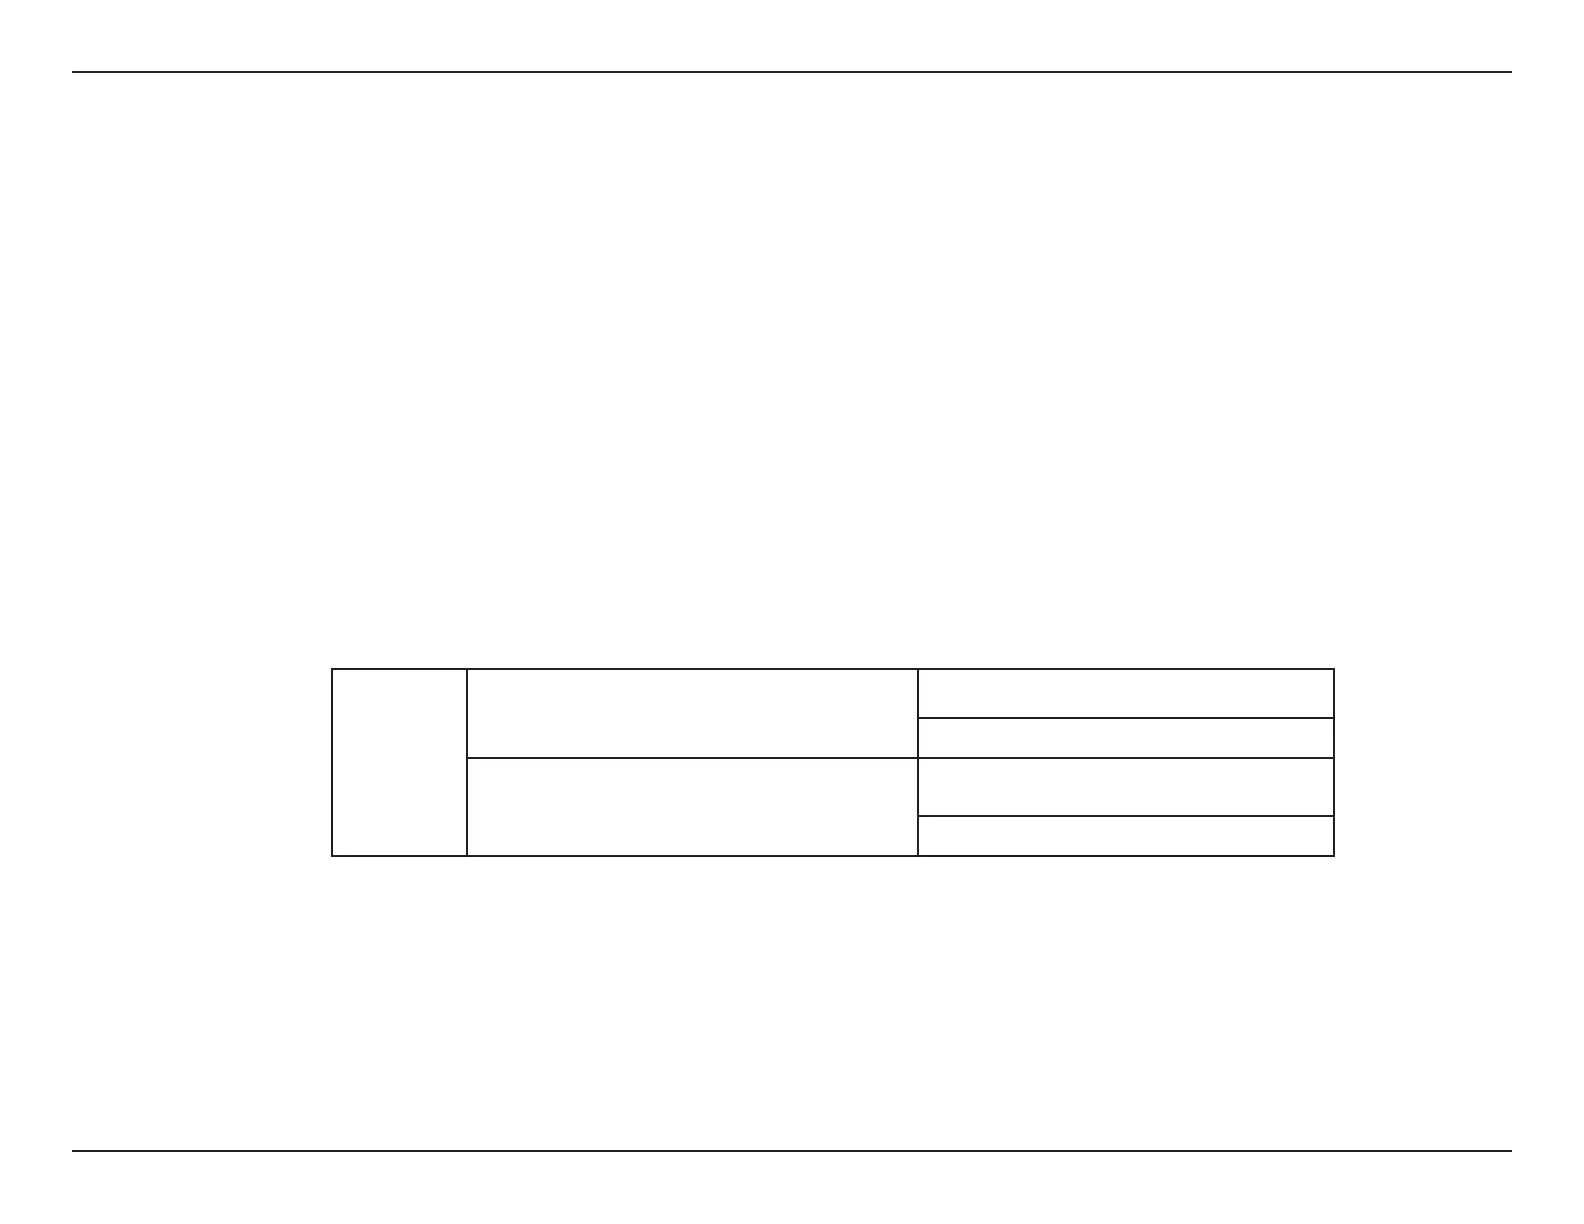
Auto Scan
Button
Auto Scan function- Press scan button for 3 seconds Start Auto Scan IP Cameras in local network.
Buzzer will beep (long).
Camera Echo function- Press scan button for 0.5 second Echo IP Camera found (1 beep for 1st camera found,
2
beeps for 2nd, 3 beeps for 3rd, 4 beeps for 4th).
Buzzer will beep (short).
Secured cameras with password: Go to the web UI of the DNR-202L. Click the Setup tab > Add Camera to manually add the cameras to the
DNR-202L. Refer to "Add Camera" on page 50.
 Loading...
