ENGLISH
57
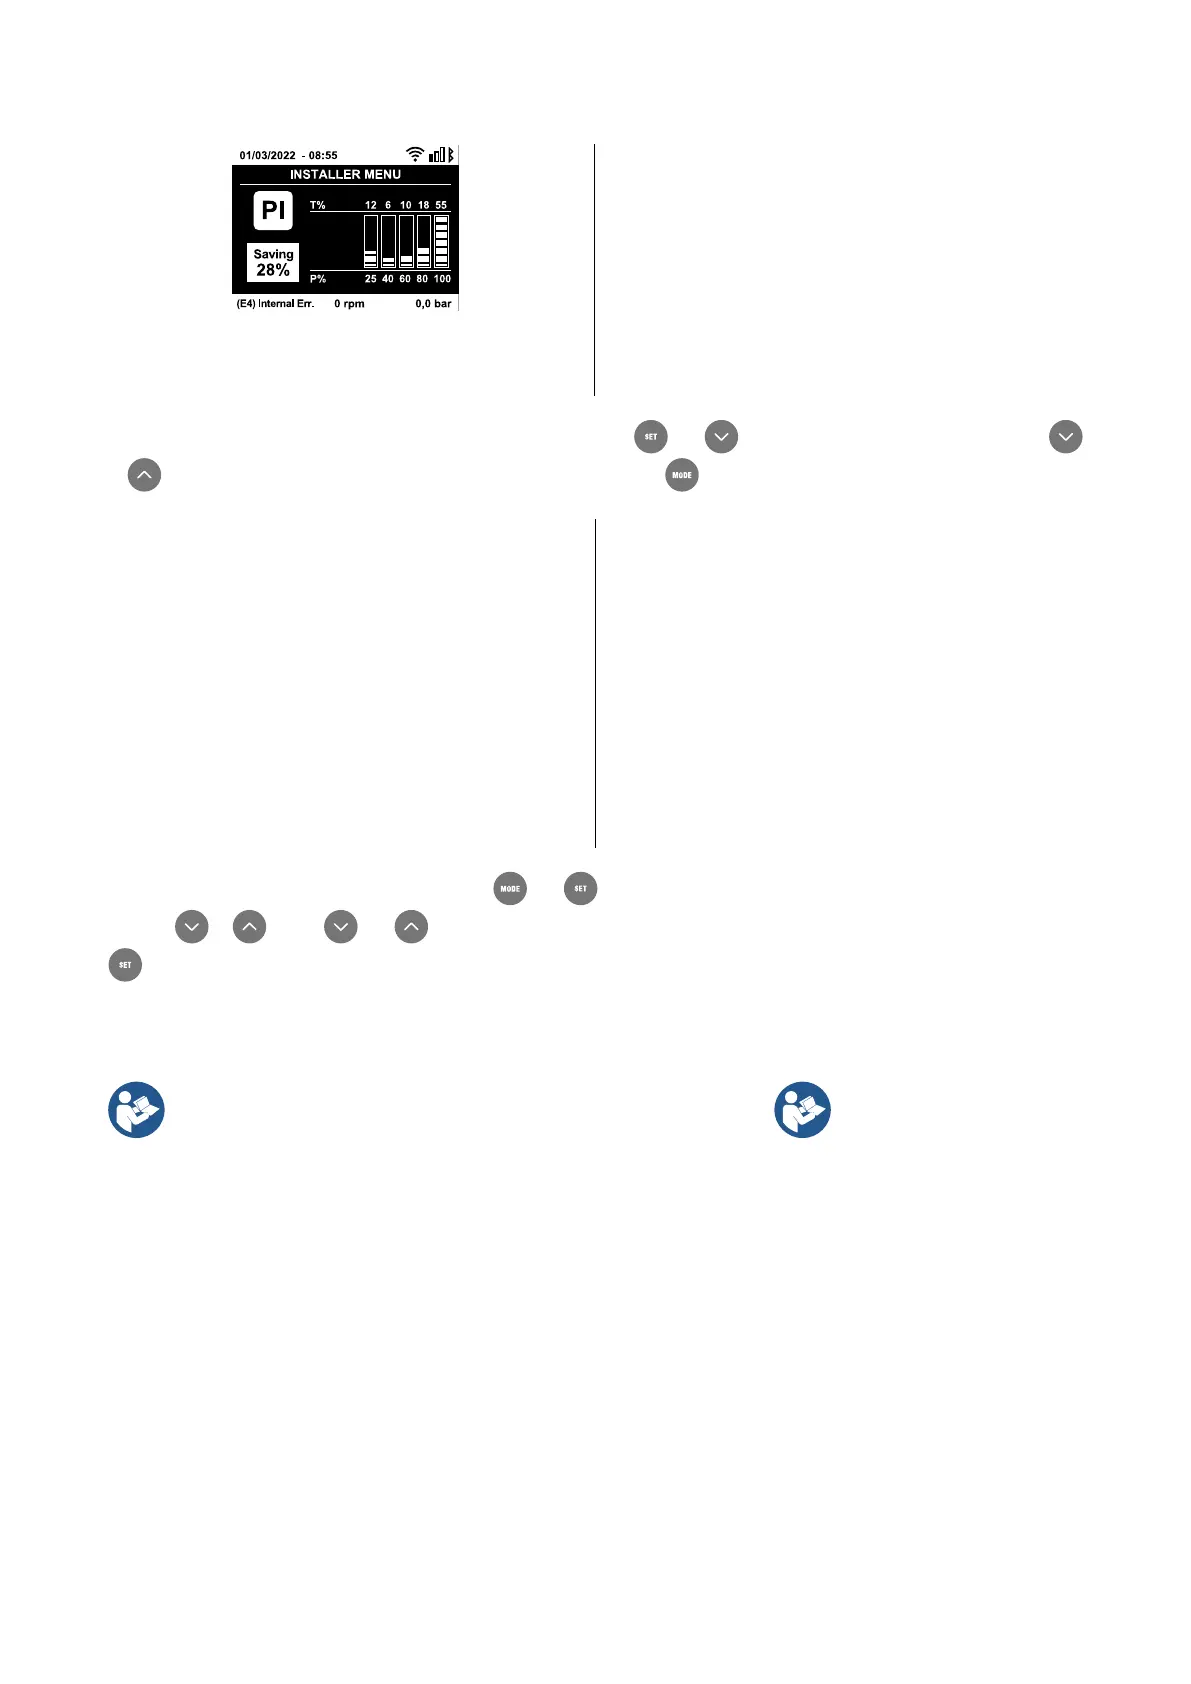
Fig. 22: Power histogram display
displayed in chronological order starting from the one that
appeared
farthest back in time x=1 to the most recent x=y. The maximum
number of faults that can be shown is 64;
when that number is
reached, the log starts to overwrite the oldest ones. This item on
the menu displays the list of faults, but does not allow reset. Reset
can be carried out only with the dedicated control from item RF on
the TECHNICAL ASSISTANCE MENU. T
he fault log cannot be
deleted with a manual reset, by switching off the appliance, or by
resetting the factory values, unless the procedure described above
has been followed.
13.2.2. Monitor Menu
From the main menu, by holding down simultaneously for 2 sec the keys and , or using the selection menu and pressing
or , you can access the MONITOR MENU. In this menu, by pressing the , key, the following values are displayed in sequence.
BK: Display brightness
Adjusts the backlighting of the display on a scale from
0 to 100.
Backlight switch-on time
Sets the time that the backlight is lit since the last time a key was
pressed. Values allowed: 20 sec to 10 min or always on (even if
this option is selected, the screen will still go into standby mode
after a few hours of inactivity to safeguard the integ
rity of the
device). When the backlight is off, the first time any key is pressed
has the sole effect of restoring the backlighting
.
Display in one of the following languages:
• English
• German
• Spanish
• Dutch
• Romanian
• Czech
• Polish
• Russian
• French
• Slovak
• Chinese
• Arabic
Once you have selected your preferred language, the system will
adopt it when moving to the next menu item.
TE: Dissipator temperature display
Shows the dissipator temperature display.
13.2.3. Setpoint Menu
From the main menu, hold down simultaneously the and keys until “SP” appears on the display (or use the selection menu
pressing or ). The and keys allow you respectively to increase and decrease the plant boosting pressure. Press
to leave this menu and return to the main menu.
SP: Setting the setpoint pressure
Pressure at which the system is pressurised: min 1 bar (14 psi) – max 6 bar (87 psi) and there are no auxiliary pressure control functions.
If several auxiliary pressure functions associated with several inputs are
active at the same time, the
device will set the lowest pressure of all the
The auxiliary setpoints can be
used only through the control
unit.
Setting the auxiliary pressures
The device has the possibility of varying the setpoint pressure according to the status of the inputs, up to 4 auxiliary
pressures can be set for a total of 5 different setpoints. For the electrical connections refer to the control unit manual; for the software
settings see paragraph Setup of the auxiliary digitali inputs IN1, IN2, IN3, IN4.
P1: Setting the auxiliary setpoint 1
Pressure at which the system is pressurised if the auxiliary setpoint function is activated on input 1.
P2: Setting the auxiliary setpoint 2
Pressure at which the system is pressurised if the auxiliary setpoint function is activated on input 2.
P3: Setting the auxiliary setpoint 3
Pressure at which the system is pressurised if the auxiliary setpoint function is activated on input 3.
P4: Setting the auxiliary setpoint 4
Pressure at which the system is pressurised if the auxiliary setpoint function is activated on input 4.