EasyManuals Logo

Daikin SUPER MULTI NX G Series Service Manual

Daikin SUPER MULTI NX G Series
285 pages
To Next Page IconTo Next Page
To Previous Page IconTo Previous Page
Page #213 background imageLoading...
Page #213 background image
Outdoor Unit: 2MXS18GVJU SiUS12-928_B
205 Removal Procedure
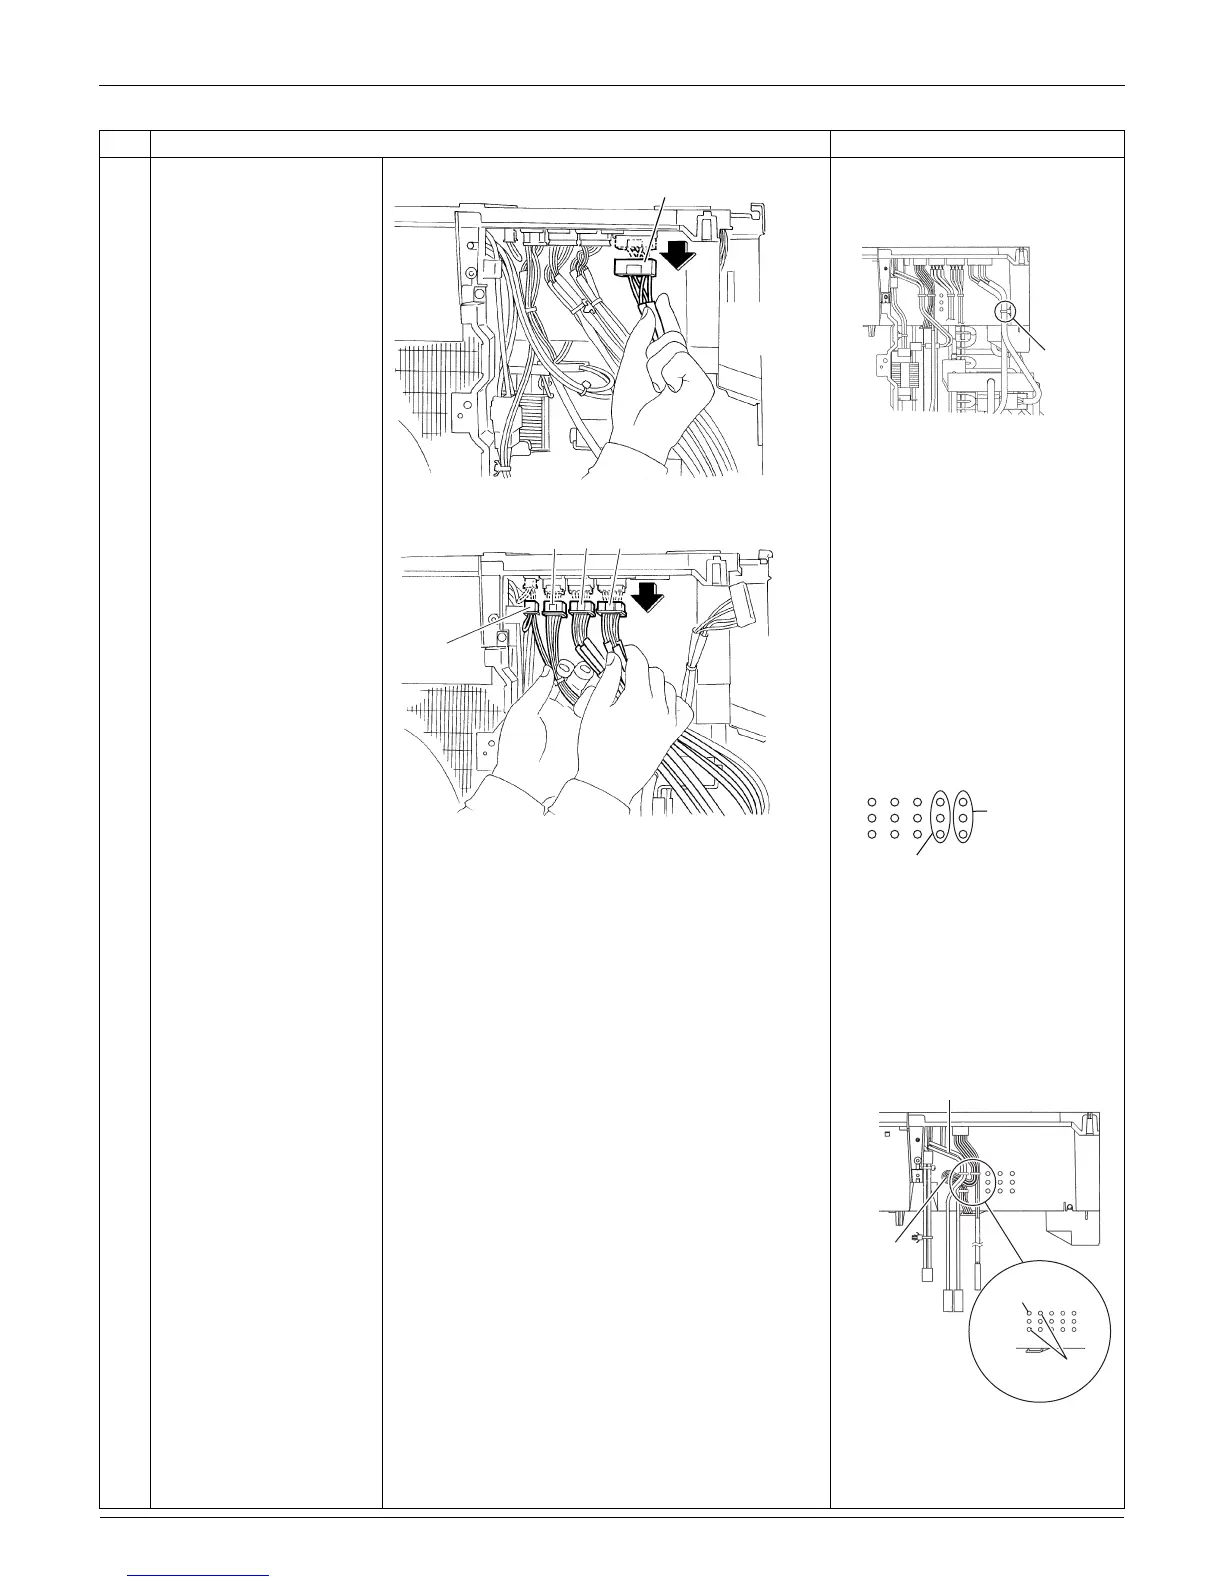
2
Disconnect the connector
for the four-way valve coil
[S80].
When reassembling, insert
the clamp into the hole as
below.
3
Disconnect the
connectors for the
thermistors [S90] [S92]
[S93] and the overload
protector [S40].
[S40]: overload protector
[S90]: thermistors
(outdoor temperature, outdoor
heat exchanger, discharge
pipe)
[S92]: gas pipe thermistors
[S93]: liquid pipe thermistors
Pull out the clamp.
When reassembling, insert
each clamp of the themistors
into one of the holes as below.
When reassembling, insert
each clamp into the holes.
When reassembling, the
thermistor harness should be
placed between the electrical
box and the reactor harness
as below.
Step
Procedure Points
(R17398)
[S80]
Clamp
(R17397)
[S40]
[S90] [S92] [S93]
(R17399)
[S92]
[S93]
(R17401)
Reactor
harness
Thermistor
ASSY
(R17093)
Reactor harness
Thermistor
ASSY

Table of Contents

Other manuals for Daikin SUPER MULTI NX G Series

Questions and Answers:

Question and Answer IconNeed help?

Do you have a question about the Daikin SUPER MULTI NX G Series and is the answer not in the manual?

Daikin SUPER MULTI NX G Series Specifications

General IconGeneral
BrandDaikin
ModelSUPER MULTI NX G Series
CategoryAir Conditioner
LanguageEnglish

Related product manuals