Charge relief valve
You may remove the charge relief valve for cleaning and installation of new O-rings. You may change the
pressure setting, however, note that the setting will vary for different charge flows depending on charge
pump size and pump speed. The factory setting is set relative to a specific charge flow at 120°F and 1800
min
-1
(rpm) input speed. The actual charge pressure varies at different speeds.
Shim adjustable style (pre-blockpoint change)
On units manufactured prior to the 1998 block point change, you adjust the charge pressure relief valve
by changing the number or size of shims located behind the charge pressure relief valve spring.
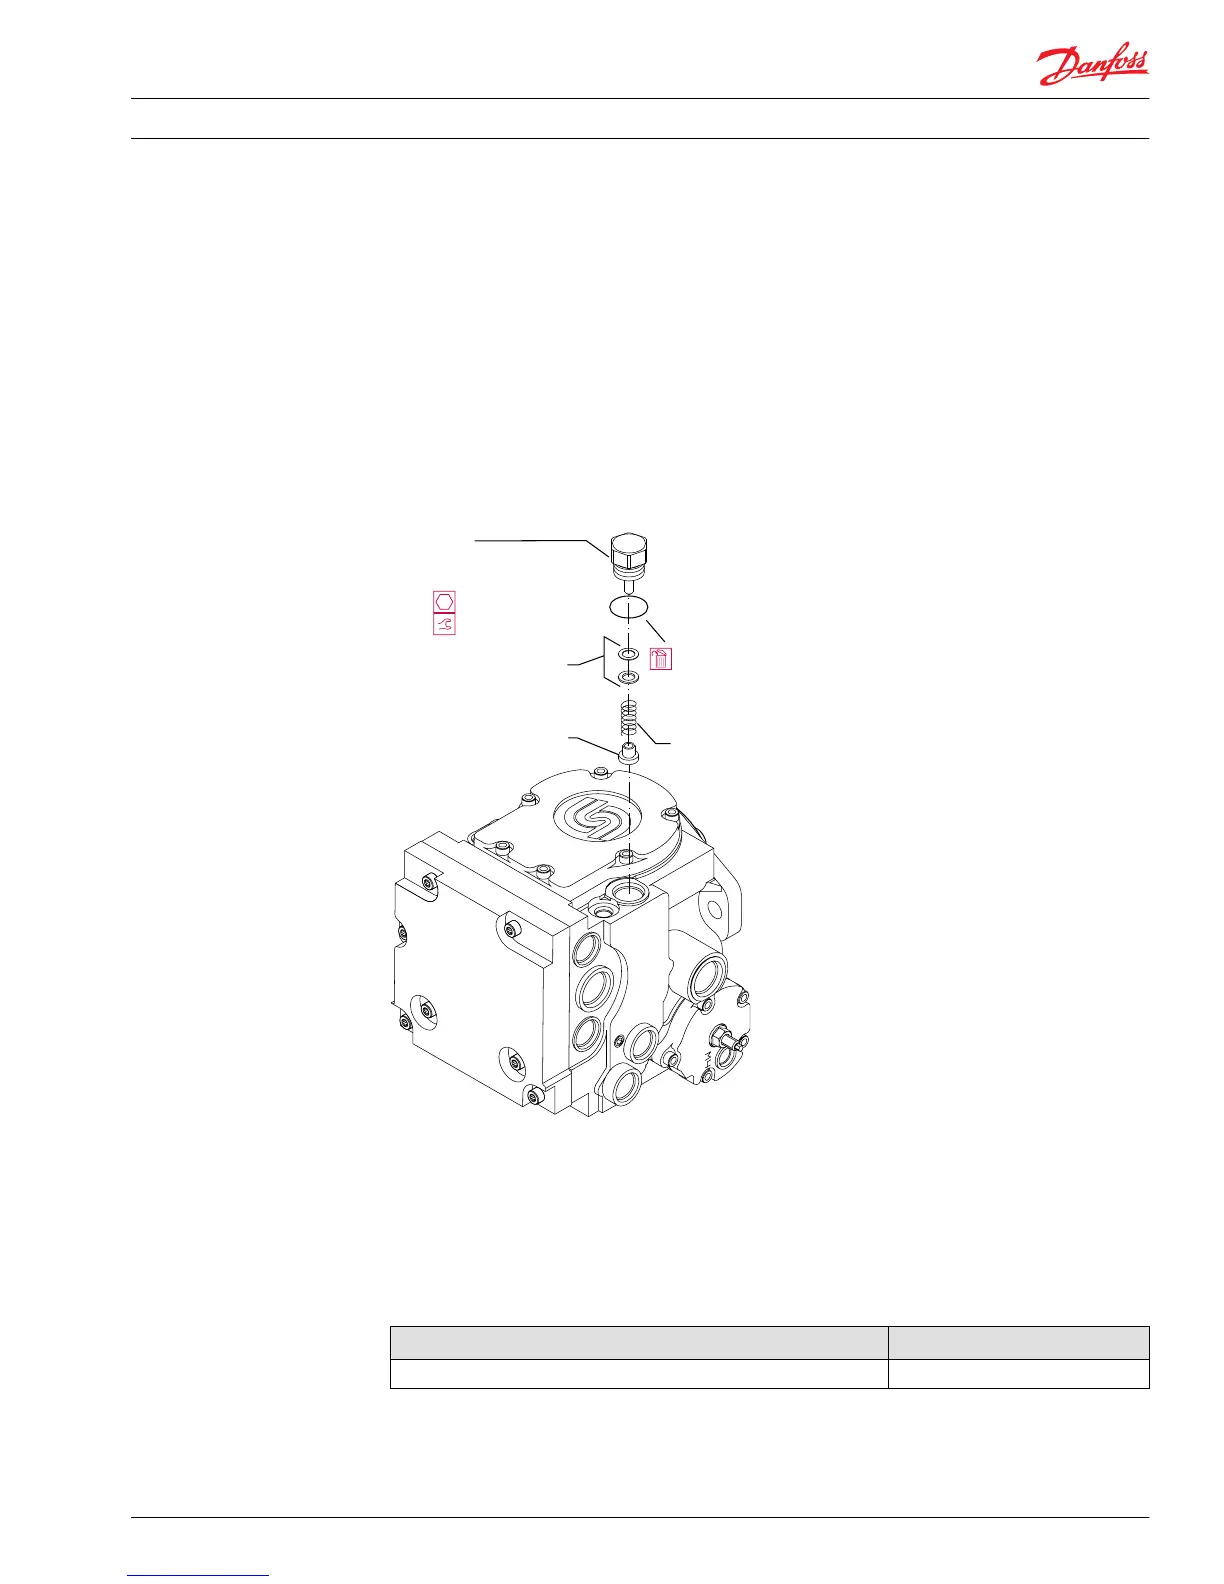
1. Remove the shim adjustable charge relief valve plug (G040) from the pump housing. Remove and
discard the O-ring (G040A) from the plug.
Adjustable charge relief valve components
2. Remove shims (G041), spring (G042), and poppet (G043) from housing.
3. Inspect the poppet and mating seat in the housing for damage or foreign material.
4. Install a new O-ring (G040A) on the charge relief valve plug (G040). Reinstall the poppet (G043),
spring (G042), and shims (G041), into the pump housing. To confirm the charge relief valve setting,
measure the charge pressure at port M3. The charge pressure levels off when it reaches the relief
setting.
Pressure change per shim
Approximate pressure change Shim thickness
4 bar [58 psi] 1.25 mm [.050 in]
5. Install plug (G040). Torque to 54-136 Nm (40-100 lbf•ft).
Service Manual
Series 42 Axial Piston Closed Circuit Pumps
Minor Repair
520L0638 • Rev 0300 • July 2015 37