1. Remove the loop flushing relief valve plug (Q060). Discard the O-ring (Q060A).
2. Remove the spring (Q061) and poppet (Q062) from the housing.
3. Do not alter the shims between the spring and plug, or interchange parts with another valve. Inspect
the poppet and mating seat in the housing for damage or foreign material. Inspect the orifice in the
valve poppet.
4. Install a new O-ring (Q060A) on the plug (Q060). Install the poppet (Q062), spring (Q061), shims, and
plug into the pump housing, torque to 27 N•m [20 lbf•ft].
Defeating loop flushing
1. Remove the loop flushing plug (Q050). Discard the O-ring (Q050A).
2. Remove the loop flushing spool assembly (Q051) from the pump housing.
3. Install the defeat spool (Q051) into the spool bore with tapped end facing outwards. Install the
standard plug with O-ring into the housing and torque to 37 N•m [27 lbf•ft].
4. Remove the loop flushing relief plug (Q060). Discard the O-ring (Q060A).
5. Remove the loop flushing relief valve components (Q061/Q062).
6. Install the loop flushing relief plug (Q060) with a new O-ring (Q060A) into the housing and torque to
27 N•m [20 lbf•ft].
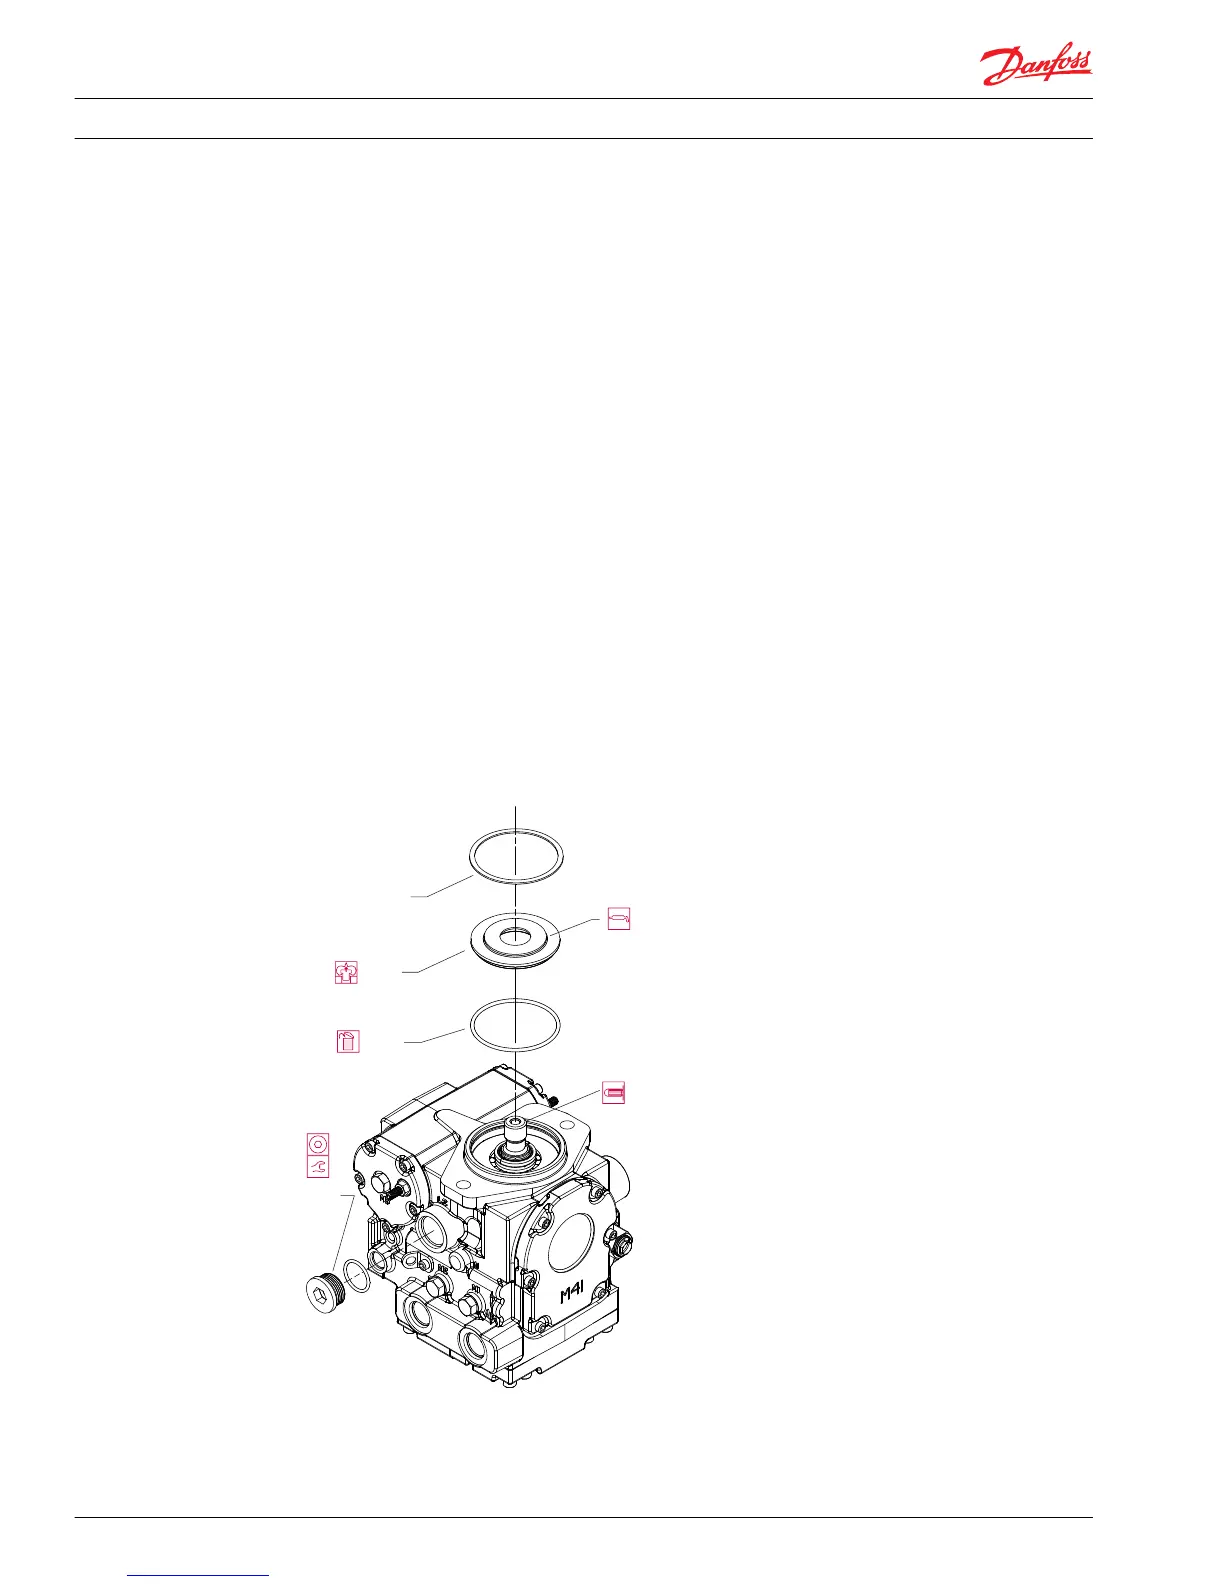
Shaft seal, roller bearing, and shaft replacement
Series 42 pumps use a lip type shaft seal. You can replace the seal and/or shaft without major
disassembly.
Shaft seal components