Case Drain Plug
Frame Size 28/32 cm3 41/51 cm3
Internal Hex 9/16 in 5/8 in
Torque 120 N•m
[89 lbf•ft]
200 N•m
[150 lbf•ft]
Seal removal
1. Position the pump with the shaft facing up.
If the unit is positioned horizontally when the shaft is removed, the cylinder block could move out of
place, making shaft installation difficult.
2. Remove the case drain plug (F091) to relieve any vacuum that may be present.
3. Remove the spiral retaining ring (F096). Using a screwdriver, pry the end of the ring free and unwind
the remainder of the ring out of the groove.
4. Remove the seal carrier assembly (C020). Loosen it from the unit by prying on the raised surface of
the seal carrier with a screwdriver.
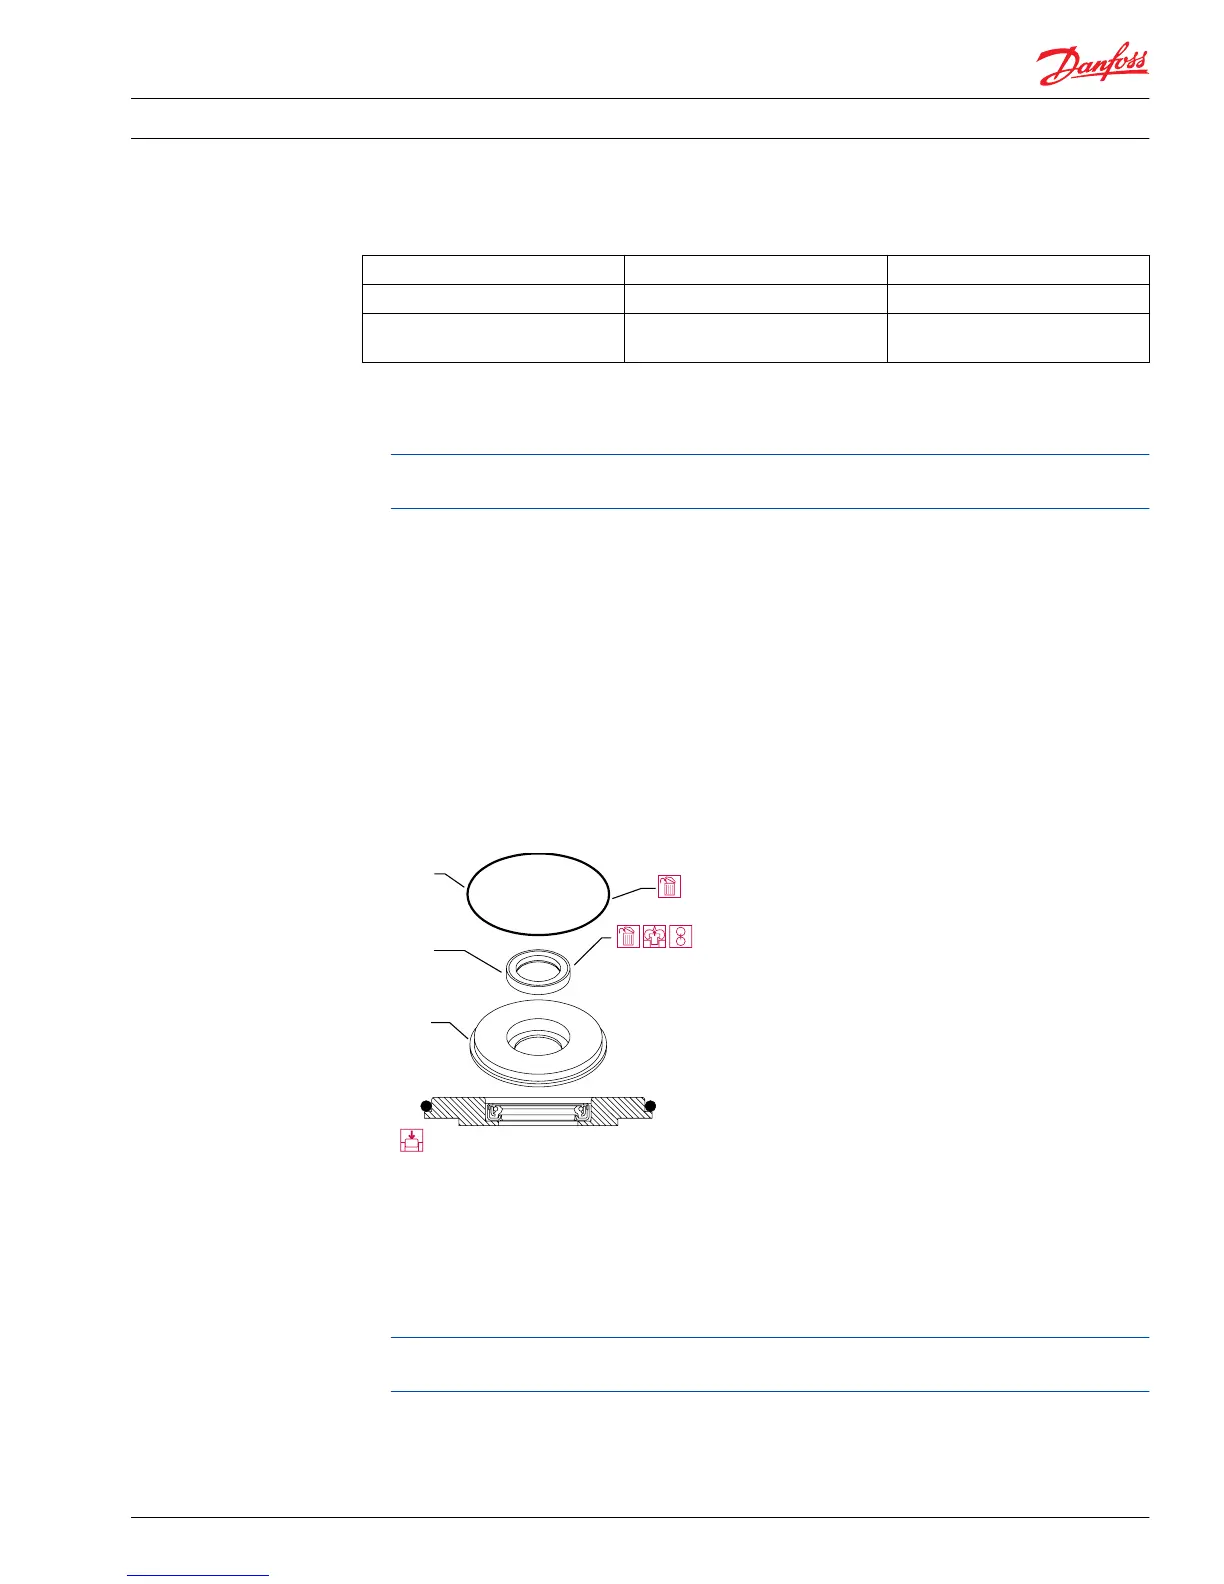
5. Removeand discard O-ring (C017).
6. Pry or press lip seal (C018) from the seal carrier (C020); use caution to avoid damaging the seal carrier.
Discard the seal.
7. Inspect the seal carrier (C020) for damage.
8. Press the new seal (C018) into the shaft bearing side of the seal carrier. Be careful to only press on the
outside diameter of the lip seal. Orient the seal as shown in the illustration. Be careful not to damage
the seal.
Installation of shaft seal
Shaft removal
1. Grip the shaft assembly by the splines or keyed end and remove from the pump.
2. Inspect the shaft for damage. Ensure the shaft and splines are straight and free of damage or heavy
wear. Inspect the surface where the rear shaft bearing contacts the shaft. If spalling is present, replace
the shaft and rear shaft bearing.
Replacement of shaft rear bearing is a major repair and violates the unit’s warranty policy unless
performed by an authorized Danfoss Global Service Partner.
If necessary, clean the sealing area with a nonabrasive material. Lubricate the shaft with a light
coating of hydraulic fluid.
Service Manual
Series 42 Axial Piston Closed Circuit Pumps
Minor Repair
520L0638 • Rev 0300 • July 2015 65
 Loading...